
2. Look through the finderscope. If the object you lined up in the telescope is not visible, loosen
the adjustment screws and move the finderscope around until you see it. Once it gets within
range, tighten the adjustment screws while centering the object in the scope. You will note that
the image will shift toward the screw you are tightening (Fig. 7).
3. Adjust screws to center object on the finderscope cross hairs. Recheck your telescope to make
certain it is still on target. If it moved, realign it and adjust your finderscope. If it hasn't, you're
all set. Your finderscope is now operational.
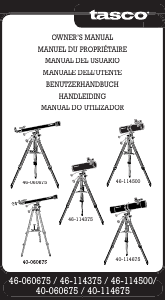
TO USE THE STARPOINTER (MODEL 46-060525)
1. The StarPointer is the quickest and easiest way to point your telescope exactly at a desired
object in the sky (Fig. 1 e). It's like having a laser pointer that you can shine directly into the
night sky. The StarPointer is a zero magnification pointing tool that uses a coated glass window
to superimpose the image of a small red dot onto the night sky. Like all finderscopes, the
StarPointer must be properly aligned with the main telescope before it can be used.
2. To turn on the StarPointer, rotate the variable brightness control clockwise until you hear a
"click." To increase the brightness level of the red dot, continue rotating the control knob about
180° until it stops.
3. Locate a bright star or planet and center it in a low power eyepiece in the main telescope.
If the StarPointer is perfectly aligned, you will see the red LED dot overlap the alignment star. If
the StarPointer is not aligned, take notice of where the red dot is relative to the bright star.
Without moving the main telescope, turn the StarPointer's azimuth and altitude alignment con-
trols until the red dot is directly over the alignment star.
If the LED dot is brighter than the alignment star, it may make it difficult to see the star. Turn the
variable brightness control counterclockwise, until the red dot is the same brightness as the
alignment star. This will make it easier to get an accurate alignment. The StarPointer is now
ready to be used. Remember to always turn the power off after you have found an object. This
will extend the life of both the battery and the LED.
FINDING OBJECTS
1. Loosen the altitude locks on the sides of the telescope tube and the silver azimuth lock on the
base of the altazimuth mount, then
move the telescope in the desired direction.
2. Look through the StarPointer finderscope and pan the telescope until the object appears in the
field of view. Once it's in the field, tighten the altitude and azimuth locks.
3. To center the object with the red dot in the StarPointer, use the fine adjustment ring on the alti-
tude slow motion rod assembly.
FOCUSING
1. Once you have found an object in the telescope, turn the focus knob until the image is sharp.
2. To focus on an object that is nearer than your current target, turn the focusing knob toward the
eyepiece (i.e .. so that the focus tube moves away from the front of the telescope). For more
distant objects, turn the focus knob in the opposite direction.
3. To achieve a truly sharp focus, never look through glass windows or across objects that pro-
duce heat waves, such as asphalt parking lots.
IMAGE ORIENTATION
1. When observing with a diagonal, the image will be right side up but reversed from left to right.
2. When observing straight through, with the eyepiece inserted directly into the telescope, the
image will be inverted. Also, the image in the finderscope will be inverted.
MAGNIFICATION
The magnification (or power) of a telescope varies depending upon the focal length of the
eyepiece being used and the focal length of the telescope.
To calculate magnification, use the following formula, in which FL= focal length:
Magnification =
FL (telescope) in mm
FL (eyepiece) in mm
SOLAR OBSERVATION
CAUTION! Viewing the sun can cause permanent eye damage. Do not view the sun with
this product or even with the naked eye. Never leave a telescope unattended during the
daytime; a child could look at the sun with it and suffer permanent damage to vision.
6
I
i
i
J
!
j



Praat mee over dit product
Laat hier weten wat jij vindt van de Tasco 46-060525 Telescoop. Als je een vraag hebt, lees dan eerst zorgvuldig de handleiding door. Een handleiding aanvragen kan via ons contactformulier.