Handleiding Taylor 1512RMT Weerstation

Handleiding voor je Taylor 1512RMT Weerstation nodig? Hieronder kun je de handleiding gratis bekijken en downloaden als PDF in het Nederlands en/of Engels. Dit product heeft 5 veelgestelde vragen, 0 comments en heeft 0 stemmen. Is dit niet de handleiding die je zoekt, neem dan contact met ons op.

Is je product kapot en biedt de handleiding geen oplossing meer? Dan kun je voor reparatie gratis terecht bij Repair Café.

Handleiding

Loading…

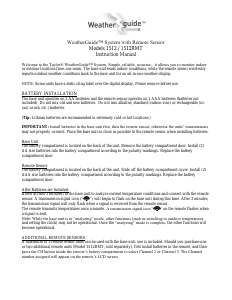
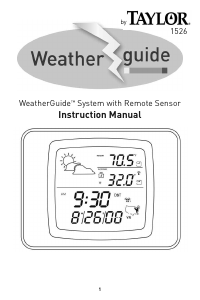
TEMPERATURE READINGS
The base unit displays the indoor temperature (“INDOOR”) from its location.
The remote sensor transmits outdoor temperature (“OUTDOOR”) from its location back to the base unit.
To switch between outdoor or auto scroll displays, press the “UP/CH” (up/channel) button.
- A Channel icon (CH1, CH2, or CH3) = indicates which remote sensor’s readings are displayed.
- The ” icon = indicates the auto scroll option is on. The base unit will automatically scroll between indoor
readings and remote sensor readings and display each for 5 seconds.
To switch between Fahrenheit and Celsius temperature displays:
- Base unit - Press the “DOWN/CF” button on the base unit to change the temperature readings on the base
unit. Both indoor and outdoor readings will display in °F or °C.
- Remote sensor - Press the “C/F” button inside the battery compartment of the remote sensor to change the
temperature display on the remote sensor. (Only the remote sensor display will change; the base unit
display will not change.)
CLOCK FEATURES
A) Clock Setting
1. Press and hold the “SET” button for 2 seconds to enter Clock Setting mode. “24 Hr” or “12 Hr” blinks.
2. Press the “UP/CH” or “DOWN/CF” button to toggle between 12 and 24 hour clock mode. Press “SET” to
confirm. The hour digits blink.
2. Press “UP/CHor “DOWN/CFto change the hours. Press “SET” to confirm. The minute digits blink.
3. Press “UP/CH or “DOWN/CF to change the minutes. Press “SET” to confirm. A language selection blinks
in the “DAY” window below the clock digits.
4. Press “UP/CH” or “DOWN/CF” to toggle between language selections. Press “SET” to confirm the displayed
language. The year digits blink.
(Note: ENG = English, FRE = French, NET = Netherlands, ESP = Spanish, DAN = Danish, GER = German)
5. Press “UP/CH” or “DOWN/CF” to change the year. Press “SET” to confirm. The month digit blinks.
6. Press “UP/CH” or “DOWN/CF” to change the month. Press “SET” to confirm. The date digit blinks.
7. Press the “UP/CH” or “DOWN/CF” button to change the date. Press “SET” to confirm. The hour and minute
digits reappear instead of the year digits. The clock is set.
Notes: If no buttons are pressed within 15 seconds, the unit will automatically exit Clock Setting mode.
Until a time has been set, the clock will count up the time since battery installation.
B) Alarm Setting this unit features 2 alarm settings. To set an alarm:
1. Press the “SET” button to switch the clock display to Alarm 1 (“A1”).
2. Press and hold “SET” for 2 seconds to enter Alarm Setting mode. The alarm hour digits blink.
3. Press “UP/CH” or “DOWN/CF” to change the hours. Press “SET” to confirm. The minute digits blink.
4. Press “UP/CH” or “DOWN/CF” to change the minutes. Press “SET” to confirm.
5. Press “ALARM”. The Alarm Bell Icon 1 (“ ”) appears above the hour digits, indicating Alarm 1 is active.
6. Press “SET” to switch the display to Alarm 2 (“A2”). Repeat steps to set Alarm 2. The Alarm Bell Icon 2
( ”) appears above the minute digits, indicating Alarm 2 is active. Press “SET” to return to the clock display.
OR
If you only wish to set one alarm, press “SET” until the clock display appears.
C) To Silence Alarms:
● To silence an alarm for 5 minutes, press the “SNOOZE” button.
● To stop the alarm for one day, press any button except “SNOOZE”. If the alarm bell icon still appears on
the screen, the alarm will sound again the next day.
● To deactivate an alarm, press the “ALARM” button until the desired Alarm Bell Icon (“ ”) disappears.
(You may do this while viewing either the Clock display or the Alarm display.)
- One Alarm Bell icon = indicates one alarm will ring at the set time (Alarm 1 or Alarm 2).
- Two Alarm Bell icons = indicates both alarms will ring at the set time.
- No Alarm Bell icons = no alarms will ring; both are deactivated.
Note: If no buttons are pressed within 15 seconds, the unit will automatically exit Alarm Setting mode.
D) To View Clock or Alarm Displays
Press the “SET” button to toggle between the Clock, Alarm 1 and Alarm 2 displays.
Download de handleiding in het Nederlands en/of Engels (PDF, 0.21 MB)
(Denk aan het milieu en print deze handleiding alleen als dat echt noodzakelijk is)

Loading…

Beoordeling

Laat ons weten wat je van de Taylor 1512RMT Weerstation vindt door een beoordeling achter te laten. Wil je je ervaringen met dit product delen of een vraag stellen? Laat dan een bericht achter onderaan de pagina.
Bent u tevreden over de Taylor 1512RMT Weerstation?
Ja Nee
Beoordeel dit product als eerste
0 stemmen

Praat mee over dit product

Laat hier weten wat jij vindt van de Taylor 1512RMT Weerstation. Als je een vraag hebt, lees dan eerst zorgvuldig de handleiding door. Een handleiding aanvragen kan via ons contactformulier.

Meer over deze handleiding

We begrijpen dat het prettig is om een papieren handleiding te hebben voor je Taylor 1512RMT Weerstation. Je kunt de handleiding bij ons altijd downloaden en daarna zelf printen. Indien je graag een originele handleiding wilt hebben, raden we je aan contact op te nemen met Taylor. Zij kunnen wellicht nog voorzien in een originele handleiding. Zoek je de handleiding van Taylor 1512RMT Weerstation in een andere taal? Kies op de homepage je taal naar keuze en zoek daarna op het modelnummer om te zien of we deze beschikbaar hebben.

Specificaties

Merk Taylor
Model 1512RMT
Categorie Weerstations
Bestandstype PDF
Bestandsgrootte 0.21 MB

Alle handleidingen voor Taylor Weerstations
Meer handleidingen voor Weerstations

Veelgestelde vragen over Taylor 1512RMT Weerstation

Ons supportteam zoekt dagelijks naar nuttige productinformatie en antwoorden op veelgestelde vragen. Als er onverhoopt toch een onjuistheid tussen onze veelgestelde vragen staat, laat het ons dan weten via het contactformulier.

Mijn weerstation gaf aan dat het zou regenen, maar dit gebeurde niet, hoe kan dat? Geverifieerd

De voorspelling van het weerstation is gebaseerd op luchtdruk. Grofweg betekent een lage luchtdruk dat er slecht weer komt en een hoge luchtdruk dat er goed weer komt. Het kan gebeuren dat het weer zich anders ontwikkelt dan het luchtdrukverloop doet vermoeden.

Ik vind dit nuttig (1404) Lees meer

Wat is de beste plek om een weerstation en de sensoren te plaatsen? Geverifieerd

Het weerstation zelf staat binnen en dient uit de buurt gehouden worden warmtebronnen zoals een keuken, raam of elektrische apparatuur. Een losse temperatuursensor voor buiten dient in de schaduw en ten minste 1,25m van de grond geplaatst the worden. Een regensensor moet op een open plaats staan, waar regen er altijd in kan. Ook de windsensor moet op een open plek staan, waar er geen obstakels zijn die de wind beïnvloeden.

Ik vind dit nuttig (334) Lees meer

Mijn weerstation heeft een regenmeter, kan deze ook de hoeveelheid gevallen sneeuw meten? Geverifieerd

Sommige regenmeters zijn voorzien van een verwarmingselement, waardoor de sneeuw smelt en gemeten kan worden. Zonder verwarmingselement loopt de regenmeter vast en kan er dus geen meting gedaan worden.

Ik vind dit nuttig (235) Lees meer

Er is een batterij in mijn apparaat gaan oxideren, kan ik het nog veilig gebruiken? Geverifieerd

Ja, het apparaat kan nog veilig gebruikt worden. Verwijder eerst de geoxideerde batterij. Doet dit niet met blote handen. Reinig daarna het batterijcompartiment met een wattenstaafje gedipt in azijn of citroensap. Laat het drogen en doe nieuwe batterijen in het apparaat.

Ik vind dit nuttig (234) Lees meer

Kan ik een verwisselbare batterij een lange tijd in een apparaat laten? Geverifieerd

Verwisselbare batterijen kunnen een lange periode in een apparaat blijven indien dit apparaat gebruikt wordt. Als een apparaat voor een lange periode wordt opgeslagen is het aan te raden de batterijen er uit te halen om oxidatie te voorkomen.

Ik vind dit nuttig (234) Lees meer
Handleiding Taylor 1512RMT Weerstation

Gerelateerde producten

Gerelateerde categorieën