Handleiding Technoline WS 6830 Weerstation

Handleiding voor je Technoline WS 6830 Weerstation nodig? Hieronder kun je de handleiding gratis bekijken en downloaden als PDF in het Nederlands en/of Engels. Dit product heeft 5 veelgestelde vragen, 0 comments en heeft 3 stemmen met een gemiddelde score van 100/100. Is dit niet de handleiding die je zoekt, neem dan contact met ons op.

Is je product kapot en biedt de handleiding geen oplossing meer? Dan kun je voor reparatie gratis terecht bij Repair Café.

Handleiding

Loading…

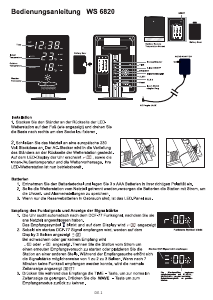
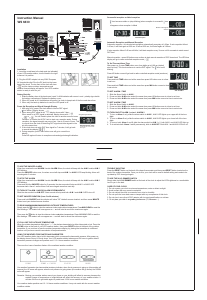
Installation
1. Insert the round base to the back pole (as indicated)
of your LED weather station, turn the base to the right
to secure it in position.
2. Plug the AC/DC adaptor into any 230V European
AC household outlet. Plug the DC jack into the lower
back of the clock. The top front of the clock will show
and the indoor-outdoor temperatures and
weather forecast display will appear. Your LED weather
station is ready to work for you.
Battery Back Up
1. Slide the battery door at the back case, insert 3 x AAA batteries with correct + and - polarity signs inside
the battery compartment. Replace the battery cover.
2. When AC power is off, the batteries will power t he clock to keep track of the time and alarm time.
3. When only the back-up batteries is used, the LED panel is off.
Power Up Reception and Signal Strength Display
1. After plug in AC power, the clock starts to receive DCF signal.
Icon blinks. Display shows
2. When strong DCF signal is detected, display shows with 3 bars
When weak or no DCF signal is detected, display shows with 1 bar
or
. You will need to place the clock to another area for better
reception, or unplug the AC/DC jack to start over reception again. During
reception, the signal strength may move from 1 bar to 2 bars to 3 bars. This
is normal since the clock is detecting DCF signal and other signals in the
air at the same time.
3. If the clock does not catch DCF time signal for 7 minutes, it will go back
to normal time display
4. During reception, press TIME button once will go to normal time
display.
Press HR again will return to reception mode and signal strength indication.
Successful reception or failed reception
Icon becomes static on (stop blinking) when reception is successful Icon
disappears when reception is failed
Weak or no RC signal Is
detected
Successful Reception
Automatic Reception and Manual Reception
Automatic reception : this clock starts reception automatically everyday at 1:00am. If auto recpetion fails at
1:00 am, it will start again at 2:00 am. If fails at 2:00 am, it will start again at 3:00 am.
If auto recpetion fails at 3:00 am still fails, it will start reception every 3 hours until it succeeds to catch correct
DCF time.
Manual reception : press HR button once anytime to start manual reception of DCF time signal. The LED time
display will go to radio controlled reception mode
To Set Time and Alarm Time
After power up, if press TIME button once, time digits go to 0:00 am (default
start-up time). The clock continues to receive DCF signal. The icon is st
ill
blinking.
Press HR button once will go back to radio controlled reception mode (as above)
TO SET TIME
Press and hold TIME button and at the same time press HR button once at a time
to set hour.
Press and hold TIME button and at the same time press MIN button once at a time
to set minute.
SET ALARM 2
TO SET ALARM 1 TIME
1. Slide the Alarm Switch to ALM 1.
2. Press and hold ALM button and at the same time press HR button once at a time to set hour.
3. Press and hold ALM button and at the same time press MIN button once at a time to set minute.
TO SET ALARM 2 TIME
1. Slide the Alarm Switch to ALM 2.
2. Press and hold ALM button and at the same time press HR button once at a time to set hour.
3. Press and hold ALM button and at the same time press MIN button once at a time to set minute.
TO TURN ON/OFF ALARM 1 or/and ALARM 2
1. To turn on Alarm 1 only, slide the alarm switch to ALM 1, ALM 1 LED lights up on upper left of the hour
digits.
2. To turn on Alarm 2 only, slide the alarm switch to ALM 2, ALM 2 LED lights up on lower left of the hour
digits.
3. To turn on both Alarm 1 and 2, slide the alarm switch to ALM 1 + 2, both ALM 1 and ALM 2 LED light up.
4. To in-activate both Alarm 1 and 2 permanently, slide to ALM OFF. Both ALM 1 and ALM 2 LED turn off.
TO USE THE SNOOZE ALARM
When time reaches the set ALARM 1 and/or ALARM 2 time, the clock will beep with the ALM 1 and/or ALM 2
LED blinking.
Press the SNOOZE button once, the alarm sound will stop and ALM 1 or ALM 2 LED keep blinking. Alarm will
sound againin 5 minutes.
TO STOP THE ALARM
When time reaches the set ALARM 1 and/or ALARM 2 time, the clock will beep with the ALM 1 and/or ALM 2
LED blinking.
Press and hold the SNOOZE button for 2 seconds, the alarm sound will stop and ALM 1 or ALM 2 LED
becomes static. Alarm 1 and/or Alarm 2 will sound again same time next day.
TO TURN OFF ALARM 1 AND/OR ALARM 2 PERMANENTLY
Slide the alarm switch to ALM OFF. Alarm sound will stop and both ALM 1 and ALM 2 LED's turn off.
TO SET SNOOZE DURATION (from 5 to 60 minutes)
Press and hold SNOOZE and time display will show "05" (default snooze duration) and then press MINUTE
button to set your desired snooze duration.
TO READ MAXIMUM-MINUMUM INDOOR-OUTDOOR TEMPERATURES
Simply press the button to view the maximum indoor and outdoor temperatures. Press MAXCLEAR to reset the
Max readings. The readout will now appear as — and will start to record the maximums again.
Then press the button to view the minimum indoor and outdoor temperatures. Press MAXMINCLEAR to reset the
Min readings. The readout will now appear as — and will start to record the minimums again.
IF YOU LOSE THE OUTDOOR TEMPERATURE
When the outdoor temperature digits show '—--", the wireless transmission is either interrupted or lost. Press the
CLEAR button at the back of your LED weather station, then press RESET button at the back of the outdoor
transmitter. If you continue to lose the outdoor temperature display, try placing the transmitter in a different
location until you have smooth transmission of temperature data.
USING THE WEATHER FORECASTER AND BAROMETER
Your LED weather station has a built-in barometer which measures the barometric pressure. After power up,
the display shows Sunny & Cloudy icons. Your LED weather station takes around 24 hours to gather data of
barometric pressure changes and predicts next 1 2- 24 hours weather conditions.
There are four types of weather display of the predicted weather condition :
TROUBLE SHOOTING
Press the RESET button on the back of the base thermometer and then press RESET button located on the
back of the outdoor transmitter. Once you do this, your clock will be reset to default setting and needs to be
up-dated by DCF time signal again.
TO USE THE HI-LO DIMMER SWITCH
Simply slide the LO-HI DIMMER switch at the back of the clock to adjust the LED brightness to a comfortable
level to you in the dark.
CARE OF YOUR CLOCK
1. Do not expose your clock to extreme temperatures, water or direct sunlight.
2. Avoid contact with any corrosive materials
3. Do not subject the clock to excessive force, dust or humidity
4. Do not open the inner back case or tamper with any components of this clock
5. Do not plug in any other AC/DC adaptor with incorrect specifications or voltage
6. Do not place your clock in range of strong interferences. (TV, Microwave)
SUNNY SUNNY & CLOUDY CLOUDY RAINY
Your weather forecaster also has weather tendency indicator, when the air pressure is going up (the weather will
improve) the UP arrow will appear, when the air pressure is going down (the weather will go worse) the DOWN
arrow will appear.
Remarks : Moving your weather station around your house or your building will affect its accuracy because the
sudden change of temperature or height/altitude will affect the accuracy of your weather station. It
will take 24 hours to get stable again to predict next 12-24 hours weather condition.
Your weather station predicts next 12 - 24 hours weather conditions. It may not match with the current weather
condition outside.
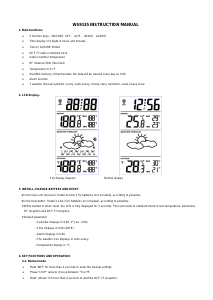
Instruction Manual
WS 6830
RC tower Icon blinking
Strong DCF signal is detected,
Minute digits may start counting
01,02, 03...60,00,01,02.... tr yi ng
to match with the correct seconds
DfJJY signal
Failed Reception
SET ALARM 1
Download de handleiding in het Nederlands en/of Engels (PDF, 0.63 MB)
(Denk aan het milieu en print deze handleiding alleen als dat echt noodzakelijk is)

Loading…

Meer over deze handleiding

We begrijpen dat het prettig is om een papieren handleiding te hebben voor je Technoline WS 6830 Weerstation. Je kunt de handleiding bij ons altijd downloaden en daarna zelf printen. Indien je graag een originele handleiding wilt hebben, raden we je aan contact op te nemen met Technoline. Zij kunnen wellicht nog voorzien in een originele handleiding. Zoek je de handleiding van Technoline WS 6830 Weerstation in een andere taal? Kies op de homepage je taal naar keuze en zoek daarna op het modelnummer om te zien of we deze beschikbaar hebben.

Specificaties

Merk Technoline
Model WS 6830
Categorie Weerstations
Bestandstype PDF
Bestandsgrootte 0.63 MB

Alle handleidingen voor Technoline Weerstations
Meer handleidingen voor Weerstations

Veelgestelde vragen over Technoline WS 6830 Weerstation

Ons supportteam zoekt dagelijks naar nuttige productinformatie en antwoorden op veelgestelde vragen. Als er onverhoopt toch een onjuistheid tussen onze veelgestelde vragen staat, laat het ons dan weten via het contactformulier.

Mijn weerstation gaf aan dat het zou regenen, maar dit gebeurde niet, hoe kan dat? Geverifieerd

De voorspelling van het weerstation is gebaseerd op luchtdruk. Grofweg betekent een lage luchtdruk dat er slecht weer komt en een hoge luchtdruk dat er goed weer komt. Het kan gebeuren dat het weer zich anders ontwikkelt dan het luchtdrukverloop doet vermoeden.

Ik vind dit nuttig (1422) Lees meer

Wat is de beste plek om een weerstation en de sensoren te plaatsen? Geverifieerd

Het weerstation zelf staat binnen en dient uit de buurt gehouden worden warmtebronnen zoals een keuken, raam of elektrische apparatuur. Een losse temperatuursensor voor buiten dient in de schaduw en ten minste 1,25m van de grond geplaatst the worden. Een regensensor moet op een open plaats staan, waar regen er altijd in kan. Ook de windsensor moet op een open plek staan, waar er geen obstakels zijn die de wind beïnvloeden.

Ik vind dit nuttig (343) Lees meer

Mijn weerstation heeft een regenmeter, kan deze ook de hoeveelheid gevallen sneeuw meten? Geverifieerd

Sommige regenmeters zijn voorzien van een verwarmingselement, waardoor de sneeuw smelt en gemeten kan worden. Zonder verwarmingselement loopt de regenmeter vast en kan er dus geen meting gedaan worden.

Ik vind dit nuttig (249) Lees meer

Kan ik een verwisselbare batterij een lange tijd in een apparaat laten? Geverifieerd

Verwisselbare batterijen kunnen een lange periode in een apparaat blijven indien dit apparaat gebruikt wordt. Als een apparaat voor een lange periode wordt opgeslagen is het aan te raden de batterijen er uit te halen om oxidatie te voorkomen.

Ik vind dit nuttig (249) Lees meer

Er is een batterij in mijn apparaat gaan oxideren, kan ik het nog veilig gebruiken? Geverifieerd

Ja, het apparaat kan nog veilig gebruikt worden. Verwijder eerst de geoxideerde batterij. Doet dit niet met blote handen. Reinig daarna het batterijcompartiment met een wattenstaafje gedipt in azijn of citroensap. Laat het drogen en doe nieuwe batterijen in het apparaat.

Ik vind dit nuttig (248) Lees meer

Beoordeling

Laat ons weten wat je van de Technoline WS 6830 Weerstation vindt door een beoordeling achter te laten. Wil je je ervaringen met dit product delen of een vraag stellen? Laat dan een bericht achter onderaan de pagina.
Bent u tevreden over de Technoline WS 6830 Weerstation?
Ja Nee
100%
0%
3 stemmen

Praat mee over dit product

Laat hier weten wat jij vindt van de Technoline WS 6830 Weerstation. Als je een vraag hebt, lees dan eerst zorgvuldig de handleiding door. Een handleiding aanvragen kan via ons contactformulier.

Handleiding Technoline WS 6830 Weerstation

Gerelateerde producten

Gerelateerde categorieën