
TRIXIE Heimtierbedarf GmbH & Co. KG · Industriestraße 32 · 24963 Tarp · GERMANY · www.trixie.de
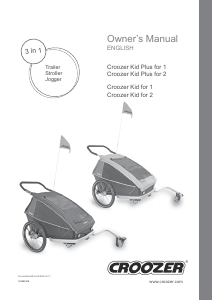
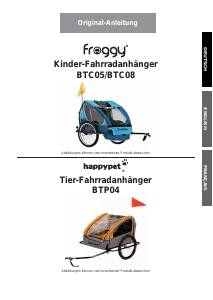
Bicycle Trailer
items 12814/12816
„Click“180°
G
Instructions
How to accustom your dog to the trailer
Note:
• If you want to use the product as a bicycle trailer, please attach the wheels to
the front wheel receiver.
•
If you want to use the product for jogging with the corresponding conversion kit
(article no. 12815), please use the rear wheel receiver for attaching the wheels.
Please use conversion kit item 12817 for bicycle trailer item 12816.
• The trailer is equipped with reflectors on the front and on the back as well
as on both wheels. In addition to that, reflecting stripes provide more safety
by increasing visibility. In case of bad visibility and darkness, battery-powered
bicycle rear lights can be attached if necessary.
• Only use the trailer with a tow bar and with the safety strap attached correctly.
• The maximum loading capacity may not be exceeded. Check air pressure and
tyre profile regularly, and ensure that bicycle and trailer are connected correct-
ly before each ride.
• Please note that riding with a trailer influences the braking behaviour of your
bike and the braking distance becomes longer! Adapt your cycling style accor-
dingly and pay attention to the excess width of the trailer. If necessary, practise
riding your bike with the trailer attached beforehand
– without your pet but with
a comparable weight
– and pay attention to the changed steering behaviour the
trailer causes.
• When using the trailer, always use the signal pennant provided.
• Pay attention to the traffic regulations.
• The trailer is intended for carrying pets only and not for transporting children!
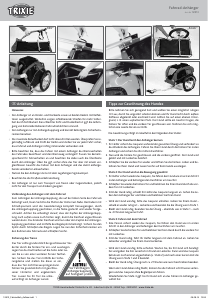
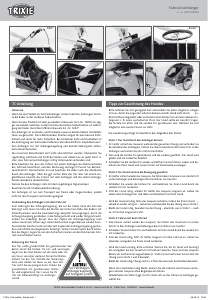
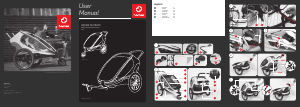
To connect to the bicycle
The tow bar connects to the bicycle via the included quick-connect hitch.
Attach the hitch to the left side of the rear bicycle wheel by removing the
axle nut, positioning the hitch on the axle, and re-tightening the axle nut.
If your bicycle has a quick-release wheel, remove the quick-release pin from
the axle, insert it through the hitch, then re-assemble through the axle. The
hitch should be installed with the male connector piece facing backwards and
angling away from the bicycle. Position the trailer behind the bicycle so that
the female connector on the tow bar can slide over the male connector on
the hitch. Lock these connectors in place with the cotter pin. Loop the black
safety strap around the bike frame and attach the snap swivel to the D-ring
on the tow bar.
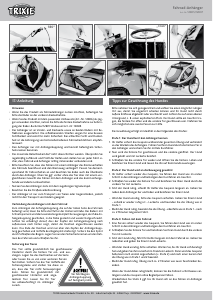
To secure your pet
Only ever allow your pet to get in or out through the
rear door, with the front door closed. Have some-
one hold the bicycle firmly in an upright position,
or lay the bicycle on its side. With the pet inside
the trailer, snap one end of the (included) safety
leash to the pet’s collar and the other end to
the D-ring located inside the trailer. Adjust
the length of this leash so the pet cannot
get out of the front window when it is
open. Always close the rear door before
riding off. Never leave your pet in the
trailer without supervision.
Please take plenty of time and choose a quiet place so that you can train your
dog without interruptions, which might distract or frighten the dog. It is also
important to choose an even surface like a tarmac lot, for example. The dog
should wear a harness; the rear door should be open and the front door should
be closed. If possible take a second person to assist.
To get the dog used to the bicycle trailer the training will ideally be carried out
in 3 steps:
Step 1: The dog becomes acquainted with the bicycle trailer
1. Your assistant holds the bike and trailer steady during the entire training and
prevents the trailer from wobbling. Lead your dog through the rear door into the
trailer and hold him with the short lead.
2. Now close the rear door and open the front door. Then praise the dog and give
him some tasty treats.
3. Close the front door again and open the rear door. Praise and reward your dog
and let him get out on command.
Step 2: The dog becomes acquainted with the trailer’s motion
1. The assistant once again holds the bike and trailer steady while you guide the
dog into the trailer. Attach the short lead to the dog’s harness.
2. Close the rear door again and reward your dog by giving him some treats
through the front door.
3. When the dog is sitting still the assistant slowly puts bike and trailer into moti
-
on. Walk alongside the trailer and praise and reward your dog.
– If the dog becomes anxious please stop the trailer. As soon as the dog has cal
-
med down, reward your dog with some treats and stop the training as in step 1.
– If the dog keeps calm stop the training - as in step 1 - after 2 minutes of a slow
ride.
Step 3: Riding with bike and trailer
1. The assistant once again holds the bike and trailer steady while you guide the
dog into the trailer and attach the short lead to the dog’s harness.
2. Close the rear door and reward your dog by giving him some treats through the
front door.
3. When the dog is sitting still the assistant slowly starts to ride the bike with
trailer. Walk alongside the trailer and give your dog tasty treats.
– If the dog becomes anxious please stop cycling. Wait until the dog calms down
again and give him a tasty treat while standing still. Now gently put the trailer
into motion again (see step 2) and after a short time stop the training as in step
1 or step 2.
– If the dog keeps calm stop the training as described after approx. 2 minutes.
If the dog stays calm you can extend the riding time step-by-step and cycle
without any escort.
Repeat step 3 if necessary until your dog gets used to riding in the bicycle trai-
ler for dogs.
Check if
trailer hitch is
secure before cycling.
1281x_FahrradAnh_Aufbau.indd 2 06.08.14 13:56


Praat mee over dit product
Laat hier weten wat jij vindt van de Trixie 12816 Fietskar. Als je een vraag hebt, lees dan eerst zorgvuldig de handleiding door. Een handleiding aanvragen kan via ons contactformulier.
beantwoord | Ik vind dit nuttig (0)