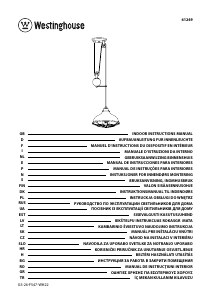
Handleiding Westinghouse 6345300 Lamp

Handleiding voor je Westinghouse 6345300 Lamp nodig? Hieronder kun je de handleiding gratis bekijken en downloaden als PDF in het Nederlands en/of Engels. Dit product heeft 7 veelgestelde vragen, 0 comments en heeft 0 stemmen. Is dit niet de handleiding die je zoekt, neem dan contact met ons op.

Is je product kapot en biedt de handleiding geen oplossing meer? Dan kun je voor reparatie gratis terecht bij Repair Café.

Handleiding

Loading…

Mini-Pendant Kit
Installation and Safety Instructions
Warning: Be sure the electricity to the wires you are working on is shut off; either the fuse is removed
or the circuit breaker is shut off.
GENERAL
You don't need special tools to install this fixture. Be sure to follow the steps in the order given. Under no
circumstances should a fixture be hung on house electrical wires, nor should a swag type fixture be installed on
a ceiling which contains a radiant type heating system. Read instructions carefully. If you are unclear as to
how to proceed, consult a qualified electrician.
INSTALLATION
Important: Do not attach fixture directly to outlet box.
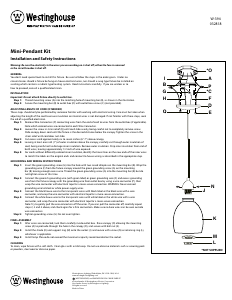
Step 1: Thread mounting screw (A) into the matching hole of mounting bar (B), as shown in the illustration.
Step 2: Secure the mounting bar (B) to outlet box (O) with outlet box screws (C) (not provided).
ADJUSTING LENGTH OF CORD IF NEEDED
These steps should only be performed by someone familiar with working with electrical wiring. Care must be taken when
adjusting the length of the cord to ensure insulation on internal wires is not damaged. If not familiar with these steps, seek
the aid of a qualified electrician.
Step 1: Remove Wire Connectors (P) connecting wires from the end of cord to wires from the outlet box (if applicable).
Note which colored wires are connected in each Wire Connector.
Step 2: Loosen the screw in strain relief (Q) until cord slides easily, being careful not to completely remove screw.
Slide canopy down cord until the fixture is the desired distance below the canopy. Tighten the screw in the
strain relief until cord does not slide.
Step 3: Cut excess cord approximately six to seven inches (6”-7”) above canopy.
Step 4: Leaving at least one inch (1”) of outer insulation above the canopy, carefully cut through outer insulation of
cord, being careful not to damage inner insulation. Remove outer insulation. Strip inner insulation from end of
both wires, leaving approximately 1/2 inch of wire exposed.
Step 5: For cords without differently colored inner insulation, identify the tracer lines on the new ends of the inner wires
to match the labels on the original ends and connect to house wiring as described in the appropriate step.
GROUNDING AND WIRING INSTRUCTIONS
Step 1: Insert the green grounding screw (G) into the hole with two raised dimples on the mounting bar (B). Wrap the
grounding wire (F) from the fixture canopy around the green grounding screw (G) on the mounting
bar (B) leaving enough excess wire. Thread the green grounding screw (G) into the mounting bar (B) but do
not tighten screw at this time.
Step 2: Connect th
e greenish grounding wire (with green label) or green grounding wire (F)
and excess grounding
wire from the fixture canopy with the grounding wire from outlet box by using a wire connector (P), then
wrap the wire connector with electrical tape for a more secure connection. WARNING: Never connect
grounding wire to black or white power supply wires.
Step 3: Connect the black house wire to the transparent wires with black label or the black wire with a wire
connector, and wrap the wire connector with electrical tape for a more secure connection.
Step 4: Con
nect the white house wire to the transparent wires with white label or the white wire
with a
wire
connector, and wrap th
e wire connector with electrical tape for a more secure connection.
Note: Try to gently pull the wire connectors off the wires. If you can pull the connector off, carefully repeat
steps 2, 3 and 4 above, and check again for a firm connection. Make sure no bare wires can be seen outside
wire connectors.
Step 5: Tighten grounding screw (G). Do not over tighten.
FINAL ASSEMBLY
Step 1: After wires are connected, tuck them carefully inside outlet box. Raise canopy (D) allowing the mounting
screw (A) to protrude through the hole in the canopy (D), and secure with ball nut (E).
Step 2: Install the shade (K) and support ring (M) onto the socket (J) and secure with screws (N) or retaining ring (L),
whichever is applicable.
Step 3: Install lamp. Please do not exceed the maximum capacity recommended on the socket.
CLEANING
To clean, wipe fixture with a soft cloth. Clean glass with a mild soap. Do not use abrasive materials such as scouring pads
or powders, steel wool or abrasive paper.
B
H
Q
G
I
A
P
*C
*O
F
D
E
J
M
L
K
N
Westinghouse Lighting, Philadelphia, PA 19154-1029, U.S.A.
www.westinghouselighting.com
, WESTINGHOUSE, and INNOVATION YOU CAN BE SURE OF
are trademarks of Westinghouse Electric Corporation.
Used under license by Westinghouse Lighting.
All rights reserved.
Made in China
W-394
032818
*NOT SUPPLIED
Download de handleiding in het Nederlands en/of Engels (PDF, 0.23 MB)
(Denk aan het milieu en print deze handleiding alleen als dat echt noodzakelijk is)

Loading…

Meer over deze handleiding

We begrijpen dat het prettig is om een papieren handleiding te hebben voor je Westinghouse 6345300 Lamp. Je kunt de handleiding bij ons altijd downloaden en daarna zelf printen. Indien je graag een originele handleiding wilt hebben, raden we je aan contact op te nemen met Westinghouse. Zij kunnen wellicht nog voorzien in een originele handleiding. Zoek je de handleiding van Westinghouse 6345300 Lamp in een andere taal? Kies op de homepage je taal naar keuze en zoek daarna op het modelnummer om te zien of we deze beschikbaar hebben.

Specificaties

Merk Westinghouse
Model 6345300
Categorie Lampen
Bestandstype PDF
Bestandsgrootte 0.23 MB

Alle handleidingen voor Westinghouse Lampen
Meer handleidingen voor Lampen

Beoordeling

Laat ons weten wat je van de Westinghouse 6345300 Lamp vindt door een beoordeling achter te laten. Wil je je ervaringen met dit product delen of een vraag stellen? Laat dan een bericht achter onderaan de pagina.
Bent u tevreden over de Westinghouse 6345300 Lamp?
Ja Nee
Beoordeel dit product als eerste
0 stemmen

Praat mee over dit product

Laat hier weten wat jij vindt van de Westinghouse 6345300 Lamp. Als je een vraag hebt, lees dan eerst zorgvuldig de handleiding door. Een handleiding aanvragen kan via ons contactformulier.

Veelgestelde vragen over Westinghouse 6345300 Lamp

Ons supportteam zoekt dagelijks naar nuttige productinformatie en antwoorden op veelgestelde vragen. Als er onverhoopt toch een onjuistheid tussen onze veelgestelde vragen staat, laat het ons dan weten via het contactformulier.

Is alle LED verlichting dimbaar? Geverifieerd

Nee, niet alle LED lampen zijn standaard dimbaar. Dit wordt aangegeven op de verpakking en evetueel op de lamp zelf.

Ik vind dit nuttig (508) Lees meer

Ik heb een nieuwe lichtbron in de lamp gedaan, maar deze gaat niet aan, waar kan dit door komen? Geverifieerd

Sommige lampen zijn gemaakt voor lichtbronnen van een specifiek wattage. Wanneer er een lichtbron in wordt gedaan die een hoger wattage vereist van de lamp kan leveren, dan kan het zijn dat het licht niet aangaat. Als de lamp een veel hoger wattage levert van waarvoor de lichtbron gemaakt is, kan de lichtbron doorbranden.

Ik vind dit nuttig (372) Lees meer

Waarom is de kleur van licht belangrijk? Geverifieerd

Er zijn grofweg twee soorten soort licht, warm licht en koud licht. Koud licht houdt je alerter en wakkerder. Warm licht werkt ontspannender. De warmte van licht wordt gemeten in Kelvin en staat aangegeven op de verpakking of de lamp zelf.

Ik vind dit nuttig (297) Lees meer

Wat is lumen? Geverifieerd

Lumen is een meeteenheid voor de totale hoeveelheid zichtbaar licht die een lichtbron naar alle kanten uitstraalt.

Ik vind dit nuttig (236) Lees meer

Welke fittingen zijn er? Geverifieerd

Wereldwijd worden vele soorten fittingen gebruiken, maar de meest gebruikte zijn die met de Edison schroefdraad, aangegeven met de letter E. In de meeste landen zijn fittingen E27 en E14 de standaard. In de Verenigde Staten zijn E26, E17, E12 en E10 de standaard.

Ik vind dit nuttig (180) Lees meer

Wat zegt het wattage over mijn lamp? Geverifieerd

Wattage is een meeteenheid voor het energieverbruik. Lampen met een hogere lichtopbrengst hebben een doorgaans hoger energieverbruik, maar voor het vergelijken van lichtopbrengst moet altijd gekeken worden naar de hoeveelheid lumen.

Ik vind dit nuttig (155) Lees meer

Wat is LED? Geverifieerd

LED staat voor light-emitting diode. Door in de juiste richting stroom door de halfgeleider te laten lopen ontstaat licht.

Ik vind dit nuttig (140) Lees meer
Handleiding Westinghouse 6345300 Lamp

Gerelateerde producten

Gerelateerde categorieën