Handleiding Westinghouse GSP625 Fornuis
Handleiding voor je Westinghouse GSP625 Fornuis nodig? Hieronder kun je de handleiding gratis bekijken en downloaden als PDF in het Nederlands en/of Engels. Dit product heeft 8 veelgestelde vragen, 0 comments en heeft 0 stemmen. Is dit niet de handleiding die je zoekt, neem dan contact met ons op.
Is je product kapot en biedt de handleiding geen oplossing meer? Dan kun je voor reparatie gratis terecht bij Repair Café.
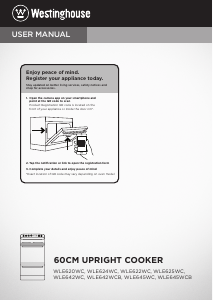
Handleiding
Loading…


Loading…
Beoordeling
Laat ons weten wat je van de Westinghouse GSP625 Fornuis vindt door een beoordeling achter te laten. Wil je je ervaringen met dit product delen of een vraag stellen? Laat dan een bericht achter onderaan de pagina.Meer over deze handleiding
We begrijpen dat het prettig is om een papieren handleiding te hebben voor je Westinghouse GSP625 Fornuis. Je kunt de handleiding bij ons altijd downloaden en daarna zelf printen. Indien je graag een originele handleiding wilt hebben, raden we je aan contact op te nemen met Westinghouse. Zij kunnen wellicht nog voorzien in een originele handleiding. Zoek je de handleiding van Westinghouse GSP625 Fornuis in een andere taal? Kies op de homepage je taal naar keuze en zoek daarna op het modelnummer om te zien of we deze beschikbaar hebben.
Specificaties
| Merk | Westinghouse |
| Model | GSP625 |
| Categorie | Fornuizen |
| Bestandstype | |
| Bestandsgrootte | 4.22 MB |
Alle handleidingen voor Westinghouse Fornuizen
Meer handleidingen voor Fornuizen
Veelgestelde vragen over Westinghouse GSP625 Fornuis
Ons supportteam zoekt dagelijks naar nuttige productinformatie en antwoorden op veelgestelde vragen. Als er onverhoopt toch een onjuistheid tussen onze veelgestelde vragen staat, laat het ons dan weten via het contactformulier.
Waarom maakt de vonkontsteking van mijn fornuis constant een klikkend geluid? Geverifieerd
Als het fornuis met veel water is gereinigd kunnen de knoppen vochtig geworden zijn, waardoor deze in werking kunnen treden. Laat de knoppen drogen. Als het probleem hierdoor niet is opgelost, neem dan contact op met de fabrikant.
Ik vind dit nuttig (1093) Lees meerDe oven in mijn fornuis wordt niet warm genoeg, wat moet ik doen? Geverifieerd
De thermostaat van het apparaat zorgt voor de verwarming tot de ingestelde temperatuur. Hoogstwaarschijnlijk is de thermostaat defect. Zorg dat deze vervangen wordt. Neem bij twijfel contact op met de fabrikant.
Ik vind dit nuttig (1066) Lees meerWelke pannen kan ik gebruiken op een inductiefornuis? Geverifieerd
In de regel zijn alle pannen die magnetisch zijn te gebruiken op een inductiefornuis. Bijna alle nieuwe pannen zijn geschikt voor inductie.
Ik vind dit nuttig (863) Lees meerMijn fornuis heeft een stekker die niet in een normaal stopcontact past, wat moet ik doen? Geverifieerd
Veel elektrische fornuizen (zowel keramisch and inductie) hebben een andere stekker. Dit is omdat deze apparaten veel vermogen hebben. Laat de installatie van het apparaat over aan een professional.
Ik vind dit nuttig (472) Lees meerWat is pyrolyse? Geverifieerd
Sommige ovens zijn uitgerust met een pyrolyse functie. Dit is een schoonmaaksysteem dat vuil en vet in de oven verbrand door gebruik van zeer hoge temperaturen. Na afloop van de pyrolyse zal het vuil tot as verworden zijn en is daarna makkelijk te verwijderen. Als de oven een pyrolyse functie heeft, is het aan te raden deze 3 tot 4 keer per jaar te gebruiken om de oven schoon te houden.
Ik vind dit nuttig (406) Lees meerKan ik een fornuis aansluiten op een verlengsnoer? Geverifieerd
Apparaten die veel stroom gebruiken, zoals een fornuis, kunnen niet zomaar op elk verlengsnoer worden aangesloten. Bekijk wat het vermogen is van de fornuis, aangegeven in Watt, en of het verlengsnoer dit aankan. Er zijn verlengsnoeren met dikkere kabels die gemaakt zijn om grotere apparaten op aan te sluiten.
Ik vind dit nuttig (209) Lees meerAls ik de oven gebruiken vallen er vaak etensresten op de bodem die rook veroorzaken. Hoe kan ik dit voorkomen? Geverifieerd
Veel ovens worden geleverd met een rooster en een bakplaat. Wanneer er voedsel wordt bereid op het rooster kan de bakplaat op de bodem gelegd worden om te voorkomen dat etensresten verbranden en rook gaan verzoorzaken
Ik vind dit nuttig (197) Lees meerKan ik door meerdere roosters te gebruiken ook meerdere dingen tegelijk bereiden in de oven? Geverifieerd
In principe is dit mogelijk. Het hangt echter af van het soort voedsel of er een veranderde bereidingstijd geldt of dat halverwege de bereiding de roosters omgewisseld moeten worden.
Ik vind dit nuttig (195) Lees meer

Praat mee over dit product
Laat hier weten wat jij vindt van de Westinghouse GSP625 Fornuis. Als je een vraag hebt, lees dan eerst zorgvuldig de handleiding door. Een handleiding aanvragen kan via ons contactformulier.