Handleiding Whirlpool WHVS 90F LT A K Afzuigkap
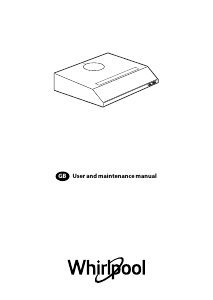
Handleiding voor je Whirlpool WHVS 90F LT A K Afzuigkap nodig? Hieronder kun je de handleiding gratis bekijken en downloaden als PDF in het Nederlands en/of Engels. Dit product heeft 3 veelgestelde vragen, 0 comments en heeft 0 stemmen. Is dit niet de handleiding die je zoekt, neem dan contact met ons op.
Is je product kapot en biedt de handleiding geen oplossing meer? Dan kun je voor reparatie gratis terecht bij Repair Café.
Handleiding
Loading…

Loading…
Meer over deze handleiding
We begrijpen dat het prettig is om een papieren handleiding te hebben voor je Whirlpool WHVS 90F LT A K Afzuigkap. Je kunt de handleiding bij ons altijd downloaden en daarna zelf printen. Indien je graag een originele handleiding wilt hebben, raden we je aan contact op te nemen met Whirlpool. Zij kunnen wellicht nog voorzien in een originele handleiding. Zoek je de handleiding van Whirlpool WHVS 90F LT A K Afzuigkap in een andere taal? Kies op de homepage je taal naar keuze en zoek daarna op het modelnummer om te zien of we deze beschikbaar hebben.
Specificaties
| Merk | Whirlpool |
| Model | WHVS 90F LT A K |
| Categorie | Afzuigkappen |
| Bestandstype | |
| Bestandsgrootte | 0.55 MB |
Alle handleidingen voor Whirlpool Afzuigkappen
Meer handleidingen voor Afzuigkappen
Veelgestelde vragen over Whirlpool WHVS 90F LT A K Afzuigkap
Ons supportteam zoekt dagelijks naar nuttige productinformatie en antwoorden op veelgestelde vragen. Als er onverhoopt toch een onjuistheid tussen onze veelgestelde vragen staat, laat het ons dan weten via het contactformulier.
Hoe hoog moet een afzuigkap minimaal boven een kookplaat hangen? Geverifieerd
Dit kan licht verschillen per merk, maar over het algemeen kunt u 65 centimeter aanhouden voor afzuigkappen boven een gaskookplaat en 50 centimeter boven een elektrische of inductiekookplaat. Deze afstanden zijn er ter bevordering van de brandveiligheid.
Ik vind dit nuttig (1241) Lees meerWat houdt '6th Sense' in? Geverifieerd
Apparaten van Whirlpool die zijn uitgerust met de 6th Sense technologie beschikken over sensoren die zorgen voor een optimale werking van het apparaat. Bij wasdrogers wordt bijvoorbeeld het vochtgehalte in de was gemeten en stopt de machine pas wanneer de was helemaal droog is.
Ik vind dit nuttig (808) Lees meerHeb ik een afzuigkap met of zonder motor nodig? Geverifieerd
Afzuigkappen met motor zijn bedoeld voor wanneer er een directe luchtafvoer naar buiten beschikbaar is. Een afzuigkap zonder motor is bedoeld om aan te sluiten wanneer er een centraal afzuigsysteem is. Sluit nooit een afzuigkap met motor aan op een centraal afzuigsysteem!
Ik vind dit nuttig (680) Lees meerBeoordeling
Laat ons weten wat je van de Whirlpool WHVS 90F LT A K Afzuigkap vindt door een beoordeling achter te laten. Wil je je ervaringen met dit product delen of een vraag stellen? Laat dan een bericht achter onderaan de pagina.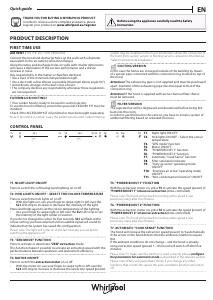






Praat mee over dit product
Laat hier weten wat jij vindt van de Whirlpool WHVS 90F LT A K Afzuigkap. Als je een vraag hebt, lees dan eerst zorgvuldig de handleiding door. Een handleiding aanvragen kan via ons contactformulier.