
Для того чтобы добавить
батарейки, отвинтите крышку
аккумуляторного отсека (в
нижней части гусеницы)
крестообразной отверткой
и добавьте 3 батарейки AA
1.5v (LR6), как показано,
соблюдая полярность .
Возвратите на место крышку.
Пожалуйста, выньте
батарейки, если Вы не
пользуетесь игрушкой
длительное время.
Пока Ваш малыш не научился
уверенно стоять на ножках, он
может играть с «Уточкой» сидя.
В этом случае, используйте
съемную игровую пирамидку.
Малыш будет учиться
перебирать пальчиками
маленькие фигурки, тренируя
моторику своих рук. Когда
ребенок подрастет и научится
ходить, процесс игры станет
более разнообразным и
интересным. Нажав на
хвостик «Уточки», игрушка
включается. В тот момент,
когда ребенок тянет «Уточку»
за веревочку, включается
музыка и раздаются смешные
звуки. Если малыш
остановился и больше не
играет, «Уточка» напомнит о
себе, издав смешные звуки,
тем самым призывая ребенка
еще немного поиграть.
Переключение в режим
«выключено» для бесшумной
игры.
Добавление батареек
Инструкции к игре
Voor het plaatsen van de
batterijen verwijder het deksel van
het batterijvak (aan de onderzijde
van de Eend) met een kruiskop-
schroevendraaier , en plaats 3 X
AA 1.5v (LR6) batterijen, met de
correcte polariteit richting.
Plaats de batterijdeksel terug.
Verwijder de batterijen wanneer
het speelgoed niet is gebruikt voor
lange perioden.
Tot uw baby kan opstaan en
lopen, kan hij leren kruipen en
spelen met de tuimelrups dat kan
afgenomen worden van het
“whistling Pull Along Duck” en zo
zijn fijn motoriek ontwikkelen
door het tuimelrups te plaatsen op
de rug van het eendje. Wanneer
de baby groot genoeg is om alleen
te staan, moedig hem het koordje
vast te houden en de eendje een
en langs te trekken, in het begin
laat hem zien hoe het te doen.
Plaats de tuimelrups stuk op de
rug van het eendje, zorg ervoor
dat de groeven van de tuimelrups
schakelen in de wielvelgen
groeven van het eendje. Zorg
ervoor dat de achterste schakelaar
op de "On” positie is. Als het
eendje rolt, zal het quacken en
fluiten om uw kind te overtuigen
van alleen te blijven stappen.
Schakelaar op "Off"-modus voor
stille spel.
VERVANGING VAN DE BATTERIJEN
HOE TE SPELEN
Per inserire le batterie, svitate il
coperchio del vano batterie (nella
parte sottostante la paperella) con
una cacciavite con testa Phillips
e inserite 3 batterie AA da 1.5V
(LR06) come mostrato, assicurandosi
che la polarità sia corretta.
Riposizionate il coperchio del vano
batterie. Si prega di rimuovere le
batterie quando il gioco non viene
utilizzato per lungo tempo.
Fino a quando il vostro bambino
non potrà alzarsi e camminare,
potrà giocare e sviluppare le proprie
abilità motorie fini, trascinarsi da
seduto e giocare con il cilindro a
sonagli, che può essere separato per
giocare autonomamente.
Quando il vostro bambino sarà
grande abbastanza per alzarsi senza
aiuto, incoraggiatelo a tenere la
cordina e tirare la paperella,
dapprima mostrandoglielo ed
assistendolo. Posizionate l’unità
del cilindro sul dorso della paperella,
assicurandosi che le scanalature sul
bordo del cilindro siano allineate
con quelle sulle ruote della
paperella. Assicuratevi che
l’interruttore sulla coda sia in
posizione “On”. Non appena la
paperella si muove, inizierà a
starnazzare e fischiettare, incoraggi-
ando il vostro bimbo a continuare
autonomamente. Passare alla
modalità "Off" per il gioco
silenzioso.
SOSTITUZIONE DELLE BATTERIE
COME GIOCARE
Um die Batterien einzufügen,
schrauben Sie den Batterieraum-
deckel (auf der Unterseite der
Ente) mit einem passenden
Schraubenzieher ab und legen
Sie 3 x AA 1.5v (LR6) Batterien
ein. Stellen Sie sicher, dass die
Batterien korrekt eingelegt sind
und achten Sie auf das (+) und (-)
Zeichen. Setzen Sie den
Batteriedeckel wieder auf.
Entfernen Sie bitte die Batterien,
wenn das Spielzeug längere Zeit
nicht in Gebrauch ist.
Babys, die noch nicht aufstehen
und laufen können, spielen im
Sitzen mit der Ente und dem
abnehmbaren Zylinder. Sie
können ihre Feinmotorik und die
Fähigkeit zum Krabbeln trainieren.
Wenn das Kind alt genug ist, um
allein zu stehen, ermuntern Sie es
dazu, die Schnur wie von Ihnen
demonstriert zu halten und die
Ente zu ziehen, wobei Sie das Kind
anfänglich unterstützen.
Platzieren Sie die zylindrische
Spieleinheit auf dem Rücken der
Ente und achten Sie darauf, dass
sie richtig in den entsprechenden
Vertiefungen gelagert ist. Stellen
Sie sicher, dass der Schalter am
Schwanz auf “Ein“ steht. Wenn
die Ente rollt, wird sie das
Kleinkind durch Quaken und
Pfeifen dazu ermuntern, alleine
weiterzumachen. Schalter in den
Modus "Aus" für stille Spiel.
BATTERIEWECHSEL
SPIELANLEITUNG
Para inserir as pilhas, retire a
tampa do compartimento das
pilhas (na parte de baixo do pato)
com uma chave de parafuso
philips utilizando uma chave de
fenda Phillips, e inserir 3 X 1.5v
AA (LR6), de acordo com a
polaridade e posição indicadas.
Recoloque a tampa do comparti-
mento das pilhas. Por favor,
remover as pilhas quando este
brinquedo não for utilizado por
longos períodos.
Até seu bebê se levantar e andar ,
ele brincara e desenvolvera suas
habilidades motoras, engatin-
hando, e, ao sentar-se, poderá
brincar com o copo separado do
pato.
Quando o bebê tiver condições
suficientes e não precisar de
ajuda, encorajá-lo a segurar a
corda e puxar o pato, demonst-
rando primeiro.
Coloque o aparelho copo
cilíndrico nas costas do Pato,
assegurando que os sulcos nas
bordas do copo estejam alinhadas
com os sulcos das rodas do Pato .
Certifique-se de que o interruptor
da cauda esteja na posição"On".
Ao se movimentar as rodas e o
aparelho copo cilíndrico posicio-
nado nas costas do Pato, emitirão
os sons de grasnar e assobiar,
incentivando assim a criança a
continuar de forma independente.
Alternar para o modo "Off" para
o jogo em silêncio.
SUBSTITUIÇÃO DAS PILHAS
COMO BRINCAR
Retire la tapa del compartimento
de la batería (en la parte inferior
del pato) con un destornillador de
cabeza Phillips e inserte 3 X AA
1.5v (LR6), como se muestra con la
polaridad correcta.
Vuelva a colocar la cubierta de la
batería. Por favor, retire las pilas
cuando el juguete no esté en uso
durante largos períodos.
Hasta que su bebé no pueda
ponerse de pie y caminar, puede
jugar y mejorar su motricidad fina
y sus habilidades mientras está
sentado y jugando con el cilindro
de bolas que se puede separar
para el juego independiente.
Cuando su bebé tiene la edad
suficiente para estar de pie sin
ayuda, lo animaremos a sostener
la cuerda y tirar del pato,
ayudándole al principio.
Coloque la unidad de tambor
cilíndrico en el lomo del pato,
asegurándose de que las ranuras
de los bordes del cilindro se
alinean con las ranuras de las
ruedas del Pato. Asegúrese de
que el interruptor está en la
posición "On".
A medida que el pato rueda,
empezará a parpar y a silbar,
animando al niño a continuar por
sí solo. Cambiar a modo "Off"
para jugar en silencio.
REMPLACEMENT DES PILES
CÓMO JUGAR
Pour insérer les piles, dévisser le
compartiment à piles (sous le
caneton) avec un tournevis
cruciforme, et insérer 3 piles AA
de 1.5 Volts (LR6) en respectant la
polarité. Refermer le couvercle
et le revisser. Retirer les piles si
l’enfant ne joue pas avec le jouet
pendant une longue période.
Avant que votre enfant sache tenir
debout et marcher, il peut jouer
assis tout en développant ses
capacités motrices en rampant ou
en marchant à quatre pattes. Le
hochet à billes se retire et devient
un jouet indépendant.
Quand votre enfant tient debout
tout seul, montrez-lui comment
fonctionne le canard,
encouragez-le à tenir la cordelette
et tirer le caneton. Placez le
hochet à billes sur le dos du
canard en faisant coïncider les
rainures du hochet avec les
rainures des roues du caneton.
Assurez-vous que le bouton sur la
queue du canard soit en position
“On“. Quand le caneton
avance, il cancane et siffle,
encourageant ainsi l’enfant à
jouer. Passer en mode "Off" pour
le jeu silencieux.
REPOSICION DE LAS BATERIAS
UTILISATION
GB
FR
ES
PT
DE
IT
NL
RU
7
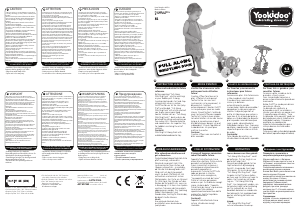
To insert the batteries, unscrew
the battery compartment cover
(on the underside of the duck)
with a Phillips head screwdriver
and insert 3 X AA 1.5v (LR6)
batteries, as shown ensuring
correct polarity . Replace battery
cover. Please remove batteries
when this toy is not in use for
long periods.
Until your baby can stand up and
walk, he can play and develop his
fine motor and crawling skills
while sitting and playing with the
tumbler that can be separated for
independent play. When your
baby is old enough to stand
unassisted, encourage him to hold
the string and pull the duck along
demonstrating and assisting him
at first. Place the cylindrical
tumbler unit on the Duck’s back,
ensuring that the grooves on the
tumbler rims line up with the
grooves on the Duck’s wheels.
Ensure that the tail switch is in the
“On“ position. As the duck
rolls, it will quack and whistle,
encouraging your toddler to
continue independently. Switch to
“Off” position for silent mode.
REPLACING THE BATTERIES
7
7
7
7
7
7
7
7
HOW TO PLAY
6
5
4
3
2
1
FCC STATEMENT: This device complies with part 15 of the FCC rules. Operation is subject to the following two conditions: (1) This device may not cause harmful
interference, and (2) This device must accept any interference received, including interference that may cause undesired operation. This equipment has been tested
and found to comply with the limits for Class B digital devices pursuant to Part 15 of the FCC rules.
These limits are designed to provide reasonable protection against harmful interference to radio communications, this equipment generates, uses and can radiate
radio frequency energy and, if not installed and used in accordance with the instruction, may cause harmful interference to radio communication. However, there is
no guarantee that interference will not occur in a particular installation. If this toy does cause interference to radio or television reception (you can check this by
turning the toy off and on while listening for the interference), one or more of the following measures may be useful: - Reorient or relocated the receiving antenna
- Increase the separation between the toy and the radio or the TV - Consult the dealer or experienced TV-radio technician for help.
NOTE: Changes, adjustments or modifications to this unit, including but not limited to, replacement of any transmitter component (crystal, semiconductor, etc.)
could result in a violation of FCC rules under part 15 and/or 95 and must be expressly approved by Spin Master LTD. or they could void the user's authority to
operate the equipment. Shielded cables must be used with this unit to ensure compliance with the Class B FCC limits.

Praat mee over dit product
Laat hier weten wat jij vindt van de Yookidoo Pull along whistling duck. Als je een vraag hebt, lees dan eerst zorgvuldig de handleiding door. Een handleiding aanvragen kan via ons contactformulier.