
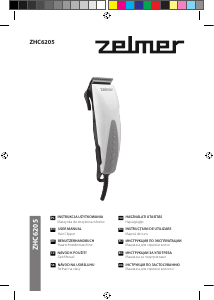
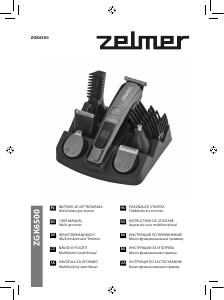
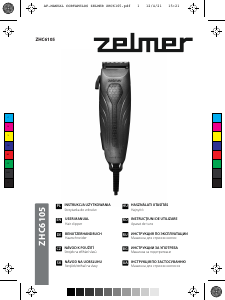
ZGK6800
INSTRUKCJA UŻYTKOWANIA
Wielofunkcyjny trymer
ИНСТРУКЦИЯ ПО ЭКСПЛУАТАЦИИ
Многофункциональный триммер
NÁVOD K POUŽITÍ
Multifunkční zastřihovač
ИНСТРУКЦИИ ЗА УПОТРЕБА
Многофункционален тример
NÁVOD NA UOBSLUHU
Multifunkčný zastrihávač
ІНСТРУКЦІЯ ПО ЗАСТОСУВАННЮ
Багатофункціональний тример
USER MANUAL
Multi groomer
BENUTZERHANDBUCH
Multifunktionaler Trimmer
HASZNÁLATI UTASÍTÁS
Többfunkciós trimmer
INSTRUCȚIUNI DE UTILIZARE
Aparat de tuns multifuncțional
PL
EN
DE
CZ
SK
HU
RO
RU
UA
BG
ZGK6800
WE WOULD LIKE TO THANK YOU FOR CHOOSING ZELMER. WE WISH
THE PRODUCT PERFORMS TO YOUR SATISFACTION AND PLEASURE.
WARNING
PLEASE READ THE INSTRUCTIONS FOR USE CAREFULLY PRIOR TO
USING THE PRODUCT. STORE THESE IN A SAFE PLACE FOR FUTURE
REFERENCE
DESCRIPTION
1. T-blade
2. Blade length setting (0-1-2mm)
3. ON/OFF button
4. Trimmer guide (3-4-5-6-mm)
5. Storage pouch
6. Cleaning brush
7. Precision trimmer
8. Design trimmer
9. Mini foil shaver
10.Nose and ear trimmer
11.LED display
12.Cutting guide (3/6/9/12/15/18/21mm)
13.Oil bottle
14.USB charging cable
SAFETY INSTRUCTIONS
This device can be used by children aged 3
or over under supervision. This appliance
can be used by children aged from 8 years
and above and persons with reduced
physical, sensory or mental capabilities or
lack of experience and knowledge if they
have been given supervision or instruction
concerning use of the appliance in a safe
way and understand the hazards involved.
Children shall not play with the appliance.
Cleaning and user maintenance shall not be
made by children without supervision.
This device can only be connected with the
USB interface (5VDC, Output Max 1A).
Follow the DEVICE CHARGE instructions
in order to charge it.
Follow the device BATTERY REMOVAL
instructions for removal of the batteries from
the device.
This device is designed for use at a
maximum altitude up to 2000m above sea
level.
IMPORTANT WARNINGS
This appliance is designed for home use and should never be used for commer-
cial or industrial use under any circumstances.
Do not use the device on wet hair.
Do not use connect or disconnect the device to the mains with your hands or feet
wet. Do not use any accessories other than those supplied.
Do not use this device near to bathtubs, showers, sinks or other tanks that
contain water. The mains connection cable must not be tangled or wrapped
around the product during use. Do not pull on the cable to unplug it or use it to
carry the product.
Do not wrap the cable around the device.
Proceed according to the cleaning section of this manual for cleaning. Do not use
the product on animals.
Unplug the product immediately from the mains in the event of any breakdown
and contact an authorised Technical support service.
In order to prevent any risk of danger, do not open the device. Only qualified
technical personnel from the brand´s Official Technical support service may carry
out repairs or procedures on the device.
Any incorrect use or improper handling of the product shall render the warranty
null and void. Only an authorised technical support service centre may carry out
repairs on this product.
B&B TRENDS SL. disclaims all liability for damages that may occur to people,
animals or objects, for the non-observance of these warnings.
INSTRUCTIONS FOR USE
Always ensure the appliance is switched off before changing any attachments.
Place the desired trimming head on top of the groomer and attach the desired
cutting comb guide.
Push "ON/OFF button" (3), the trimmer is turned on and push "ON/OFF button"
again to turn it off. The display is 100% when the battery is full. The display is LO
when the battery is less than 20%.
The charging battery logo is displayed when the trimmer is charging.
You can choose between different cutting fixed comb guides
3/6/9/12/15/18/21mm (12) or 3-4-5-6mm adjustable trimmer guide (4).
HOW TO PLACE AND REMOVE
ATTACHMENTS
A detachable blade system enables you to quickly change from blade for full
grooming to detail trimming blade around a moustache, goatee, or anywhere to
define the hair line. To remove the attachments, simply pull top edge of blade
away from the body unit. To attach, align the back tab of the attachment head to
the cavity on the inner edge of trimmer unit and push down on top of blade.
T-BLADE (Fig.1)
For uniform cutting, allow the trimmer to cut its way through the hair. Do not force
it through at a faster rate.
Select the desired guide combs 3/6/9/12/15/18/18mm. Start by combing the hair
so it falls into its natural direction.
Place the largest guide comb onto your trimmer and start by trimming the sides
from the bottom upwards. Hold the trimmer lightly against the hair, with teeth of
the guide comb pointing up but flat against the head. Slowly lift the trimmer up
and outward through the hair, cutting only a small amount at a time. Repeat
around sides and back of head.
To trim your beard/moustache hold the groomer with the cutting blade facing you.
Start with edge of beard/moustache line, and with the cutting blades resting
lightly against your skin, use slow movements to create a beard/moustache line.
PRECISION TRIMMER (Fig.7)
One adjustable comb for precision trimmer
Select the desired length on the adjustable comb 3-4-5-6mm.
Hold the groomer with the cutting blade facing you.
Start with edge of beard/moustache line, and with the cutting blades resting
lightly against your skin, use slow movements to create a beard/moustache line.
DESIGN TRIMMER (Fig.8)
Use the design trimmer to create fine lines and contours around your facial style,
close to the skin.
Hold the design trimming head perpendicular to the skin and move the trimming
head upwards or downwards with gentle pressure.
MINI FOIL SHAVER (Fig.9)
Hold the groomer and allow mini foil shaver gently touches your face.
Use short, well-controlled movements to shave around your beard/moustache.
Use your free hand to stretch your skin. This encourages the hair to stand
upright, making it easier to shave.
NOSE AND EAR TRIMMER (Fig.10)
Insert the nose and ear attachment gently into the nostril or ear.
Gently move the groomer in and out of the nostril or ear and at the same time
rotate the groomer.
IMPORTANT: Avoid inserting the cutting unit more than 6mm into your nostril.
CHARGING THE DEVICE
Before using your groomer for the first time, charge for 2-3 hours, and charge 2
hours regularly. Ensure the product is switched off. The hair trimmer is complete-
ly handy to carry and can be charged anywhere with the USB cable (Fig.14). First
insert the plug on the end of the USB charging cable lead into the unit and then
connect the USB charging cable to the USB interface. This appliance is suitable
for 5V DC Max 1A charger, computer and other power interface. The LED display
(Fig.11) shows remaining battery power in percent. IMPORTANT: This product is
for cord and cordless use. Your groomer cannot be overcharged. However, if the
product is not going to be used for an extended period time (2-3 months), unplug
it from the mains and store. Fully recharge your hair clipper when you like to use
it again. To preserve the life of your batteries, let them run out every 2 months
then recharge for 2-3 hours again.
MAINTENANCE AND CLEANING
Unplug the product when you do not intend to use it for an extended period of
time to prolong its shelf-life. Allow the device to cool down prior to storage.
Separate the tool head from the body and use the cleaning brush (Fig.6) to
remove dust from the internal parts. Apply a drop of oil (Fig.13) on one of the
edges of the blades for their maintenance, and turn on the device for a few
seconds to distribute it. This should be done when you notice a certain amount of
difficulty during the trimming operation.
Ensure that the device is unplugged prior to cleaning it.
This device may only be cleaned with a damp cloth, and chemical products must
never be used for the same
PRODUCT DISPOSAL
REMOVING BATTERY
The appliance must be disconnected from
the supply mains when removing the
battery.
Ensure that the clipper is discharged of all power First remove the comb. Then
remove the blade.
Unscrew the 2 screws in the blade base of the unit. Unscrew the other screw on
the lower back housing of the clipper. Lift or pry the clipper halves apart,
exposing the battery.
Cut the metal pieces on both ends of the battery and remove it from the PCB. Pull
downward the battery set from the unit.
The battery must be removed from the
appliance before it is scrapped. The battery
is to be disposed of safety


Praat mee over dit product
Laat hier weten wat jij vindt van de Zelmer ZGK6800 Tondeuse. Als je een vraag hebt, lees dan eerst zorgvuldig de handleiding door. Een handleiding aanvragen kan via ons contactformulier.