OPERATION
1. Ensure the compressor is on level ground...do not allow
it to run, positioned on an incline.
2. Check that the mains voltage corresponds with that
shown on the data label on the side of the compressor.
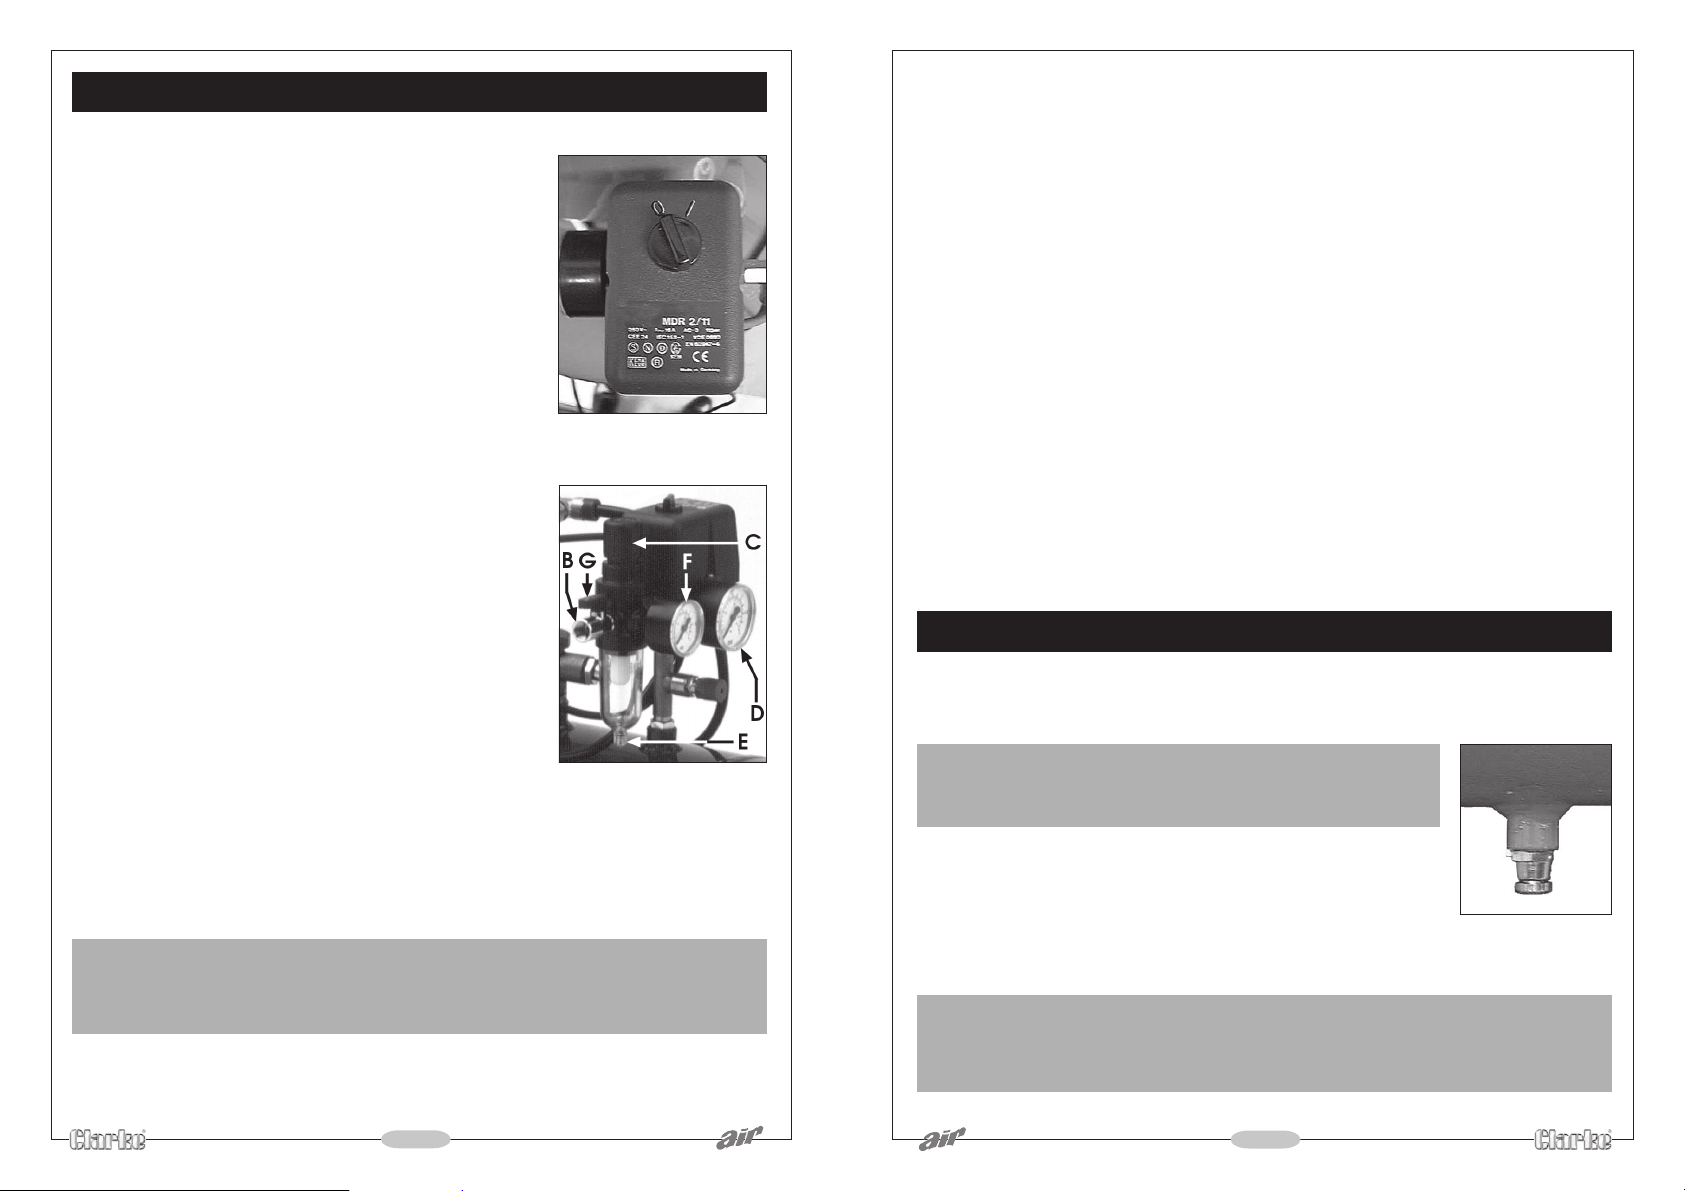
3. Ensure that the ON/OFF switch, mounted on the Pressure
Switch (shown in fig.1), is turned to the ‘0’ (OFF) position,
then plug in and switch on at the mains supply.
. To start the compressor, turn the ON/OFF switch to the
‘I’ (ON) position - the motor should start immediately.
NOTE: Should the motor fail to start immediately, it is possible
that the air receiver is already full of air. Check the tank
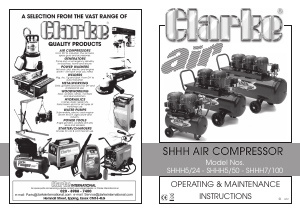
pressure gauge (F, fig. 2). If you release air, by opening the
air outlet tap, the motor will start automatically once the cut-
in pressure is reached.
Before connecting your airline to the compressor,allow
it to run for 10 - 15 seconds, with the air outlet tap,(G,
Fig. 2) completely open to permit a good distribution
of the lubricating oil.
2. Close the outlet tap then connect one end of suitable
air hose to the connector at the filter/regulator outlet,
(B, Fig. 3)and the other end to the equipment to be
used.
3. Set the outlet pressure by adjusting the Pressure
Regulator.
To do this, lift the Pressure Regulator Knob (C Fig. 2),
and turn it clockwise to increase pressure, anticlockwise
to decrease.
To lock the regulator knob and hence the outlet
pressure, push the Regulator knob down until it clicks
into place.
Fig.1
Fig.2
NOTE: For most spray work do not exceed 50 psi (unless following paint manufacturer’s
instructions).
For other airline equipment such as, tyre gauges, staple guns, paraffin guns etc., it may be
necessary to set the operating pressure at a higher (or lower) level.
IMPORTANT:
Always refer to the accessory manufacturers recommendations for
optimum
operating pressures for their equipment.
4. With operating pressure set, reopen the air outlet tap.
6
IMPORTANT:
ALWAYS switch the compressor ON or OFF at the Pressure
Switch...NEVER at the mains supply switch
2. Close the air outlet tap and trigger the equipment (spray
gun,air tool etc.) to release air from the air hose before
disconnecting the hose from the machine.
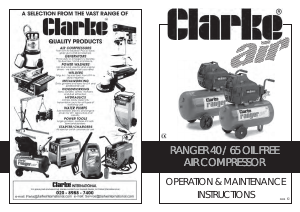
3. Before transporting your compressor or when leaving
overnight, expel all air from the receiver by opening the
drain valve Fig 6.
(Does not apply to the SHHH2)
IMPORTANT:
DO NOT FORGET to close the valve again when the tank is empty, particularly if the
compressor may not be used for sojme time.
Fig.4
7
SHUTTING DOWN THE COMPRESSOR
1. To shut off the compressor, simply turn the ON/OFF switch (see Fig. 1), to the O’ (OFF)
position.
7. The Pressure Switch, located within the plastic cover beneath the ON/OFF switch, should
not require adjustment. This is an automatic device and has been preset at the factory
to stop the motor when pressure in the receiver reaches its maximum, and to start it
again when the pressure in the receiver falls to the minimum preset value. This operation
is completely automatic and does not affect the spraying process in any way. However,
should problems develop with the cut-in, cut out settings, please consult your Clarke
dealer, or the Clarke Service Dep’t.
NOTE:
a
. If the machine pumps continuously without cutting out then the compressor is too
small for the application/tool being used, and damage may result. Consult your
Clarke dealer.
b. The motor is protected by a Thermal Overload so that if the motor overheats for any
reason - the thermal overload will trip, stopping the motor. Allow a period for the
motor to cool down before restarting (15 - 20 minutes).
c. DO NOT exceed the Duty Cycle for the machine (see Specifications).


Praat mee over dit product
Laat hier weten wat jij vindt van de Clarke SHHH 7/100 Compressor. Als je een vraag hebt, lees dan eerst zorgvuldig de handleiding door. Een handleiding aanvragen kan via ons contactformulier.