
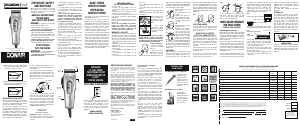
20 PIECE HAIRCUT KIT
Instructions for Care and Use
MODEL HC408
I
MPORTANT SAFETY
INSTRUCTIONS
When using electrical appliances, especially
when children are present,
basic safety
precautions
should
always
be
followed,
including the following:
READ ALL INSTRUCTIONS
BEFORE USING
KEEP AWAY FROM WATER
DANGER — any appliance is electrically
live, even when the switch is off.
To reduce the risk of electric shock:
1. Do not reach for an appliance that has
fallen into water.
Unplug immediately.
2. Do not use while bathing or in the shower.
3. Do not place or store appliance where it can
fall or be pulled into a tub or sink. Do not place
in or drop into water or other liquids.
4. Always unplug this appliance from the
electrical outlet immediately after using.
5. Unplug this appliance before cleaning.
DO NOT REACH
INTO THE WATER
WARNING
— To reduce the risk of burns,
electric shock, fire, or injury to persons:
1. This appliance should never be left unat-
tended when plugged in.
2. This appliance should not be used by, on,
or near children or by individuals with certain
disabilities.
3. Use this appliance only for its intended
use as described in this manual. Do not
use attachments not recommended by the
manufacturer.
4. Never operate this appliance if it has a
damaged cord or plug, if it is not working
properly, if it has been dropped, dam-
aged, or dropped into water. Return the
appliance to an Authorized Service Center
for examination and repair.
5. Keep the cord away from heated surfaces.
6.
Never
operate
the
appliance
with
the
air
opening blocked or while on a soft surface,
such as a bed
or
couch, where the air
openings may be blocked. Keep the air open-
ings free of lint, hair and the like.
7.
Never drop or insert any object into any
opening.
8. Do not use outdoors or operate where
aerosol (spray) products are being used or
where oxygen is being administered.
9. To disconnect, turn all controls to OFF, then
remove plug from outlet.
10. Do not place appliance on any surface
while it is operating.
11. Do not use this appliance with a
damaged or broken comb or with teeth miss-
ing from the blades, as injury may occur.
12. Avoid skin contact with moving blades.
13. If the cord becomes tangled during use,
turn the unit off and straighten cord before
operating again.
SAVE THESE
INSTRUCTIONS
OPERATING
INSTRUCTIONS
This appliance is used on Alternating Current
120V (AC 60 hertz) only.
To reduce the risk of electric shock, this
appliance has a polarized plug (one blade is
wider than the other). As a safety feature, this
plug will fit in the outlet only one way. If the
plug does not fit fully in the outlet, reverse
the plug. If it still does not fit, contact a
qualified electrician to install the proper out-
let.
Do
not
change
the
plug
in
any
way.
Your new Conair
®
haircut kit has everything
you need to achieve professional haircuts at
home. It features a powerful clipper with cut-
ting
precision.
Also
included
are
8
number-
coded
comb
attachments
for
different
hair
lengths (including left and right ear combs). It
also comes with 2 styling clips to assist you in
cutting longer hair styles, a storage case, bar-
ber comb, barber scissors, barber cape, clean-
ing
brush,
lubricating
oil
and
a
blade
guard
for
easy maintenance of the clipper blades.
THE CONAIR GUIDE
TO CUTTING HAIR AT HOME
Before you start:
1. Inspect your clipper. Make sure it’s free
of hair and dirt, properly oiled, and running
smoothly.
2. Place a towel or cape around the neck of
the person whose hair is being cut.
3. Seat the person so that his or her head is at
your eye level. This gives you greater visibility
and control.
4. First, comb hair until it’s tangle-free. Then
hold clipper in a comfortable grip. Now you’re
ready to cut.
Please note your [number] cut
™
20-piece
haircut kit comes with easy-to-use
number-coded combs,
so you can easily
remember your favorite comb once you
start to use the kit on a regular basis.
MEDIUM TO LONG CUT
To begin with, cut only a small amount of
hair until you become used to the length each
attachment leaves the hair. Try the longest
attachment on the clipper first. If you want a
shorter cut, you can then use shorter combs.
• Short attachment comb (number 1) cuts
hair to 1/8".
• Medium-Short
attachment
comb
(number
2)
cuts hair to 1/4".
• Medium-Long
attachment
comb
(number
3)
cuts hair to 3/8".
• Long attachment comb (number 4) cuts
hair to 1/2".
• Long attachment comb (number 5) cuts
hair to 5/8".
• Long attachment comb (number 6) cuts
hair to 3/4".
• Long attachment comb (number 7) cuts
hair to 7/8".
• Long attachment comb (number 8) cuts
hair to 1".
• Left ear attachment comb lightly tapers
over left ear.
• Right ear attachment comb lightly tapers
over right ear.
Attach combs by hold-
ing them teeth up,
then snapping onto the
bottom of the clipper
blade.
To remove comb
attachments,
place
index
finger
and
thumb
as illustrated; then pull
out and up.
NOTE: Never push or shove the clipper
through the hair to make it move more
quickly. Professional experience shows that
the clipper works most efficiently when it
cuts through the hair at its own speed.
To begin cutting hair:
1. The hair should be
combed in its natural
direction.
2. Using the largest
attachment comb, trim
sides from the bottom
upwards. Hold clipper lightly against the hair
with teeth of the attachment comb pointing
up ward, yet flat against the head. Gradually lift
the clipper upward and outward through the
hair, trimming just a little at a time.
Repeat around sides and
back of head.
If you want hair to be even
shorter:
A) Apply more pressure to
the head with the attach-
ment comb that is in place.
This takes a little practice,
of course.
OR
B) Just switch to a shorter
attachment comb.
Remember, it’s better to
leave
too
much
hair
than
too
little.
For
longer
hair
on
top,
use the barber comb and lift
hair on the top of the head,
cutting over the comb. Or,
hold the hair between the
fingers and cut to desired
length. Always working from
the front to the back of the head, gradually cut
the hair shorter by reducing the space between
the comb or fingers and the head. Comb often
to check for uneven strands, and to get rid of
trimmed hair.
OUTLINING:
Outlining requires no attachments. Comb
hair into the desired style. Position the clip-
per between the sideburns and the ear (see
above), making sure the corner edge of the
blade is against the hairline. With the outline of
the
hair
as
your
guide,
slowly
move
the
clipper
over, around and behind the ears. For the back
of
the
neck
and
the
sideburns,
hold
the
clipper
upside down (see Fig. 1) and, holding it against
the skin at the length desired, move the clipper
downward.
Fig. 1
STOP. COMB CHECK.
For best results, do as the professionals do:
comb hair often, and check clipping results as
you comb. This way you avoid uneven sides,
bangs, neckline, etc.
SHORT CUTS TO PERFECT
FLAT TOPS, CREW CUTS, ETC.
Always cut from the back of the neck to the
crown, using the longest comb setting. Hold
the comb attachment flat against the head
and slowly move the clipper up through the
hair. Use the same technique for the sides,
cutting from the bottom to the upper side of
the head.
For the front to the crown, cut the hair against
the direction in which it grows. Then even it
up with the sides.
For a flat top, use the flat comb, not the
attachment comb. Just cut hair on top of the
head over the flat comb (see Fig. 2).
Fig. 2
To taper hair down to the neckline, use
attachment
comb
#1.
Comb
hair
and
check for uneven spots. Outline sideburns
and neck areas (see “Outlining”).
USER-MAINTENANCE
INSTRUCTIONS
CARE OF YOUR CLIPPERS
MAINTENANCE OF THE BLADE
Always apply oil to the blades before, during and
after use. This will ensure maximum cutting
performance. Hold clipper away from your body
in a downward position and apply oil on the front
and sides of the cutter blade. Wipe excess oil off
with a soft dry cloth.
Conair
®
hair clippers are carefully inspected to
insure that the blades are in perfect alignment.
You will need to realign the blades if they
should be knocked out of alignment. How can
you tell if the blades need realigning? Simply
match them up, point for point, to conform with
the drawing below.
To replace cutting comb and cutter after remov-
al for cleaning, replacement or because they
are out of alignment, slide the cutter back onto
the black plastic oscillating head. Next, you
must make sure that the cutter (small blade)
and the cutting comb (large blade) are properly
aligned. Line up the new or existing cutting
comb with the two screw holes. Place the
original screws, one in each hole, and lightly
tighten with a Phillips head screwdriver.
Fig. 3
Large blade (cutting comb)
Blade screws
Small blade (cutter)
Then, match the two blades up, point to point,
conforming with the illustration below in Fig. 4.
Fig. 4
1/32" to 1/16"
Cutting Comb (large blade)
Cutter
(small blade)
*The top edge of the cutting comb should be
1/32" to 1/16" (.79 mm. to 1.59 mm.) higher
than the top edge of the cutter. This is important
so that the clipper does not cut too close or
come in contact with the skin.
*The extreme left tooth of the cutting comb
must cover or be to the extreme left of the first
small tooth of the cutter.
*Be sure that the extreme right big tooth of the
cutter touches the extreme right tooth of the
cutting comb.
Any other servicing should be performed by an
authorized service representative or that the
appliance has no user-serviceable parts. The
product is for household use.
Do not pull, twist, or wrap line cord around
appliance.
SPECIAL OIL
To maintain the blades of your Conair
®
clipper, always apply oil to the blades before,
during and after use.
Gently place a few
drops of oil on the teeth of the blades, using
the special Conair
®
oil included with your
set. Turn the clipper on for a minute, then
turn off. This light, natural oil was formu-
lated specifically for the Conair
®
high-speed
clipper. Be cause it is the right oil to use, it
will not slow down the blades. Never use
any other product. There is no substitute for
Conair oil.
POWER SCREW
The power screw permits you to adjust power
to your clipper. You may need to make this
adjustment if the power in your house is low.
(The Conair
®
clipper was designed for house-
hold use.)
1. With a screwdriver or a dime, turn the power
screw counterclockwise until the arm strikes a
coil, making a clacking noise (Fig.1).
Fig. 1
2. Turn the screw clockwise until the noise stops,
and then turn about 45 degrees more. This is
the maximum power setting (Fig. 2).
Fig. 2
ADJUSTABLE TAPER LEVER
Just like professional clippers, the Conair taper
lever is positioned at your thumb. You can hold
the clipper in your hand and adjust the lever at
the same time...while you’re clipping.
This taper lever eliminates the need for
an attachment comb because it lets you
gradually adjust the closeness of the cut. For
the closest cut and the shortest hair, push taper
lever up as far as it will go. To increase cutting
length, slowly push lever down. If you push to
the lowest position, it will leave hair about the
same length as the short attachment.
Because a different cutting edge is used in
each setting, the taper lever lengthens the life
of your blades.
Packed-in hair can slow down any clipper. To
remove hair without removing the blades, use
your cleaning brush to brush hair out of the
blades. This should be done after each use.
When blades are free of hair, apply a small
amount of oil across them.
Close Cut
Longer Cut
If you do this after every clipping, especially
with heavy hair cutting, the blades should
remain in good working condition. If clipper
stops cutting and this action doesn’t help,
check the blades. If they’ve become dull,
re place them. For new blades, send check
or money order for $6.50 (see order blank.)
This price includes postage and handling, but
$10.00 minimum must be met.
Conair Corporation
150 Milford Rd.
East Windsor, NJ 08520
CAUTION: Never pull on the clipper cord.
Never twist or wrap the cord around the clip-
per. Lay it flat with the cord coiled up when
not in use.
Blade
Top
Bottom
Blade
Power
Screw
Adjustable
Taper Lever
ON/OFF
Switch
WARNING:
IF YOU THINK
THE POWER IS OFF
WHEN THE SWITCH
IS OFF,
YOU'RE WRONG.
KEEP AWAY FROM WATER
Everyone knows that electricity and water
are a dangerous combination. But did you
know that an electric appliance is still
electrically alive even if the switch is off? If
the plug is in, the power is on. So when you
are not using your appliances, keep them
unplugged.
ALWAYS UNPLUG
SMALL APPLIANCES
LIMITED FIVE YEAR WARRANTY
Conair will repair or replace (at our option) your unit
free of charge for 60 months from the date of purchase
if the appliance is defective in workmanship
or materials.
To obtain service under this warranty, return the
defective product to the service center listed below,
together with your purchase receipt and $3.00 for
postage and handling. California residents need only
provide proof of purchase and should call 1-800-366-
0937 for shipping instructions. In the absence of a
purchase receipt, the warranty period shall be 60
months from the date of manufacture.
ANY IMPLIED WARRANTIES, OBLIGATIONS, OR
LIABILITIES, INCLUDING BUT NOT LIMITED TO THE
IMPLIED WARRANTY OF MERCHANTABILITY AND
FITNESS FOR A PARTICULAR PURPOSE, SHALL BE
LIMITED IN DURATION TO THE 60-MONTH DURATION
OF THIS WRITTEN, LIMITED WARRANTY. Some
states do not allow limitations on how long an implied
warranty lasts, so the above limitations may not apply
to you.
IN NO EVENT SHALL CONAIR BE LIABLE FOR ANY
SPECIAL, INCIDENTAL, OR CONSEQUENTIAL
DAMAGES FOR BREACH OF THIS OR ANY OTHER
WARRANTY, EXPRESS OR IMPLIED, WHATSOEVER.
Some states do not allow the exclusion or limitation of
special, incidental, or consequential damages, so the
above limitation may not apply to you.
This warranty gives you specific legal rights, and you
may also have other rights, which vary from state to
state.
© 2010 Conair Corporation
SERVICE CENTER
CONAIR CORPORATION
Service Department
7475 North Glen Harbor Blvd.
Glendale, AZ 85307
10PG112364
IB-9855
Once again, thanks for buying a
Conair product.
Your Conair
®
clipper blades are made of high
carbon stainless steel. They are engineered
for precise, professional results. If blades feel
like they are pulling or grabbing hair, it means
they are losing their sharpness and should be
replaced as soon as possible.
Attachment combs should also be replaced
if they are lost or broken. It is easier to cut
hair with the accuracy of a pro when the
necessary tools are at your fingertips.
Conair makes a variety of accessories
for different haircut kits. If your haircut kit does
not include them, you may want to consider
adding them to your professional haircutting
tools.
Left and right ear attachment combs
provide effortless, precise cutting around the ears.
Styling clips hold hair in place when you are sec-
tioning hair. A styling comb makes it easy to taper
or cut hair at an angle. A barber cape ensures a
comfortable and neat haircut and a convenient
storage pouch keeps all your essentials in one
place.
Last but not least, an easy-to-follow
30-minute “Haircuts at Home” video is
available. It demonstrates basic haircut-
ting techniques and follows four popular
haircuts step by step. It will give you the
confidence and instruction you need to give.
great-looking haircuts to every member of
your family.
To register your Conair product, please simply
go to www.conair.com/registration and the site
will guide you.
EXCITING ITEMS
FROM CONAIR
PT1 Mighty Mini 15-Piece Clipper Kit
Powerful DC motor
makes this unique,
lightweight clipper /
trimmer a versatile cut-
ting instrument, as it
can also be used for
detailing and bikini line
trimming.
GMT189CGB 13-Piece Trimmer
Rechargeable
Beard & Mustache
trimmer with stainless
steel blades and a
5-position attachment
comb for a blended
and tapered trim.
Model Comb-408
Model CLP- 1
Model HC VIDEO
Model Comb-408 Model SC- 1
Model BLD-8
Model HCNB-1 Model Comb-408
Model HC OIL
Model HC- 1
Model CAPE-1
Model Comb-408
HAIRCUT KIT REPLACEMENT PARTS & ACCESSORIES ORDER FORM
Pricing in effect through June 1, 2011. Orders postmarked after this date
will be accepted, and the customer will be notified if pricing has changed.
CUT HERE
ITEM PART # PRICE QUANTITY AMOUNT
Blade Set for HC408 BLD-8 $6.50
Set of 4 Attachment Combs:1/8", 1/4", 3/8", 1/2". COMB-408 $5.00
Set of 2 Attachment Combs: left ear and right ear. COMB-408 $1.75
1" Comb COMB-408 $1.75
3 attachment combs 5/8", 3/4", 7/8". COMB-408 $5.00
Neck Brush HCNB-1 $1.50
Deluxe Black Vinyl Cape with Velcro Collar CAPE-1 $5.00
Lubricating Oil (pkg. of 3 tubes) HC OIL $2.00
30 Minute Haircut Video HC VIDEO $8.95
Barber Scissors SC-1 $2.00
Blade Guard HC-1 $1.00
Styling Clips (set of 3) CLP-1 $1.50
Enclose check or money order made payable to Conair. (We cannot accept cash, stamps or C.O.D. orders.) *CT, IL, AZ,
and PA residents should add applicable state sales tax. Minimum order of $10.00 or a $2.00 handling charge will be
Subtotal
added to order. All prices include handling and return postage. Prices are subject to change without notice. Prices
are valid only for shipments within the continental United States. Please allow 4–6 weeks for delivery. To avoid
*Sales Tax
delays, please print clearly. We must have a street address, as UPS cannot deliver to a P.O. box.
TOTAL
NAME_____________________________________________________________________________________
ADDRESS__________________________________________________________APT.____________________
Mail to:
Conair Corporation
CITY___________________________________________________________STATE____________ZIP________
Service Department
150 Milford Road
TELEPHONE ( )___________________________________ (We call only if we have a question about your order.)
East Windsor, NJ 08520-9730
For information on other Conair
®
haircut kit parts, call: 1-800-3-CONAIR.


Praat mee over dit product
Laat hier weten wat jij vindt van de Conair HC408 Tondeuse. Als je een vraag hebt, lees dan eerst zorgvuldig de handleiding door. Een handleiding aanvragen kan via ons contactformulier.