
GB/IE/NI GB/IE/NI GB/IE/NI GB/IE/NI GB/IE/NI GB/IE/NI GB/IE/NI GB/IE/NI
GB/IE/NI GB/IE/NI GB/IE/NI GB/IE/NI GB/IE/NI GB/IE/NI GB/IE/NI GB/IE/NI
FR/BE FR/BE FR/BE
FR/BEFR/BEFR/BE
FR/BEFR/BEFR/BEFR/BEFR/BE
FR/BE FR/BE FR/BE FR/BE FR/BE
FR/BEFR/BEFR/BEFR/BEFR/BEFR/BEFR/BEFR/BE
premier chiffre. Confirmez votre choix à l‘aide
de la touche MODE
14
. Répétez le processus
pour tous les chiffres restants.
Confirmez votre choix avec la touche SET
15
.
Appuyez sur la touche MODE
14
pour accéder
au format horaire et appuyez sur la touche SET
15
pour éditer. Appuyez de manière répétée
sur la touche +
22
ou la touche –
21
jusqu‘à
ce que 12 Hr (format 12 heures) ou 24 Hr
(format 24 heures) apparaisse sur l‘écran LC.
Confirmez votre choix avec la touche SET
15
.
Appuyez sur la touche MODE
14
pour accéder
à l‘horloge. Un nombre à trois ou quatre chiffres
apparaît sur l‘écran LC. Appuyez sur la touche
SET
15
pour éditer et appuyez de manière
répétée sur la touche +
22
ou la touche –
21
jusqu‘à ce que le nombre souhaité apparaisse
comme premier chiffre à gauche. Confirmez
votre choix à l‘aide de la touche MODE
14
.
pour éditer et appuyez de manière répétée sur
la touche +
22
ou la touche –
21
jusqu‘à ce
que le nombre souhaité apparaisse comme
premier chiffre. Confirmez votre choix à l‘aide
de la touche MODE
14
. Répétez ce processus
pour les chiffres restants.
Confirmez votre choix avec la touche SET
15
.
Appuyez sur la touche MODE
14
pour accéder
à l‘unité de poids et appuyez sur la touche
SET
15
pour éditer. Appuyez de manière répé-
tée sur la touche +
22
ou la touche –
21
jusqu‘à ce que SET KG ou SET LB apparaisse
sur l‘écran LC.
Confirmez votre choix avec la touche SET
15
.
Appuyez sur la touche MODE
14
pour accéder
au poids. Un nombre à trois chiffres apparaît
sur l‘écran LC. Appuyez sur la touche SET
15
pour éditer et appuyez de manière répétée sur
la touche +
22
ou la touche –
21
jusqu‘à ce
que le nombre souhaité apparaisse comme
votre choix à l‘aide de la touche MODE
14
.
Répétez le processus pour tous les chiffres
restants.
Confirmez votre choix avec la touche SET
15
.
Remarque : vous pouvez calculer le périmètre
(U) des pneus en multipliant le diamètre (D) par
3,1416 (Fig. M). La liste (Fig. N) contient le
périmètre de pneu (U) correspondant aux dia-
mètres (D) courants.
Appuyez sur la touche MODE
14
pour accéder
à l‘unité de longueur et à l‘unité de vitesse cor-
respondante, puis appuyez sur la touche SET
15
pour éditer. Appuyez de manière répétée sur
la touche +
22
ou la touche –
21
jusqu‘à ce
que SET KM KMH ou SET MILE MPH appa-
raisse sur l‘écran LC.
Confirmez votre choix avec la touche SET
15
.
Appuyez sur la touche MODE
14
pour accé-
der à l‘âge. Un nombre à deux chiffres apparaît
sur l‘écran LC. Appuyez sur la touche SET
15
Appuyez de manière répétée sur la touche +
22
ou la touche –
21
jusqu‘à ce que la langue
souhaitée apparaisse.
Confirmez votre choix avec la touche SET
15
.
Appuyez sur la touche MODE
14
pour accéder
au profil d‘utilisateur et appuyez sur la touche
SET
15
pour éditer.
Appuyez de manière répétée sur la touche +
22
ou la touche –
21
jusqu‘à ce que le profil
d‘utilisateur souhaité (AVANCE ou FACILE)
apparaisse.
Confirmez votre choix avec la touche SET
15
.
Appuyez sur la touche MODE
14
pour accéder
à la dimension des pneus (SET WS). Un nombre
à quatre chiffres apparaît sur l‘écran LC. Saisis-
sez le périmètre de votre pneu en mm. Appuyez
sur la touche SET
15
pour éditer et appuyez
de manière répétée sur la touche +
22
ou la
touche –
21
jusqu‘à ce que le nombre souhaité
apparaisse comme premier chiffre. Confirmez
Mise en service
Effectuer les réglages de base
Réglages de base : Langue > Profil d‘utilisation
> Dimension des pneus > Unité de longueur > Âge
> Unité de poids > Poids > Système de temps >
Heure > Économie de CO2 > Intervalle d‘entretien
> Unité de température
Fonctions importantes : Touche MODE
14
p
our
la sélection / Touche +
22
ou Touche –
21
pour le
réglage des valeurs / Touche SET
15
pour éditer et
saisir
Remarque : l‘écran LC
13
s‘active automatique-
ment, environ 2 secondes après la mise en place
de la
3
pile. Le choix de la langue s‘affiche
immédiatement.
Appuyez sur la touche SET
15
pour éditer.
Scannez le code QR avec votre
smartphone et visualisez en vi
déo
comment monter votre produit.
Mise en place du compteur vélo
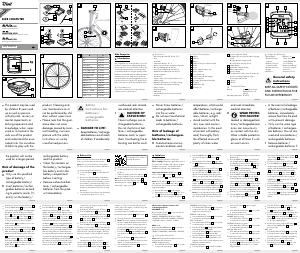
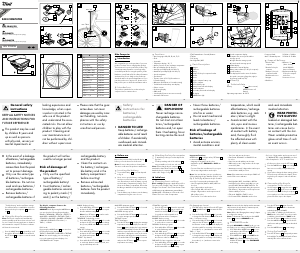
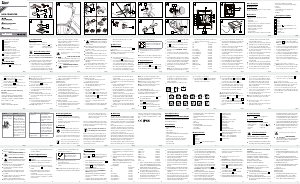
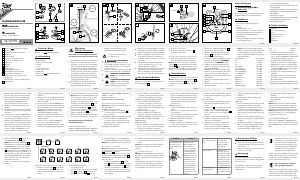
Pour la pose du produit, procédez comme le
montrent les figures B à I.
Coupez les extrémités qui dépassent des
attache-câbles
2
à l‘aide d‘un outil appro-
prié, une pince coupante par exemple.
Remarque : assurez-vous que le compteur vélo
8
est installé à moins de 70 cm du
6
capteur. Fixez
le compteur vélo
8
au capteur
6
sous un angle
de 30 °, cf. Fig. B.
Remarque : ce produit ne doit pas être utilisé sur
un vélo électrique. Le moteur du vélo pourrait occa-
sionner le dysfonctionnement du produit.
Mise en place de la pile
Pour insérer la pile
3
, veuillez procéder comme
le montre la Fig. A.
Utilisez une pièce de monnaie pour ouvrir le
compartiment à pile. À l‘aide de la pièce, tour-
nez le couvercle du compartiment à pile dans
le sens anti-horaire. Mettez la pile en place
dans le compartiment en respectant la polarité.
Celle-ci est indiquée dans le compartiment à
pile. Assurez-vous que la bague d‘étanchéité
est placée correctement avant de mettre la pile
en place.
Tournez le couvercle de compartiment à pile
à l‘aide de la pièce de monnaie dans le sens
horaire afin de le fermer.
la pile / pile rechargeable
et sur le produit.
Nettoyez les contacts de
la pile / pile rechargeable
et du comparti
ment à pile
avant d‘insérer la
pile !
Retirez immédiatement les
pil
es / piles recharge
ables
usées du produit.
Avant la mise en service
Retirez le film de protection de l‘écran LC
13
avant
la première utilisation.
le produit pendant une
période prolongée.
Risque d‘endomma-
gement du produit
Exclusivement utiliser
le type de pile / pile
rechargeable spécifié.
Insérez les piles / piles
recharge ables conformé-
ment à l‘indication de pola-
rité (+) et (-) indiquée sur
pour éviter tout endom-
magement.
Utilisez uniquement des
piles / piles recharge
ables
du même
type. Ne mélan-
gez pas des piles
/ piles
rechargeables usées et
neuves !
Retirez les piles / piles
rechargeables, si vous
ne comptez pas utiliser
piles / piles rechargeables
endommagées ou suj
ettes
à des fuites peuvent pro-
voquer des brûlures au
contact de la peau. Vous
devez donc porter des
gants adéquats pour les
manipuler.
En cas de fuite des piles /
piles rechargeables, reti-
rez-les aussitôt du produit
Évitez tout contact avec
la peau, les yeux ou les
muqueuses! En cas de
contact avec l’acide d’
une
pile, rincez la zone tou-
chée à l’eau claire et
consultez immédiatement
un médecin !
PORTER DES
GANTS DE
PROTECTION! Les
Risque de fuite des
piles / piles rechar-
geables
Évitez d’exposer les piles /
piles rechargeables à
des conditions et tempé-
ratures extrêmes suscep-
tibles de les endommage
r,
par ex. sur des radia-
teurs / exposition directe
aux rayons du soleil.
une surchauffe, un incen-
die ou une explosion.
Ne jetez jamais des
piles / piles recharg
eables
au feu ou dans l’eau.
Ne pas soumettre les
piles / piles rechargeables
à une charge mécanique.
consultez immédiatement
un médecin !
RISQUE D‘EX-
PLOSION !
Ne rechargez jamais des
piles non rechargeables.
Ne court-circuitez pas
les piles / piles rechar-
geables et / ou ne les
ouvrez pas ! Autrement,
vous risquez de provoq
uer
Consignes
de sécurité
relatives aux
piles / aux piles
rechargeables
DANGER DE MORT!
Rangez les piles / piles
rechargeables hors de
la portée des enfants.
En cas d’ingestion,
Sachez que la garantie ne
couvre aucun dommage
dû à une utilisation inap-
propriée, au non-respect
des consignes de fonction-
nement et de sécurité ou
à une utilisation par des
personnes non autorisées.
surveillés ou s‘ils ont été
informés de l‘utilisation
sûre du produit et s‘ils
comprennent les risques
liés à son utilisation. Les
enfants ne doivent pas
jouer avec le produit. Le
nettoyage et l‘entretien
du produit ne doivent pas
être effectués par des
enfants laissés sans sur-
veillance.
SÉCURITÉ ET INSTRUC-
TIONS POUR L‘AVENIR !
Le produit peut être utilisé
par des enfants âgés de
8 ans et plus, ainsi que
par des personnes ayant
des capacités physiques,
sensorielles ou mentales
réduites ou manquant
d‘expérience ou de
connaissances s‘ils sont
Contenu de la livraison
1 compteur vélo
1 support de
compteur vélo
1 amortisseur pour sup-
port de compteur vélo
1 support avec capteur
1 aimant
6attache-câbles
2 piles, 3 V
(courant
continu), pile bouton
modèle CR2032
2 bagues d‘étanchéité
de rechange pour
compteur vélo et
capteur
1 mode d‘emploi
Instructions
générales de
sécurité
CONSERVEZ TOUTES
LES CONSIGNES DE
16
Affichage de comparaison de vitesse :
Compare la vitesse actuelle à la vitesse
moyenne
▲ supérieur à la vitesse moyenne
▼ inférieur à la vitesse moyenne
17
Affichage SCAN
18
Affichage d‘intervalle d‘entretien
19
Affichage de charge de pile
20
Affichage de direction de vitesse :
Il indique la tendance à augmenter (grandes
barres, droite) ou à diminuer (petites barres,
gauche) de la vitesse.
21
Touche –
22
Touche +
Caractéristiques techniques
Pile : 3 V (courant continu)
(pile bouton CR2032)
Température de
fonctionnement : 0–50 °C
– Affichage du scan (les fonctions sont activées)
– Rétroéclairage
Descriptif des pièces
1
Aimant
2
Attache-câble
3
Pile
4
Amortisseur pour fixation d‘ordinateur de vélo
5
Fixation
6
Capteur
7
Couvercle du compartiment à pile du
compteur vélo
8
Compteur vélo
9
Couvercle du compartiment à pile du capteur
10
Affichage primaire de valeur de fonction
11
Affichage de fonction
12
Affichage secondaire de valeur de fonction
13
Écran à cristaux liquides (LC)
14
Touche MODE (M)
15
Touche SET (S)
Fonctions
– Langues du menu : GB, DE, FR, NL, IT, ES
– Horloge
– Chronomètre
– Affichage de la température °C / °F
– Fonction mémoire pour température min. et max.
– Affichage vitesse (0–99,9 km / h)
– Affichage vitesse moyenne (0–99,9 km / h)
– Affichage vitesse maximale (0–99,9 km / h)
– Comparaison de vitesse
– Tendance de vitesse
– Minuterie de parcours (max. 9:59:59) (compte
à rebours ou croissant)
– Compteur kilométrique (compte à rebours ou
croissant)
– Afficheur-totaliseur kilomètres et trajet
– Compteur de calories
– Affichage combustion de graisse
– Réduit les émissions de CO2
Compteur vélo
Introduction
Nous vous félicitons pour l‘achat de votre nouveau
produit. Vous avez opté pour un produit de grande
qualité. Le mode d‘emploi fait partie intégrante de ce
produit. Il contient des indications importantes pour
la sécurité, l’utilisation et la mise au rebut. Veuillez
lire consciencieusement toutes les indications d‘utili-
sation et de sécurité du produit. Ce produit doit uni-
quement être utilisé conformément aux instructions
et dans les domaines d‘application spécifiés. Lors
d‘une cession à tiers, veuillez également remettre
tous les documents.
Utilisation conforme
Le produit est conçu pour une utilisation en tant
que compteur vélo. Non destiné à une utilisation
commerciale.
date of purchase, we will repair or replace it – at
our choice – free of charge to you.
The warranty period begins on the date of purchase.
Please keep the original sales receipt in a safe loca-
tion. This document is required as your proof of pur-
chase. This warranty becomes void if the product has
been damaged, or used or maintained improperly.
The warranty applies to defects in material or manu-
facture. This warranty does not cover product parts
subject to normal wear, thus possibly considered con-
sumables (e.g. batteries) or for damage to fragile parts,
e.g. switches, rechargeable batteries or glass parts.
The complete declaration of conformity is available
at: www.owim.com.
Warranty
The product has been manufactured to strict quality
guidelines and meticulously examined before
delivery.
In the event of product defects you have legal rights
against the retailer of this product. Your legal rights are
not limited in any way by our warranty detailed below.
The warranty for this product is 3 years from the date
of purchase. Should this product show any fault in
materials or manufacture within 3 years from the
Batteries / rechargeable batteries may not be dis-
posed of with the usual domestic waste. They may
contain toxic heavy metals and are subject to haz-
ardous waste treatment rules and regulations. The
chemical symbols for heavy metals are as follows:
Cd = cadmium, Hg = mercury, Pb = lead. That is why
you should dispose of used batteries / rechargeable
batteries at a local collection point.
Declaration of conformity
We, OWIM GmbH & Co. KG, Stiftsbergstraße 1,
DE-74167 Neckarsulm, GERMANY, hereby declare
under our sole responsibility the product Bike Com-
puter, Model No.: HG00734A / HG00734B,
Version: 02 / 2017, to which this declaration refers,
complies with the standards/normative documents
of 1999/5/EC.
Contact your local refuse disposal author-
ity for more details of how to dispose of
your worn-out product.
To help protect the environment, please
dispose of the product properly when it
has reached the end of its useful life and
not in the household waste. Information on
collection points and their opening hours
can be obtained from your local authority.
Faulty or used batteries / rechargeable batteries
must be recycled in accordance with Directive
2006/66/EC and its amendments. Please return
the batteries / rechargeable batteries and / or the
product to the available collection points.
Environmental damage through
incorrect disposal of the batterie
s /
rechargeable batteries!
Disposal
The packaging is made entirely of recy-
clable materials, which you may dispose
of at local recycling facilities. The Green
Dot is not valid for Germany.
b
a
Observe the marking of the packaging
materials for waste separation, which
are marked with abbreviations (a) and
numbers (b) with following meaning:
1–7: plastics / 20–22: paper and fibre-
board / 80–98: composite materials.
The product and packaging materials
are recyclable, dispose of it separately
for better waste treatment. The Triman
logo is valid in France only.
Cleaning and care
Do not use any liquids or cleaning agents for
cleaning. Otherwise there is a risk of damaging
the product.
Clean the product on the outside only with a
soft, dry cloth.
Maintenance
Remove the battery from the product if the
product is not going to be used for a prolonged
period.
Regularly examine the product i.e. check its
components for damage and ensure that they
are positioned correctly.
Problem Solution
Speed or distance are
not displayed
Adjust magnet and
sensor correctly.
- Check that the battery
is inserted with the
poles arranged the
right way round.
Display is black The ambient temperature
is too high or the bicycle
computer was exposed
to direct sunlight for too
long. Remove product
from direct sunlight and
let it cool off for a while.
The LC display shows
irregular symbols.
Remove battery and
replace it again.
- If error messages appear in the display, remove
these products from the proximity of the product. If
the device fails to work, remove the batteries for a
short while and then replace them.
Problem Solution
Empty LC display or no
response after putting
the battery in again
Remove battery. If
required, guide a sharp
instrument (e.g. a screw-
driver) into the hole
labelled “RESET”. Insert
a 3V battery into the bat-
tery compartment in such
a way that the + terminal
points upwards. Replace
the battery cap on the
battery compartment.
The microprocessor is
reset and restarted.
Ensure that the O-ring is attached correctly
before inserting the battery.
Turn the battery cap clockwise onto the battery
compartment using a coin to close it.
Press and hold any button to return to normal
operating mode.
Note: When the battery has been removed, all
information will be deleted after approx. 20 seconds.
Removing the bicycle
computer from the bicycle
Turn the bicycle computer counter-clockwise to
remove it.
To remove the cable ties
2
using a suitable
tool such as a side cutter.
Troubleshooting
Note: This product contains delicate electronic com-
ponents. Therefore, interference may occur when it
is near products which transmit radio signals.
(language, age, weight, time). Other saved
information will be deleted.
Replacing the battery
Note: The bicycle computer battery must be
replaced when the battery state indicator
19
is
shown on the LC display
13
.
Press the MODE button
14
and the SET button
15
at the same time and keep them pressed
until the battery symbol and {{----}} are shown
on the LC display
13
.
To replace the battery, proceed as shown in
figure A.
Open the battery compartment by turning the
battery cap anticlockwise using a coin. Remove
the old battery and replace this with a new
battery. Please note the polarity when inserting
the battery. This is shown in the battery com-
partment.
Resetting the bicycle computer
Press the MODE button
14
and the +button
22
at the same time and keep them pressed until
RESET is displayed on the LC display
13
.
Now press the SET button
15
. Now you can
adjust the previously configured basic settings
Using the backlight
Press the –button
21
to temporarily activate
the backlight. The backlight will switch off auto-
matically after a short amount of time.
Press the MODE button
14
to proceed to the
next function and repeat the steps as
described above.
Press the MODE button
14
to exit settings.
b) Press down the MODE button
14
and the user
profile will be displayed, then press the SET
button
15
.
By repeatedly pressing the +button
22
and the
–button
21
you can switch between the
ADVANCE and EASY modes. EASY mode,
press and hold the SET button
15
to request
setting mode.
Press the SET button again
15
.
Press the +button
22
and the –button
21
to
activate or deactivate individual settings (i.e.
CLOCK).
Select „ON“ to add the selected function to
EASY mode.
Select „OFF“ if you do not wish to add the
selected function to EASY mode.
Press the SET button
15
to confirm your entry.
MAXSPEED: Maximum speed
Press and hold the SET button
15
for 3 seconds
to set the maximum speed to 0.
AVGSPEED: Average speed
Press and hold the SET button
15
for 3 seconds
to set the average speed to 0.
TRIPTIME: Trip time
Press and hold the SET button
15
for 3 seconds
to set the trip time to 0.
CUSTOMIZE mode
Alongside ADVANCE and EASY mode, you can
also apply your own settings in CUSTOMIZE mode
(see procedure).
There are two ways of requesting CUSTOMIZE mode:
a) Press the SET button
15
and –button
21
to pro-
ceed to setting mode. Go to your user profile
and press the SET button
15
.
Press the MODE button
14
to edit settings and
then repeatedly press the +button
22
or the –
button
21
until the desired number appears as
the first figure on the right. Repeat this process
for all of the remaining figures.
Confirm your choice using the SET button
15
and press the MODE button
14
to return to
the current page.
SCAN: Scan
Note: In scan mode, the display switches automat-
ically between the trip distance, maximum speed,
average speed and trip time.
Note: Refer to the „Basic settings“ chapter to
configure the settings.
Note: To deactivate scan mode press the +button
22
to return to ADVANCE mode.
TRIPDIST: Trip distance
Press and hold the SET button
15
for 3 seconds
to set the trip distance, average speed and trip
duration to 0.



Praat mee over dit product
Laat hier weten wat jij vindt van de Crivit IAN 286004 Fietscomputer. Als je een vraag hebt, lees dan eerst zorgvuldig de handleiding door. Een handleiding aanvragen kan via ons contactformulier.
beantwoord | Ik vind dit nuttig (3) Lees meer (Vertaald door Google)
Ik vind dit nuttig (0) (Vertaald door Google)
beantwoord | Ik vind dit nuttig (0)
beantwoord | Ik vind dit nuttig (0)
beantwoord | Ik vind dit nuttig (0)
beantwoord | Ik vind dit nuttig (0)