IT/MTIT/MTIT/MTIT/MTIT/MTIT/MTIT/MTIT/MTIT/MT
GB/MT GB/MT GB/MT GB/MTGB/MT
© Copyright
Reprint or reproduction – including excerpts –
only with permission of
ABRAHAM DIEDERICHS GmbH & Co. oHG
Oberkamper Str. 37 - 39
D-42349 Wuppertal
Germany
10/2008
This publication in all its parts is protected under copyright.
Any use outside the strict limitations of the copyright law without the
permission of ABRAHAM DIEDERICHS GmbH & Co. oHG
is prohibited and punishable.
This applies in particular to reproduction, translation and microfilming,
and entry and processing on an electronic system.
Last Information Update: 10 / 2008 · Ident.-No.: 102008-5
Q
Information
Q
Service
Abraham Diederichs GmbH & Co. oHG
Kundenservice/Customer Service
Hastener Straße 4 - 8
42349 Wuppertal – Germany
T + 49 (0) 18 05/99 21 21
(14 Cent/min from Deutsche Telekom landlines)
+ 49 (0) 2 02/6 98 05 88
Y adw-service@diy-world.de
Q
Declaration of Conformity/Manufacturer
This product complies with the requirements of the valid European and na-
tional Directives (Low Voltage Directive 2006/95/EC, Electromagnetic
Compatibility 2004/108/EC). Conformity has been verified.
The corresponding declarations and documents are retained by the manu-
facturer.
Subject to technical alterations.
Q
Disposal
The packaging is made of environment-friendly materials. It can
be disposed of in your local recycling containers.
Never dispose of electrical appliances in the
household waste.
In accordance with European Directive 2002/96/EC, used electrical
appliances must be collected separately and recycled in an ecologically
compatible manner. Details of options for disposing of the product at the
end of its useful life can be obtained from your local or city council.
Battery disposal
In accordance with Directive 91/157/EEC, batteries must be
recycled and must not be disposed of in household waste.
Consumers are under a legal obligation to take all batteries
and rechargeable batteries to a public collection point or return them to a
retailer.
Problem Cause Remedy
Timer does not
switch off water-
ing session
- The start and end
times for watering
do not coincide.
- Battery failed during
watering session.
-
Battery was changed
during watering
and the programs
were not saved.
- Check the set days
and reprogram if
necessary.
- Change the battery.
- Reprogram the timer.
Timer returns to
Auto mode during
programming
- Timer will not return
to auto mode if no
program input for
1 minute.
- Return to program-
ming step and
continue.
Q
Troubleshooting
If the following suggestions do not solve the problem, please contact the
manufacturer.
Problem Cause Remedy
No display
- Battery is empty.
- Battery has been
inserted incorrectly.
- Change the battery.
- Insert the battery
again.
No watering at
the programmed
times
- Battery is empty.
- Programs were not
saved when the bat-
tery was changed.
- Program start times
may be incorrectly
set.
- Timer indicates OFF.
- Water tap is closed.
- Change the battery.
- Reprogram the timer.
- Check the set times
and enter them
again if necessary.
- Switch the timer to
AUTO.
- Open the water tap.
Switch off:
j Press the Man/Auto button
2
until the arrow is pointing to OFF.
Manual watering stops.
If you leave the watering computer in OFF position, watering will not take
place, either as programmed or manually.
If you wish to reset programmed watering, press the Man/Auto button
2
until the arrow is pointing to AUTO.
Q
Maintenance and cleaning
j Inspect and clean the dirt filter regularly.
j Unscrew the watering computer from the water tap.
j Remove the dirt filter and clean it under running water.
j Clean the device on the outside only with a soft, slightly dampened cloth.
Do not use solvents, benzene or similar substances, as they damage
the device.
j Press the Prog button
3
to enter the next program (2, 3 etc.). Repeat
the steps described above.
j Finally, press the Time button
8
to end programming. The display
panel
1
shows the current time.
Delete programs
1. Press the Prog button
3
1 x. The display shows 1 ON.
2. Press the Esc button
4
1 x to delete the program.
3. Press the Prog button
3
again. The display shows 1 OFF.
4. Finally, press the Time button
8
. The display panel
1
shows the current
time.
Q
Manual mode
You can also set the watering computer to manual mode so that it switches
watering on outside the programmed watering days.
Switch on:
j Press the Man/Auto button
2
until the arrow is pointing to ON.
Manual watering starts.
j Press the Prog button
3
to enter the next program (2, 3 etc.). Repeat
the steps described above.
j Finally, press the Time button
8
to end programming. The display
panel shows the current time
1
.
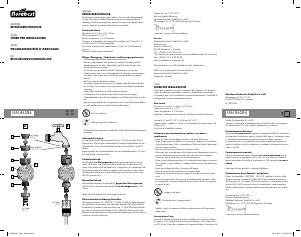
Install the watering computer
j Screw the watering computer onto the water tap manually with the tap
connection
11
. Do not tighten it with tools.
j If necessary use the supplied adapter thread
10
.
j Screw the hose connection
14
onto the watering computer.
Check and/or alter programs
1. Press the Prog button
3
1 x. The display shows 1 ON.
2. Press the Day button
5
and set the watering days.
3. Press the Hour button
6
and set the hour for the start time.
4. Press the Min button
7
and set the minutes for the start time.
5. Press the Prog button
3
; the display shows 1 OFF.
Repeat steps 2 - 4 as described above to alter the end days or the end
time for the program.
Single days Combinations
MO MO WE FR
TU TU TH SA
WE SA SU
TH MO TU WE
FR TH FR SA
SA MO TU WE TH FR
SU MO TU WE TH FR SA
MO TU WE TH FR SA SU
MO= Monday, TU= Tuesday, WE= Wednesday, TH= Thursday, FR= Friday,
SA= Saturday, SU= Sunday
Set the watering end time
1. Press the Prog button
3
1 x. The display shows 1 OFF.
2. Press the Hour button
6
and set the hour for the watering end time.
3. Press the Min button
7
and set the minutes for the watering end time.
4. Press the Day button
5
and set the watering days.
Note: the watering end days must be consistent with the watering
start days.
j Keep the Time button
8
pressed and press the Min button
7
to set
the current minutes (0 - 59). Release the buttons when you have set the
correct time.
Q
Set the watering programs
Set the watering start time
The watering computer allows you to set watering with several programs
for individual days of the week or for programmed combinations of days.
1. Press the Man / Auto button
2
. The arrow points to AUTO.
2. Press the Prog button
3
1 x. The display shows 1 ON.
3. Press the Hour button
6
and set the hour for the start time.
4. Press the Min button
7
and set the minutes for the start time.
5. Press the Day button
5
and set the watering days. Watering takes
place on the selected days.
The selected watering day or the combination of watering days applies to
the selected program number.
Q
Set the day of the week and time
Set the day of the week, the time and the required watering program be-
fore you connect the watering computer to the water supply.
j To do this, open the protective cover
12
.
j When you have finished programming the device, replace the protec-
tive cover
12
to protect the display panel
1
.
Set the day of the week
j Keep the Time button
8
pressed and press the Day button
5
until
the current day of the week is displayed.
MO= Monday, TU= Tuesday, WE= Wednesday, TH= Thursday,
FR= Friday, SA= Saturday, SU= Sunday
Set the time
j Keep the Time button
8
pressed and press the Hour button
6
to set
the current time (0 - 23). Release the buttons when you have set the
correct time.
Q
Plan programming
Before programming the watering computer, you should first plan the watering
programs. To do this, note the details in a table as shown below. This sim-
plifies programming and is useful for changes at a later date.
Note: make sure that the watering days for the program start and program
end are the same.
Program the watering computer with the water tap closed.
Program No. Start time End time Watering days
Example 17:00 17:30 MO WE FR
1
2
3
etc.
6
Hour button: set the hour of the current time and the start and end
times for watering.
7
Min (minute) button: set the minutes of the current time and the
start and end times for watering.
8
Time button: set the current time and return to the time display.
Display panel
ON: the arrow on the display panel points to ON. The valve is opened
and watering begins immediately.
AUTO: the arrow on the display panel points to AUTO. The timer is in auto-
matic mode. When this function is selected, watering takes place according to
the set programs.
OFF: the arrow on the display panel points to OFF. The valve is closed
and no water comes from the watering computer. In this operating mode,
no watering is carried out.
Day of the week: the current day of the week in automatic mode and
the selected watering days in programming mode are displayed.
Batt: when the battery is almost empty, this display appears
.
Display lockout (A and
): this indicates that the display is locked.
Program: displays the number of the program in programming mode.
j Replace the front cover accurately on the watering computer.
Important notes:
j Insert the new battery within 2 minutes to prevent loss of the programmed
data.
j Insert a new battery before a lengthy period of absence. This ensures
that watering takes place as programmed.
Note: if the battery is removed or fails during a programmed water-
ing session, the battery must be replaced within 2 minutes. Otherwise
the timer will turn off the water supply.
Q
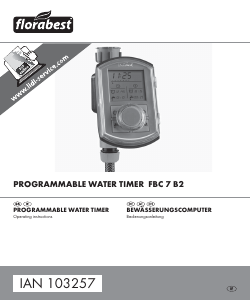
Operating buttons and display panel (see Fig. A)
Operating buttons
2
Man/Auto (manual/automatic) button: switch between
manual on/off and automatic watering.
3
Prog (program) button: set or alter the saved watering programs.
4
Esc (delete) button: delete the set programs in programming mode
or activate the display lockout.
5
Day button: set the day of the week and the watering day.
CAUTION! Do not expose the device to temperatures below 0 °C or
to frost. This could damage the device.
J This device is not suitable for use in the following situations:
- The water pressure is above 10 bar (145 PSI).
- With well water or unfiltered water.
- The water is conveyed by a pump.
J Avoid tensile loads on the connected water hose.
Q
Getting Started
Q
Inserting/changing the battery
j Press the battery compartment button
13
on the underside of the
watering computer and remove the front cover.
j Release the two screws with a suitable cross screw driver and remove
the cover of the battery compartment.
j Insert a 9 V block battery on the battery pole. Take care that the
polarity (+/-) is correct.
j Close the battery compartment with the cover and retighten the two
screws. Check when doing so that the rubber seal is fitted properly.
In the event of contact with battery acid, rinse the affected area with
plenty of clean water and consult a doctor immediately.
J Remove spent batteries from the device immediately. Otherwise there
is an increased risk of leakage.
J Remove the battery from the device if it is not in use for any length of time.
J Check the device for damage prior to assembly. Never use a damaged
device.
WARNING!
Never open the housing of the device. This can result in
injury and damage to the product. Repairs must only be carried out by
the Service Office or an electrician.
Q
Product-Specific Safety Instructions
m CAUTION! DANGER TO LIFE! Do not use the watering computer
in combination with chemicals, foodstuffs, highly combustible or explo-
sive materials or substances.
J Only use the device outdoors.
J Only use cold water from the water main.
J Only use clean fresh water.
J Do not use the device if temperatures fall below 4 °C (39°F).
are intended to prevent fatal injury, accidents and damage. For this reason,
please read the following information on safety and proper use carefully.
J
Danger to life and risk of accidents for infants
and children! Never leave children unattended with the
packaging material and the device. There is otherwise a
risk of fatal injury by suffocation. Always keep children away from the
device.
WARNING!
DANGER TO LIFE! Keep batteries out of the reach
of children. Do not leave batteries lying around. There is a risk of
children or animals swallowing them. Consult a doctor immediately if
a battery is swallowed.
J
DANGER OF EXPLOSION! Never recharge, short-circuit
or open batteries. This can cause them to overheat, burn or
burst. Never throw batteries into fire or water. The batteries
may explode.
J
Leaked or damaged batteries can cause irritation on contact
with the skin. For this reason, please always wear suitable
protective gloves in such cases.
J Avoid contact with the skin, eyes and mucous membranes if fluid has
leaked from the battery.
1 x operating manual
Q
Technical Data
Operating pressure: 1.4 – 6.9 bar (21 – 100 PSI)
Max. operating pressure: 10 bar (145 PSI)
Operating temperature range: 4° – 38°C (39 – 100°F)
Battery: 1 x 9 V Alkaline (not included in the supply
scope)
Note: The device is suitable for all current
1
/
2
“ plug-in hose systems.
Q
Safety
Safety Instructions
Safety instructions are an important part of this operating manual and must
be observed at all times when using electrical appliances. The instructions
Q
Description of Parts
1
Display panel
2
Man/Auto (manual/automatic) button
3
Prog (program) button
4
Esc (delete)
5
Day button
6
Hour button
7
Min (minute) button
8
Time button
9
Display - battery
10
Adapter thread
11
Tap connection
12
Protective cover
13
Battery compartment button
14
Hose connection
Q
Supply Scope
1 x watering computer with tap connection
1 x adapter thread
1 x hose connection
GB/MT
GB/MT GB/MT GB/MT GB/MT GB/MT GB/MT GB/MT GB/MT GB/MT
GB/MTGB/MTGB/MTGB/MTGB/MTGB/MTIT/MTIT/MTIT/MT
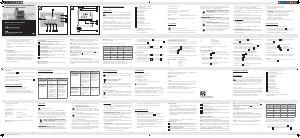
Garden watering timer system
Q
Introduction
The operating manual is an integral part of this product. It contains
important information relating to safety, handling and disposal.
Before using the device for the first time, familiarise yourself with
all its functions. To do this, please read the following assembly, operating
and safety instructions.
Q
Proper Use
The watering computer is intended solely for outdoor use to control irrigation
systems. Any other use or modification of the product constitute improper
use and may result in injury and damage to the device. The manufacturer
is not liable for damage caused by improper use. The device is not intended
for commercial use.
Problema Causa Soluzione
La seduta di irriga-
zione non viene
spenta dal timer
- I tempi di avviamen-
to e di conclusione
per l’irrigazione non
corrispondono.
- La batteria si scarica
durante la seduta
di irrigazione.
- La batteria è stata
sostituisca durante
la seduta di irriga-
zione e i programmi
non sono stati me-
morizzati.
- Controlli i giorni im-
postati, eseguendo
eventualmente di
nuovo la program-
mazione.
-
Sostituisca la batteria.
- Programmi nuova-
mente il timer.
Il timer durante la
programmazione
passa automati-
camente alla mo-
dalità di funzio-
namento
automatica
- Il timer non passa
alla modalità di fun-
zionamento auto-
matica, se non viene
inserito il program-
ma per un minuto.
- Passi all’operazione
di programmazione
e continui con la
programmazione.
Q
Eliminare malfunzionamenti
Nel caso in cui i provvedimenti riportati qui a seguito non dovessero avere
un riscontro positivo, La preghiamo di comunicarlo al costruttore.
Problema Causa Soluzione
Assenza di visua-
lizzazione
- La batteria è scarica.
-
La batteria è stata in-
serita in modo errato.
-
Sostituisca la batteria.
- Inserisca nuova-
mente la batteria.
L’irrigazione non
viene eseguita
nei tempi pro-
grammati
- La batteria è scarica.
-
I programmi non sono
stati memorizzati al
momento del cambio
della batteria.
- I tempi di inizio pro-
gramma sono even-
tualmente impostati
male.
- Timer segnala OFF.
- Il rubinetto è chiuso.
-
Sostituisca la batteria.
- Riprogrammi il timer.
- Controlli i tempi im-
postati e li inserisca
eventualmente di
nuovo.
- Imposti il timer su
AUTO.
- Apra il rubinetto.
Se lascia il computer di irrigazione nella posizione „OFF“, non viene ese-
guita né l’irrigazione programmata né quella manuale.
Se desidera impostare nuovamente l’irrigazione programmata, prema il
tasto - Man/Auto
2
fino a che il tasto segnali „AUTO“.
Q
Manutenzione e pulizia
j Controlli e pulisca regolarmente il passino che trattiene la sporcizia.
j Sviti il computer d’irrigazione dal rubinetto dell’acqua.
j Tolga il passino che trattiene la sporcizia e lo pulisca sotto l’acqua
corrente.
j Pulisca l’apparecchiatura solo dall’esterno per mezzo di una pezza
morbida e leggermente umida.
Non faccia uso di solventi, benzina o simili visto che questi danneg-
giano l’apparecchiatura.
Eliminare programmi
1. Prema per 1 x il tasto - Prog
3
. La visualizzazione mostra „1 ON”.
2. Prema per 1 x il tasto - Esc
4
per cancellare il programma.
3.
Prema nuovamente il tasto - Prog
3
. La visualizzazione mostra „1 OFF“ an.
4. Prema infine il tasto - Time
8
. Nel campo di visualizzazione
1
viene
mostrato l’orario attuale.
Q
Funzionamento manuale
Le viene anche offerta l’opportunità di impostare il computer di irrigazione
secondo la modalità di funzionamento manuale affinché questa avvii l’irri-
gazione al di fuori delle dati di irrigazione programmate.
Accendere:
j Prema il tasto - Man/Auto
2
fino a che la freccia sia impostata su „ON“.
L’irrigazione manuale viene avviata.
Spegnere:
j Prema il tasto - Man/Auto
2
fino a che la freccia sia impostata su „OFF“.
L’irrigazione manuale viene interrotta.
Installare il computer di irrigazione
j Avviti manualmente il computer di irrigazione con il collegamento del
rubinetto
11
sul rubinetto. Non usi attrezzi per fissarlo.
j Faccia eventualmente uso della filettatura dell‘adattatore
10
contenu-
ta nel volume di consegna.
j Avviti il collegamento del tubo flessibile
14
sul computer di irrigazione.
Controllare e modificare eventualmente i programmi
1. Prema per 1 x il tasto - Prog
3
. La visualizzazione mostra „1 ON”.
2. Prema il tasto - Day
5
e imposti le giornate di irrgazione.
3. Prema il tasto - Hour
6
e imposti l’ora dell’orario di avviamento.
4. Prema il tasto - Min
7
e imposti i minuti dell’orario di avviamento.
5. Prema il tasto - Prog
3
. La visualizzazione mostra „1 OFF“. Ripeta i
passaggi sovra riportati 2 - 4 per modificare le giornate finali o l’orario
finale per il programma.
j Prema il tasto - Prog
3
per passare al nuovo programma (2, 3, ecc.).
Ripeta i passaggi sovra riportati.
j Prema infine il tasto - Time
8
per terminare il programma. Nel campo
di visualizzazione
1
viene mostrato l’orario attuale.
SU MO TU WE TH FR SA
MO TU WE TH FR SA SU
MO= lunedì, TU= martedì, WE= mercoledì, TH= giovedì, FR= venerdì,
SA= sabato, SU= domenica.
Impostare l’orario della conclusione dell‘irrigazione
1. Prema per 1 x il tasto - Prog
3
. La visualizzazione mostra „1 OFF“.
2. Prema il tasto - Hour
6
e imposti l’ora dell’orario della conclusione
dell’irrigazione.
3. Prema il tasto - Min
7
e imposti i minuti dell’orario della conclusione
dell’irrigazione.
4. Prema il tasto - Day
5
e imposti i giorni dell’irrigazione.
Avviso: I giorni della conclusione dell’irrigazione devono corrispon-
dere ai giorni dell’inizio dell’irrigazione.
j Prema il tasto - Prog
3
per passare al programma seguente (2, 3, ecc.).
Ripeta i passaggi sovra menzionati.
j Prema infine il tasto - Time
8
per concludere la programmazione.
Nel campo di visualizzazione
1
viene mostrato l’orario attuale.
1. Prema il tasto - Man / Auto
2
. La freccia segnala „AUTO“.
2. Prema per 1 x il tasto - Prog
3
. La visualizzazione mostra „1 ON“.
3. Prema il tasto - Hour
6
e imposti l’ora dell’orario di avviamento
dell’irrigazione.
4. Prema il tasto - Min
7
e imposti i minuti dell’orario di avviamento
dell’irrigazione.
5. Prema il tasto - Day
5
e imposti i giorni di irrigazione. L’irrigazione
avviene dunque nelle giornate selezionate.
La giornata di irrigazione oppure la sequenza delle giornate di irrigazione
selezionate vale per il numero del programma selezionato.
Singole giornate Sequenza
MO MO WE FR
TU TU TH SA
WE SA SU
TH MO TU WE
FR TH FR SA
SA MO TU WE TH FR
Impostare il giorno della settimana
j Tenga premuto il tasto - Time
8
e prema il tasto - Day
5
, fino a che
non venga visualizzato il giorno attuale della settimana.
MO= lunedì, TU= martedì, WE= mercoledì, TH= giovedì, FR= venerdì,
SA= sabato, SU= domenica.
Impostare l‘orario
j Tenga premuto il tasto - Time
8
e prema il tasto - Hour
6
al fine di
impostare l’orario attuale (0 - 23). Abbandoni i tasti non appena l’ora-
rio corretto è impostato.
j Tenga premuto il tasto - Time
8
e prema il tasto - Min
7
al fine di
impostare i minuti attuali (0 - 59). Abbandoni i tasti, non appena l’ora-
rio corretto è impostato.
Q
Impostare il programma di irrigazione
Impostare l’orario di avviamento dell‘irrigazione
Per mezzo del computer di irrigazione ha l’opportunità di fissare l’irrigazione
mediante diversi programmi per i singoli giorni della settimana o per sequenze
di giornate della settimana programmate.
Q
Smaltimento
L’imballaggio è costituito di materiali ecologici. Può essere
smaltito nei contenitori di riciclaggio locali.
Non getti le apparecchiature
elettriche nei rifiuti domestici!
Secondo la direttiva della Comunità Europea 2002 / 96 / CEE le apparecchia-
ture elettriche usate devono essere raccolte separatamente e riciclate in modo
ecologico. Riguardo alle possibilità dello smaltimento delle apparecchiature
usate La informano la Sua amministrazione municipale oppure urbana.
Smaltimento delle batterie
Secondo la direttiva 91/157/CEE le batterie devono essere
riciclate e non possono essere smaltite nei rifiuti domestici. Tutti i
consumatori sono obbligati per legge a consegnare tutte le
batterie e tutti i caricabatterie presso un punto di raccolta della propria
amministrazione comunale / del proprio quartiere o di consegnarle presso
il rivenditore.
Modifiche tecniche riservate.
© Copyright
Copia o moltiplicazione – anche se solo parzialepossibili
esclusivamente pervia autorizzazione da parte di:
ABRAHAM DIEDERICHS GmbH & Co. oHG
Oberkamper Str. 37 - 39
D-42349 Wuppertal
Germania
10/2008
Questo documento incluse tutte le sue parti è protetto da diritto d’autore.
Ogni tipo di uso, di là dei limiti stretti della legge del diritto d’autore, è vie-
tato e penalmente perseguibile, senza la pervia autorizzazione da parte di
ABRAHAM DIEDERICHS GmbH & Co. oHG.
Questo principio si applica particolarmente per copie, traduzioni, microfilm
e memorizzazione ed elaborazione in sistemi elettronici.
Aggiornamenti delle informazioni: 10 / 2008 · Codice prodotto: 102008-5
Q
Informazioni
Q
Servizio clienti
Abraham Diederichs GmbH & Co. oHG
Kundenservice
Hastener Straße 4 - 8
42349 Wuppertal – Germania
T + 49 (0) 18 05 / 99 21 21
(14 centesimi / minuto dalla rete telefonica fissa di Telekom Germania)
+ 49 (0) 2 02 / 6 98 05 88
Y adw-service@diy-world.de
Q
Dichiarazione di conformità/
Dichiarazione del costruttore
Questo prodotto corrisponde ai requisiti delle direttive vigenti a livello euro-
peo e nazionale (direttiva di bassa tensione 2006 / 95 / CEE, sostenibilità
elettromagnetica 2004 / 108 / CEE). La conformità è stata comprovata.
Le corrispettive dichiarazioni e i relativi documenti sono archiviati presso il
costruttore.
Controllo di qualità Lidl –
qui può essere sicuro!
Lidl Quality Control –
rest assured!

Praat mee over dit product
Laat hier weten wat jij vindt van de Florabest FLBC 9 Besproeiingscomputer. Als je een vraag hebt, lees dan eerst zorgvuldig de handleiding door. Een handleiding aanvragen kan via ons contactformulier.
beantwoord | Ik vind dit nuttig (0) (Vertaald door Google)
beantwoord | Ik vind dit nuttig (0) (Vertaald door Google)
beantwoord | Ik vind dit nuttig (0) (Vertaald door Google)
beantwoord | Ik vind dit nuttig (0) (Vertaald door Google)