
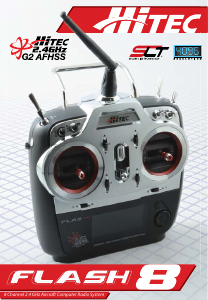
8 Channel 2.4 GHz Aircraft Computer Radio System8 Channel 2.4 GHz Aircraft Computer Radio System
Section 3: System Menu Programming Section 3: System Menu Programming
40 41
Trainer cont.
2. Press the jog dial again to activate the menu.
3. Rotate the jog dial to select “ACT” (activate), then press the jog
dial to conrm your selection and activate the trainer menu.
4. Scroll to highlight “MODE” and press the jog dial to activate
the menu.
5. Scroll to select the number of channels the student radio can
control:
ALL: Gives the student access to all control channels 1~8.
STICK: Gives the student access only to the stick (gimbal)
channels 1~4. Press the jog dial to conrm your selection.
Section 3: System Menu Programming
Within the trainer menu, you can set the Flash 8 as a “Master radio”, set the trainer switch and activate
the other features. To do this, the transmitter must be in transmit mode. If not in transmit mode, the only
options you will have are the “pupil” options.
To congure the trainer function:
1. From the System Menu, scroll to highlight “TRAINER” and press
the jog dial once to enter the activation menu.
6. Within the trainer menu, you can choose to limit the control
the student has for each channel by selecting one of the three
choices:
- NOR for full control
- MIX for limited control
- OFF for no control
7. To adjust the level of control for any channel, scroll to the channel you want to change and press the
jog dial to activate the selections.
8. Scroll to select “NOR”, “MIX”, or “OFF” and press the jog dial to conrm your selection.
Sensor
When used with the Optima series of telemetry-capable receivers, the
Flash 8 has the ability to communicate a variety of information from
the airplane directly to the transmitter.
Refer to Section Seven: Using the Telemetry System on page 111 for
more information about utilizing the telemetry features of the Flash 8.
Spectra
The spectra menu is utilized to manage the interface between the Flash 8 transmitter and the receiver for
each aircraft. This includes specifying the receiver type, performing a range check, binding the receiver,
and specifying a frequency scan. All of these functions are covered in the receiver selection section on
page 15.
Trainer cont.
9. To select a switch that will be used for the trainer function,
scroll down to the S/W eld and press the jog dial to enter the
switch selection menu, press the jog dial again to activate the
switch selections.
b. If you choose a switch:
- The switch position menu will appear. Scroll to highlight the
switch position that you will use to enable the mix. Press the jog
dial to conrm your selection.
- Scroll to select “ON” and press the jog dial to conrm your
selection. If you toggle the selected switch, the eld in the top
right corner of the screen will indicate when the mix is active.
11. Press the back button twice to return to the System Menu.
To disable the trainer function:
1. Scroll to highlight the “MIX” eld in the trainer menu and press
the jog dial to activate the menu.
2. Select “INH” (inhibit) and press the jog dial to conrm your
selection.
3. Press the back button to return to the model function menu.
10. Scroll to select a switch to activate the trainer function. Press the jog dial to conrm your selection.
a. If you choose the “NULL” option, the mix will remain inactive at all times for this model.



Praat mee over dit product
Laat hier weten wat jij vindt van de Hitec Flash 8 RC Controller. Als je een vraag hebt, lees dan eerst zorgvuldig de handleiding door. Een handleiding aanvragen kan via ons contactformulier.