
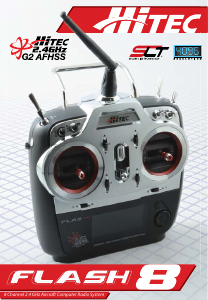
8 Channel 2.4 GHz Aircraft Computer Radio System8 Channel 2.4 GHz Aircraft Computer Radio System
Section 3: System Menu Programming Section 3: System Menu Programming
42 43
Control Modes
The Flash 8 is capable of operating in control Modes 1 - 4. The default is “Mode 2” for radios sold in North
America, as this is generally preferred by the majority of pilots.
1. From the System Menu, scroll to “MANAGEMENT” and press
the jog dial to enter the management menu.
2. Scroll to highlight “BACKLIGHT” and press the jog dial to
activate the menu.
3. Scroll to select the amount of time that the screen backlight
will stay active without manipulating the jog dial or back
button. Press the jog dial to conrm your selection.
Management Menu
The Management menu allows you to tailor numerous system-wide features of the Flash 8.
From the management menu, you can control the following:
User Interface screen backlight duration and contrast.
Battery type used in the transmitter.
UI Feedback - Audible tones during warnings and when you press or scroll the jog dial.
Warning Setup – Audible warnings when the transmitter is powered on.
3. Scroll through the modes until you nd the one you would
like to use. The selected mode will be applied to each new
model that is created. Press the jog dial to conrm your
selection.
4. Press the Back button to exit the Mode Select menu.
Some modes require additional adjustments to the hardware of the Flash 8 transmitter. For
more information on the Flash 8’s hardware adjustments refer to Appendix A. Hardware
Adjustments.
1. From the System Menu, scroll to highlight “MODE” and press
the jog dial to enter the mode selection menu.
2. Press the jog dial again to activate the mode selections.
4. Scroll to highlight “CONTRAST” and press the jog dial to
activate the menu.
5. Scroll to adjust the contrast level of the display screen. Press
the jog dial to conrm your selection.
Management Menu cont.
6. Scroll to highlight “BATTERY” and press the jog dial to activate
the menu.
7. Scroll to select the battery type used in the transmitter. Press
the jog dial to conrm your selection.
8. Scroll to highlight “UI FEEDBACK” and press the jog dial to
activate the menu.
9. Scroll to select “ON” or “OFF”. When user interface feedback
is turned on, the radio emits a beep each time the jog dial is
scrolled or pressed. The transmitter will emit continuous beeps if
a warning is active. Press the jog dial to conrm your selection.
11. Scroll to highlight “RF CHECK” and press the jog dial to
activate the menu.
12. Scroll to select “ON” or “OFF”. When RF check is turned on, the
radio will prompt you to approve signal transmission each time
the unit is powered on. Otherwise, the radio will automatically
begin transmitting when powered on. Press the jog dial to
conrm your selection.
13. Scroll to highlight “HIGH THROTTLE” and press the jog dial to
activate the menu.
14. Scroll to select “ON” or “OFF”. When high throttle is turned on,
the radio will warn you if the throttle stick is not at idle when the
unit is powered on. Press the jog dial to conrm your selection.
10. Scroll to highlight “WARNING SETUP” and press the jog dial to
activate the menu. .



Praat mee over dit product
Laat hier weten wat jij vindt van de Hitec Flash 8 RC Controller. Als je een vraag hebt, lees dan eerst zorgvuldig de handleiding door. Een handleiding aanvragen kan via ons contactformulier.