
8 Channel 2.4 GHz Aircraft Computer Radio System8 Channel 2.4 GHz Aircraft Computer Radio System
Section 1: Introduction Section 1: Introduction
16 17
Maxima Series Receiver Link (ID-Setting or Bind)
Press the jog dial and back button simultaneously to enter the System
Menu list. From here scroll to the “SPECTRA” function and press the jog
dial to enter the Spectra setup menu.
Press the jog dial to
activate the receiver
selection and scroll
to the “Maxima”
receiver.
Press the jog dial to save your
setting. When prompted to
change the receiver type, select
“YES” and press the jog dial to
conrm your choice.
Your Hitec AFHSS system uses a communication protocol that links and binds the Hitec 2.4GHz receiver
to your transmitter. Once the receiver and transmitter are “bound”, no other transmitter can interfere with
your receiver during its operation. In the case of multiple model memory transmitters, you can bind as
many Hitec 2.4GHz receivers to your transmitter, one per model memory as necessary. Each transmitter
and receiver set is paired at the factory for your convenience.
Turn on the transmitter by holding down the power button momentarily.
(To turn o the transmitter, press and hold the power button for approxi-
mately 3 seconds.)
CH1
CH2
CH3
CH4
CH5
CH6
CH7
CH8
B
A
T/9
CH1
CH2
CH3
CH4
CH5
CH6
CH7
CH8
B
AT
/9
CH1
CH2
CH3
CH4
CH5
CH6
CH7
CH8
BAT/9
8
Now when prompted if you are “Ready to Transmit” select “Yes” and push the jog dial to conrm your response.
In the receiver selection screen, scroll to “BINDING” and
press the jog dial to enter the binding screen.
Select “yes” if you would like to proceed
with the binding process.
Press and hold the link button on the Receiver and turn on the power.
Release the link button. Both RED and BLUE LEDs will be blinking rapidly to nd
the transmitter’s signal.
When the LED stops blinking, press the jog dial to get to the next screen. The blue
LED will glow solid.
Turn the power to the receiver o, then back on. Check for a solid blue LED light . Once
it’s on, press the jog dial to FINISH the binding process. Make sure all functions are
working properly before ying your model.
OPTIMA 7
6
OPTIMA 9
MINIMA 6E & MINIMA 6T
(6Toutputblockisontop)
6
OPTIMA 6 & OPTIMA 6 LITE
6Lutilizesasoftcaseand
exposedoutputblock
2.4G
Hz 6 Channel
Aircraft Receiver
CH1
CH1
CH1
CH1
CH1
CH6/BAT
6
Optima and Minima Series Receivers
1. Function Button: Used for binding the receiver to a module or Hitec 2.4 built-in transmitters, entering
the FAIL-SAFE or Hold feature.
2. Dual LED: Status Indicator: Indicates the set-up process codes and current status of the receiver.
3. Channel Output and Battery Input Ports: The ports for battery power input and servos, gyros and
other accessories’ output ports are located at the side.
4. SPC (Supplementary Power Connection)*: Power the Optima and Minima receivers function with up
to a 35V electric aircraft motor battery.
5. Telemetry Sensor and Data Port*: A three pin servo plug connector port is featured on the Optima 7
and Optima 9 (Optima 6 is not applicable.) Using the HPP-22 PC interface accessory, this port serves to
facilitate upgrading the device’ s software and interfacing the optional onboard sensor station.
6. BODA (Boosted Omni Directional Antenna) System*: Hitec’s exclusive 2.4GHz BODA System will show
you another way of using our 2.4GHz systems. The single Omni-directional antenna booster makes it
much easier to install the 2.4GHz antenna. Intensive tests have proven that the single BODA system
in our 6 & 7 channel systems is better than or equal to our competitor’s dual antenna systems while
our Optima 9 receiver features a dual BODA system to give the added security that larger models need.
Installation is easy and simple, insert the antenna into the supported antenna holder and stick it to the
desired spot you wish to install.
The following information contains the complete directions on how to use the Optima and Minima series
receivers (version 3.00(0)). We encourage you to review this information before using these products.
MINIMA 6S MINIMA 6LMINIMA 6S & MINIMA 6T
(6T output block is on top)
OPTIMA 7
OPTIMA 9OPTIMA 6 & OPTIMA 6 LITE
(6L utilizes a soft case and exposed output block)
6
6
6


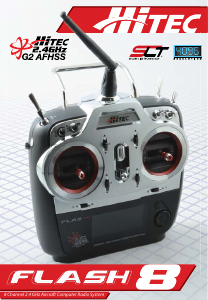

Praat mee over dit product
Laat hier weten wat jij vindt van de Hitec Flash 8 RC Controller. Als je een vraag hebt, lees dan eerst zorgvuldig de handleiding door. Een handleiding aanvragen kan via ons contactformulier.