Handleiding Hozelock 2490 Auto Reel Tuinslanghaspel

Handleiding voor je Hozelock 2490 Auto Reel Tuinslanghaspel nodig? Hieronder kun je de handleiding gratis bekijken en downloaden als PDF in het Nederlands en/of Engels. Dit product heeft 1 veelgestelde vraag, 3 comments en heeft 12 stemmen met een gemiddelde score van 33/100. Is dit niet de handleiding die je zoekt, neem dan contact met ons op.

Is je product kapot en biedt de handleiding geen oplossing meer? Dan kun je voor reparatie gratis terecht bij Repair Café.

Handleiding

Loading…

5
(Fig.1)
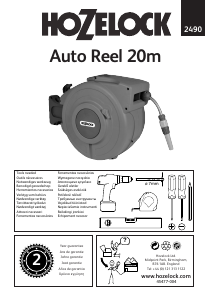
A. 93273 - Auto Reel
B. 83360 - Wall Bracket
C. 93411 - Feeder Hose
D. 2175 - Threaded tap connector
E. 2166 - Hose End Connector
F. 2185 - Waterstop Connector
G. 53025 x4 - Wall Plug
H. 53112 x4 - Screws
I. 2292 - Hose Nozzle
J. 83304 - Side Disc
TOOLS NEEDED:
• Flat-ended screwdriver
• Philips screwdriver
• Tape measure
• Ø7mm masonry drill bit
• Electric drill
• Spirit Level
FIT THE WATER INLET HOSE
Fig 1.
A. One side of the reel has its side disc already removed.
Lay the reel on a soft surface with this side uppermost.
B. Two screws hold in place the plate on the internal hose
connector. Unscrew them.
C. Pass the 2 metre water inlet hose through the opening
from the outside to the inside of the casing. Unscrew
the large hose nut connector and put it on the hose.
Push the hose under the teeth of the small clasp.
Tighten the hose nut. Screw the internal hose
connector back in place.
D. Fit the side disc. Attach the 2166 hose end connector
to the free end of the water inlet hose. Attach the
2185 water stop connector to the watering hose.
If the water inlet hose supplied is too short to reach
your tap, replace it with a good quality 13mm (1/2”)
hose.
SELECT A SUITABLE POSITION FOR
INSTALLATION
Fig. 2
The reel is designed for external use only and is not
suitable for use with indoor taps.
The reel should be able to swivel through 180º. Allow
50cm of clearance on both sides of the wall bracket.
If the hose is to be used around corners, mount the reel
at least 1m from the corner and use a hose guide, part
no. 2392, which is not supplied.
FIX THE WALL BRACKET
Fig 3.
Important: Ensure that the bracket is vertical.
Use the four plugs and screws supplied. The plugs and
screws supplied are designed for use on standard brick
and concrete or timber walls only. To fix the bracket to
any other surface, you should use screws and plugs
appropriate for that surface.
INSTALLING THE REEL
Fig 4.
1. Align the back of the reel with the wall bracket.
2. Slide the pivot tube through the reel and wall bracket
from the top.
3. Attach the threaded tap connector to your tap and
connect the water inlet hose to it.
4. Attach the 2292 nozzle onto the end of the watering
hose.
Test the assembly to ensure the reel rotates freely
through 180º. Turn the tap on and run the water
through the reel before using it for the first time. Check
for leaks and re-tighten assembled parts if leaks
appear.
A padlock (not supplied) may be fitted to secure the
reel when left unattended on the wall (fig 4A).
Fig 4B.
There is a park point on the top of the pivot tube for
stowage of the water inlet hose end when not in use.
There is an accessory park at the bottom of the bracket
for stowage of hose end accessories.
USING THE SAFETY LOCK
Fig 5.
Operate the safety lock by using the lever on the side of
the reel.
The safety lock has two functions:
1. To stop the hose being pulled out when fully re-wound.
2. To stop accidental rewind while the hose is in use.
To engage the safety lock, turn the lever towards the
symbol. To disengage it, turn the lever so that it
points towards the symbol.
For added security always engage the safety lock when
the reel is unattended.
Do not operate the safety lock while the reel is turning.
USING THE REEL SAFELY
1. To unwind the hose, disengage the safety lock, (see
above) take hold of the hose end and walk away from
the reel in any direction.
2. The reel has an automatic latch to hold the hose in
place at the required length. You will hear 4 latch
clicks’ every metre as the hose is unwound.
When the hose is at the required length, stop and
slowly pull the hose until you hear one of the 4 latch
clicks. The hose is now held in place for use, or may be
placed on the ground without rewinding. At this point,
you can engage the safety lock if required.
3. If you need more hose, disengage the safety lock if
necessary, take hold of the hose end and walk away
from the reel with the hose repeating the automatic
latching procedure.
4. The automatic latch is released by pulling the hose
away from the reel past the 4 latch clicks. THE HOSE
GB
Contents
Assembly and installation of
the Auto Reel
Warning
Download de handleiding in het Nederlands en/of Engels (PDF, 1.44 MB)
(Denk aan het milieu en print deze handleiding alleen als dat echt noodzakelijk is)

Loading…

Beoordeling

Laat ons weten wat je van de Hozelock 2490 Auto Reel Tuinslanghaspel vindt door een beoordeling achter te laten. Wil je je ervaringen met dit product delen of een vraag stellen? Laat dan een bericht achter onderaan de pagina.
Bent u tevreden over de Hozelock 2490 Auto Reel Tuinslanghaspel?
Ja Nee
33%
67%
12 stemmen

Praat mee over dit product

Laat hier weten wat jij vindt van de Hozelock 2490 Auto Reel Tuinslanghaspel. Als je een vraag hebt, lees dan eerst zorgvuldig de handleiding door. Een handleiding aanvragen kan via ons contactformulier.

Amo 16-07-2019
Ik moet weten hoe ik de veren voor automatisch terugspoelen opnieuw moet spannen, omdat ik de slang aan het vervangen was, de slang naar buiten gleed en de spanning zichzelf heeft opgeheven en nu weet ik niet hoe ik de spanning weer moet opkrikken. Kun je helpen?

beantwoord | Ik vind dit nuttig (60) (Vertaald door Google)
Dean Galley 13-07-2022
Hoe vervang ik de slang in mijn Hozelock 2490 automatische haspelcassette?

beantwoord | Ik vind dit nuttig (15) (Vertaald door Google)
Raymond Carr 31-05-2022
Het terugspoelen van de slang is niet in de juiste volgorde. Ik heb gesplitst de twee helften van de behuizing, wanneer de slang volledig is uitgeschoven, is de positie van de slang aan de linkerkant terwijl de katrolhouder aan de rechterkant is en een ongelijkmatige wind geeft. Ik moet de wieg verplaatsen, is de pen die in de plastic schroefdraad zit verwijderbaar, zo ja kan ik deze verwijderen en de wieg naar de juiste positie schuiven en de pen weer vastzetten of is er een andere oplossing. Bedankt

beantwoord | Ik vind dit nuttig (2) (Vertaald door Google)

Meer over deze handleiding

We begrijpen dat het prettig is om een papieren handleiding te hebben voor je Hozelock 2490 Auto Reel Tuinslanghaspel. Je kunt de handleiding bij ons altijd downloaden en daarna zelf printen. Indien je graag een originele handleiding wilt hebben, raden we je aan contact op te nemen met Hozelock. Zij kunnen wellicht nog voorzien in een originele handleiding. Zoek je de handleiding van Hozelock 2490 Auto Reel Tuinslanghaspel in een andere taal? Kies op de homepage je taal naar keuze en zoek daarna op het modelnummer om te zien of we deze beschikbaar hebben.

Specificaties

Merk Hozelock
Model 2490 Auto Reel
Categorie Tuinslanghaspels
Bestandstype PDF
Bestandsgrootte 1.44 MB

Alle handleidingen voor Hozelock Tuinslanghaspels
Meer handleidingen voor Tuinslanghaspels

Veelgestelde vragen over Hozelock 2490 Auto Reel Tuinslanghaspel

Ons supportteam zoekt dagelijks naar nuttige productinformatie en antwoorden op veelgestelde vragen. Als er onverhoopt toch een onjuistheid tussen onze veelgestelde vragen staat, laat het ons dan weten via het contactformulier.

Kan ik de tuinslanghaspel buiten laten in de winter? Geverifieerd

Nee, Hozelock adviseert sterk om de haspel binnen te halen gedurende de winter, tenzij deze daadwerkelik gebruikt wordt. Vorst kan het product beschadigen.

Ik vind dit nuttig (31) Lees meer
Handleiding Hozelock 2490 Auto Reel Tuinslanghaspel

Gerelateerde producten

Gerelateerde categorieën