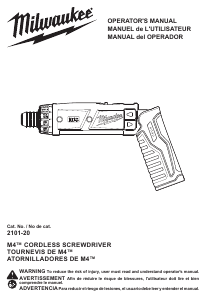
Handleiding Milwaukee 2101-22 Schroefmachine

Handleiding voor je Milwaukee 2101-22 Schroefmachine nodig? Hieronder kun je de handleiding gratis bekijken en downloaden als PDF in het Nederlands en/of Engels. Dit product heeft 2 veelgestelde vragen, 0 comments en heeft 0 stemmen. Is dit niet de handleiding die je zoekt, neem dan contact met ons op.

Is je product kapot en biedt de handleiding geen oplossing meer? Dan kun je voor reparatie gratis terecht bij Repair Café.

Handleiding

Loading…

4
*When set to high speed, set the clutch at 10 or be-
low. The Automatic Shut-O󰀨 may not work at higher
clutch settings (see "Automatic Shut-O󰀨").
NOTE: Because the settings shown in the table are
only a guide, use a piece of scrap material to test
the di󰀨erent clutch settings before driving screws
into the workpiece.
Using the Lock Switch
When the battery is installed, the tool is in operating
condition. The lock switch prevents accidental start-
ing by locking the forward/reverse switch. Always set
the lock switch to “lock” before performing mainte-
nance, changing accessories, storing
Unlock
Lock
the tool and any time the tool is not in
use.
1. To lock, push the lock switch to dis-
play the lock symbol.
2. To unlock, push the lock switch to
display the unlock
symbol.
Selecting High or Low Speed
1. For low speed and more torque, push
HI LO
the speed selector back ("1" is dis-
played).
2. For high speed and less torque, push
the speed selector forward ("2" is
displayed).
Selecting Forward or Reverse
Press and hold the top of the switch ◄ for forward
rotation, and the bottom of the switch ► for reverse
rotation. The switch will automatically return to the
center OFF position when it is released.
Automatic Shut-O󰀨
To prevent extra driving force after the selected
torque has been reached, the tool will automatically
shut o󰀨 if the clutch slips. At higher clutch settings,
this feature may not immediately engage. Release
the switch to reset the automatic shut-o󰀨.
Cold Weather Operation
MILWAUKEE Lithium-Ion battery packs are designed
to operate in temperatures below freezing. When
the battery pack is too cold, it may need to warm up
before normal use. Put the battery on a tool and use
the tool in a light application. It may “buzz” for a short
time until it warms up. When the buzzing stops, use
the tool normally.
APPLICATIONS
WARNING
To reduce the risk of electric shock,
check work area for hidden pipes
and wires before drilling or driving screws.
This tool provides a quick, convenient means of drill-
ing small holes and installing and removing screws.
Because of the many screw sizes, types, thread
engagements and materials available, it is di󰀩cult to
limit the application of this tool by screw size. How-
ever, for applications in wood, a #6 wood screw with
a full pilot hole is recommended as a practical limit.
Drilling in Wood, Composition Materials
and Plastic
Always use sharp bits. When using twist drill bits, pull
the bit out of the hole frequently to clear chips from
the bit utes. To reduce the chance of splintering,
back work with a piece of scrap wood. Select low
speeds for plastics with a low melting point.
Removing the Battery from the Tool
Turn the battery cap counterclockwise to unlock. Pull
the battery out of the tool.
WARNING
Always remove battery pack before
changing or removing accessories.
Only use accessories specically recommended
for this tool. Others may be hazardous.
Checking the Fuel Gauge
To determine the amount of charge left in the battery,
press the forward/reverse switch. The Fuel Gauge
will light up for 2-3 seconds.
OPERATION
WARNING
To reduce the risk of injury, always
wear proper eye protection marked
to comply with ANSI Z87.1.
When working in dusty situations, wear appro-
priate respiratory protection or use an OSHA
compliant dust extraction solution.
Always remove battery pack before changing
or removing accessories. Only use accessories
specically recommended for this tool. Others
may be hazardous.
Installing Bits
Always remove the battery before inserting or remov-
ing bits. Select the proper style and size bit for the
type of screw you are using.
1. To install the bit, pull out the collar. Press the bit
into the socket until the collar snaps back and the
bit is locked into place.
2. To remove the bit, pull out the collar, then pull out
the bit.
NOTE: It is not necessary to hold the collar out when
installing and removing bits.
Adjusting the Handle
The handle is designed for convenience and con-
trol. The durable, center pivot allows the handle to
be used in the conventional shape or folded into a
pistol grip. Access to the forward/reverse switch and
lock switch is comfortable in either handle position.
Using the Adjustable Clutch
This tool has an adjustable clutch for
Drilling
Driving
driving di󰀨erent types of screws into
di󰀨erent materials. When properly
adjusted, the clutch will slip at a
preset torque to prevent driving the
screw too deep and to prevent dam-
age to the screw or tool.
To adjust the clutch, turn the clutch
adjusting ring so that the desired
setting (1-21) lines up with the arrow
on the motor housing, as shown.
The torque specifications shown
here are approximate values obtained with a fully
charged battery pack.
Clutch
Setting
(in lbs)
Applications
Lo Hi
1
4
7
10
13
16
19
3.7
6.5
9.3
12.8
16.4
20.0
23.4
3.7
6.5
9.3
11.2
N/A
N/A
N/A
Small screws in softwood.
Medium screws in
softwood or small screws in
hardwood.
Large screws in softwoods.
Medium screws in
hardwood or large screws
in hardwood with pilot hole.
Download de handleiding in het Nederlands en/of Engels (PDF, 1.78 MB)
(Denk aan het milieu en print deze handleiding alleen als dat echt noodzakelijk is)

Loading…

Beoordeling

Laat ons weten wat je van de Milwaukee 2101-22 Schroefmachine vindt door een beoordeling achter te laten. Wil je je ervaringen met dit product delen of een vraag stellen? Laat dan een bericht achter onderaan de pagina.
Bent u tevreden over de Milwaukee 2101-22 Schroefmachine?
Ja Nee
Beoordeel dit product als eerste
0 stemmen

Praat mee over dit product

Laat hier weten wat jij vindt van de Milwaukee 2101-22 Schroefmachine. Als je een vraag hebt, lees dan eerst zorgvuldig de handleiding door. Een handleiding aanvragen kan via ons contactformulier.

Meer over deze handleiding

We begrijpen dat het prettig is om een papieren handleiding te hebben voor je Milwaukee 2101-22 Schroefmachine. Je kunt de handleiding bij ons altijd downloaden en daarna zelf printen. Indien je graag een originele handleiding wilt hebben, raden we je aan contact op te nemen met Milwaukee. Zij kunnen wellicht nog voorzien in een originele handleiding. Zoek je de handleiding van Milwaukee 2101-22 Schroefmachine in een andere taal? Kies op de homepage je taal naar keuze en zoek daarna op het modelnummer om te zien of we deze beschikbaar hebben.

Specificaties

Merk Milwaukee
Model 2101-22
Categorie Schroefmachines
Bestandstype PDF
Bestandsgrootte 1.78 MB

Alle handleidingen voor Milwaukee Schroefmachines
Meer handleidingen voor Schroefmachines

Veelgestelde vragen over Milwaukee 2101-22 Schroefmachine

Ons supportteam zoekt dagelijks naar nuttige productinformatie en antwoorden op veelgestelde vragen. Als er onverhoopt toch een onjuistheid tussen onze veelgestelde vragen staat, laat het ons dan weten via het contactformulier.

Bij gebruik van de schroefmachine blijf ik de kop van de schroef stukdraaien. Hoe kan dit? Geverifieerd

De meeste schroefmachines kunnen ingesteld worden om harder of zachter te schroeven. Als de schroef steeds stukdraait kan het zijn dat de schroefmachine anders ingesteld moet worden. Als het een draadloos apparaat betreft, zorg dan altijd dat de batterij is opgeladen voor het beste resultaat.

Ik vind dit nuttig (67) Lees meer

Kan ik elektrisch gereedschap in een schuur of garage opbergen? Geverifieerd

Over het algemeen kunt u elektrisch gereedschap in een schuur of garage opbergen, ook als het daar soms vriest. Voor de levensduur van het elektrisch gereedschap is het echter beter om het op een droge plaats zonder grote temperatuurschommelingen op te slaan. In een schuur of garage kunnen door temperatuurverschillen condensvorming ontstaan ​​waardoor roest kan ontstaan. Bovendien gaan gereedschappen die op batterijen werken korter mee en laden ze minder goed op bij zeer lage temperaturen. Om er zeker van te zijn hoe uw elektrisch gereedschap moet worden opgeborgen, leest u altijd aandachtig de gebruikershandleiding.

Ik vind dit nuttig (13) Lees meer
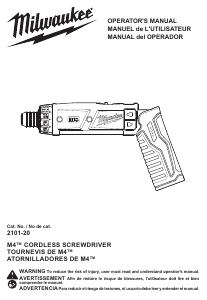
Handleiding Milwaukee 2101-22 Schroefmachine

Gerelateerde producten

Gerelateerde categorieën