
~~o
~W
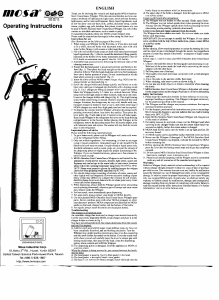
Stainless Steel Cream Whipper
CSS2: Max. O.5L
CSS3: Max 1.0L
Operating Instructions
DISHWASHER SAFE.
Mosa Industrial Corp.
18, Kehu 3
rd
Rd., Huwei, Yunlin 63247
Central Taiwan Science Park-Huwei Park, Taiwan
Tel:+886-5-636-1867
http://www.twmosa.com
ENGLISH
Thank you for ehoosing this versatile and high quality MOSA Stainless
Steel Cream/Sauce Whipper. With this universal kitchen tool
you
can
create a multitude of light desserts, light creme, sweet and sour mousses,
light sauces, and hot and cold Espumas. Many liquid ingredients, sueh
as low fat dairy- and non-dairy milk, coffee, chocolate-syrup,
vanilla
cream, yoghurt, egg yolk, ketchup, fruit-juices, sweet-liquors, etc. can
be
used
in MOSA Stainless Steel Cream/Sauce Whipper, hut only if they
contain no insoluble substances such as seeds or pulp!
For guaranteed quality, please use
MOSA
cream chargers only.
Please
read the instructions thoroughly heforc using the first timc!
Instructions for use
(See illustrations on the fold-out
pages
of
the cover.)
I.
When
using your
Whipper
for the first time, or if you have not
used
it for a while, rinse the bottle
with
lukewarm
water, then
with
cold
water
before filling it with
eream
or other ingredients.
2. Fill
with
well chilled fresh
cream
or fresh well
mixed
and strained
liquid ingredients (fig. I). Never exeeed the maximum filling quantity
indicated on the bottom of the bottle (maximum one pint/O.5 liter for
0.5 L bottle or
maximum
one quart/I liter for 1.0 L bottle).
3.
Assemble
head
accessories
hy
following
the
relevant
steps
of
the
cleaning instructions.
4. Ensure that the head gasket is positioned correctly and firmly in the
head (fig. I).
Then
place
the
head
straight on the bottle and
screw
closed as follows: Turnthe head clockwise until you feel resistance;
then
tum
a further quarter
of
a turn. Do not
cross-thread
or tilt the
head
when screwing it onto bottle! (fig. 2)
5. Insert tbe silver-colored
MOSA
cream
charger
(8 gr.
N20)
into the
charger bolder as illustrated (fig. 1).
6.
Screw
the
charger
holder
and
charger
quickly
and firmly on to the
inlet
valve
until gas is
released
into the bottle with a hissing
sound
(fig. 3). Use I charger per filling (2 chargers with I quart/liter bottle).
Shake
the
Whipper
hriskly
4~5
times in a vertical direction.
When
using well-cooled light cream or other mixtures, shake up to ten times.
Unscrew
the
charger
holder
and charger (fig. 4). The slight hissing
sound
while
unscrewing
is normal.
Remove
and
discard
the
used
charger. Attention, the
cbarger
may be
very
cold,
handle
with care,
transport charger in
holder
to trash or use a
cloth
when
removing
it!
MOSA chargers are made from high-grade steel and can be reeycled.
7. To dispense the content, hold tbe Whipper vertically (decorating nozzle
pointing
downward)
about
Icm
above
the surface.
Then
press
the
lever gently (fig. 5) and make a test, if content is too soft shake again.
Keep cream Whipper in the refrigerator but never in the deep-freezing
compartment
or in the freezer.
Before
placing
the
Whipper
in the
refrigerator, remove the decorating nozzle from the nozzle adaptor, rinse
with lukewarm water and replace. The eontent will stay fresh for several
days in the refrigerator.
Important
pieces of advice
Please
mind
the following important points:
1. To get a better result, please cool the Whipper well under cold water
or in the refrigerator before filling.
2.
Only
use soluble ingredients. For sweetening, it is best to use sugar
syrup
or liquid sweeteners.
Granulated
sugar
or salt
should
first be
dissolved in cool water or cream. Use pulverized or liquid spices only.
Insoluble substances such as seeds, pulp, etc. prevent the elosure
of
the dispensing piston or might impair the
proper
functioning
of
tbc
Whipper. If you use blended mixtures,
please
use a fine
strainer
to
remove
seeds or pulp.
3.
MOSA
Stainless Steel Cream/Sauce
Whipper
is well suited for the
preparation of cold and hot mousses, desserts, light creme, sauces and
Espumas and can be kept in the
warm
baths or bain-marie; however
please follow the operating temperature range from
3'C/37'F
to
75'C/
167'F.
Please wear protective gloves for handling because the whipper
can be bot wben preparing warm ingredients up to
75'C.
4. You should shake recipes consisting of mixtures of cream, sauces and
otber liquids well and frequently. However excessive shaking of pure
heavy
cream
may stiffen it to a degree that it looses its soft texture,
therefore please do not over shake and do not shake pure heavy cream
every
time before dispensing.
5.
When
dispensing, always hold the
Whipper
upside down (decorating
nozzle pointing downward), otherwise gas will escape and some cream
may remain inside the Whipper.
6. For best result, serve immediately upon dispensing.
7. For spare parts, please contact
your
dealer or
MOSA
directly.
8. Use only genuine MOSA Stainless Steel Cream/Sauce Whipper spare
parts.
Never
combine
parts
with
other
MOSA
produets
or
other
manufacturers' products. MOSA components are identified by MOSA
marks
on the head, charger holder, and the
bottom
of
the bottle.
9. For repairs always return the entire unit
(head
plus bottle).
Troubleshooting
The
charger
is not pierced open:
An unsuitable cbargcr has been used or charger was inserted incorrectly.
Use the exclusively disposable MOSA cream charger and place it in the
charger
holder
as
shown
in fig, 1.
You have not pressed the lever, but
cream
dispensing from the nozzle
and
can't
be stopped:
a) Additives such as powdered sugar, cream stiffener, pulp, etc. bave not
been
completely
dissolved, and are blocking the piston. Turn the
Whipper
into upright position (nozzle up), place it on the countertop
and wait until content has settled on the hottom. Cover the nozzle well
with a
heavy
towel and carefully press the lever to release gas until
hissing sound stops, then unscrew the head, clean the dispensing
piston, strain contents and refill the Whipper.
b) The dispensing piston is damaged. Send the appliance to
MOSA
or
a service center.
When
the charger is being screwed in, gas escapes
bcnvccn
the bottle
and
the head:
a) The head gasket is missing. Insert a head gasket in the head.
b) The head gasket IS damaged. Insert a new gasket.
c) The head is not screwed on firmly enough.
Screw
the head onto the
bottle firmly in accordance with Use Instructions.
d) The upper edge
ofthe
bottle is damaged. Send the appliance to MOSA
or a service center.
Cream
is still liquid after preparation:
a) The
Whipper
was not shaken or often enough.
Shake
again firmly.
b) The
Whipper
was not turned upside
down
when
pressing
the lever.
Always
tum
the
Whipper
upside
down
before
pressing
the
lever
(decorating nozzle pointing vertieally
downward!)
Cream
is too
finn
and "spits" sideways from the nozzle:
The
Whipper
has been shaken too much. Do not
over
shake nor shake
before
each dispensing.
IMPORTANT: Do not attempt to
modify
the Whipper.
If
you
cannot
solve a problem with the help of these instructions, please contact MOSA
or a service center.
Cleaning:
Before opening, allow remaining pressure to escape by pressing the lever
until no cream or gas is discharged through tbe nozzle. An insignificant
amount of cream may remain in the bottle - a teaspoon
of
liquid
cream
at the most.
Follow steps I, 2 and 3 to
dean
your MOSA Stainless Steel Cream/Sauce
Whipper:
1. Unscrew the head then remove the head gasket and decorating nozzle.
Hold
end
of
the piston inside the head
while
unscrewing
the nozzle
adaptor with the
other
hand.
2. Pull the piston out
of
tbe head.
3.
Thoroughly
clean each individual
component
with a
mild
detergent
and
brush,
4.
Allow
the parts to dry and reassemble them later.
5.
When
eleaning, only
remove
parts as
shown
in fig. 6.
6. Do not use
any
sharp
objects
or abrasive materials
when
cleaning
the bottle.
7. MOSA Stainless Steel Cream/Sauce Whipper is dishwasber safe except
for the chargerholder and the charger.Pleaselake it offbeforedishwasbing.
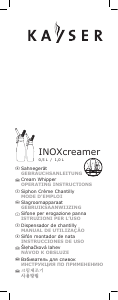
Safety
Instructions:
1.
Please
keep this instruction booklet for later reference to avoid any
improper handling or operating. This Whipper is designed exclusively
for the
purposes
specified in this manual.
2. The
Whipper
and
the
charger
are
pressure
containers that require
increased
attention and care.
3. For thechargers, pertinent safety instruetions are given on its package.
Never expose the chargers to any heat radiation that may lead to heating
them
over
50'C
(l22'F).
4.
Keep
MOSA
Stainless Steel Cream/Sauce Whipper and chargers out
ofthe
reach
of
children.
5.
For
safety reasons, do not bend or lean over the
Whipper
head wben
screwing
in the charger!
Make
sure that the cream maker head was
screwed
on tightly,
before
the
cream
maker
is charged.
6.
MOSA
head screws easily onto the bottle in an up-right position. Do
not cross-thread.
7. All
MOSA
parts can be
assembled
easily; therefore never use force.
8.
Never
use the
Whipper
if
damaged.
If the
MOSA
Stainless
Steel
Cream/Sauce Whipper was dropped, it sbould bechecked by MOSA
before
resuming
use.
9.
Before
opening
the
MOSA
Stainless Steel
Cream/Sauce
Wbipper,
press the lever until tbe hissing sound stops and all gas bas completely
escaped.
10. Do not expose MOSA Stainless Steel Cream/Sauce Whipper to direct
heat
(stove, sunlight, oven, microwave, etc.).
11. Please be advised that tampering with the Whipper and/or its components
voids any and all warranties
of
the manufacturer/supplier.
Warranty:
Defective Whipper (faulty materials or bad workmanship) will be repaired
without
charge (freight prepaid!)
within
two years
of
date
of
purchase
per valid invoice. This warranty does not cover any liability for malfunction
caused by improper use, use of damaged/wear parts, or any consequential
damage. In order to assure the proper functioning of your cream Whipper,
only
use original
MOSA
parts.
In particular, we
shall
not satisfy any
warranty or liability claims for malfunction, damage, and consequential
damage
resulting from any failure
of
complying with andlor failure to
read this manual and the safety instructions contained therein. For further
information: visit us at
www.twmosa.com
-


Praat mee over dit product
Laat hier weten wat jij vindt van de Mosa CSS3 Slagroomspuit. Als je een vraag hebt, lees dan eerst zorgvuldig de handleiding door. Een handleiding aanvragen kan via ons contactformulier.