
&OHMJTI
Congratulations on your purchase, and welcome to Philips!
To fully benet from the support that Philips oers, register
your product at www.philips.com.cn/welcome.
1 Important
Read this user manual carefully before you use the
appliance and keep it for future reference.
• WARNING: Do not use this
appliance near water.
• Never immerse the brush body
in water or any other liquid, nor
rinse it under the tap.
• Always switch o the appliance
after use.
• This appliance can be used
by children aged from 8 years
and above and persons with
reduced physical, sensory or
mental capabilities or lack of
experience and knowledge
if they have been given
supervision or instruction
concerning use of the appliance
in a safe way and understand
the hazards involved.
• Children shall not play with the
appliance. Cleaning and user
maintenance shall not be made
by children without supervision.
• Always return the appliance to
a service centre authorized by
Philips for examination or repair.
Repair by unqualied people
could result in an extremely
hazardous situation for the user.
• Never use any accessories or
parts from other manufacturers
or that Philips does not
specically recommend.
If you use such accessories or
ౕВ㑾〆∕ڹᎣ㣤ᓄᩜᠮ
www.philips.com.cn/welcome
HP4675
© 2016 Koninklijke Philips N.V.
Ԋ⪆ᰶᱰݖ
3140 035 41454
parts, your guarantee
becomes invalid.
• Do not use the appliance
for any other purpose than
described in this manual.
• Do not use the appliance on
articial hair.
• Never block the ion outlet.
• Do not insert metal objects
into the ion outlet to avoid
unexpected dangers.
• Do not use this ion brush
together with hairdryer for
styling purpose.
• Do not expose the brush under
sunlight for long period of time.
The ultraviolet ray may lead to
aging in the brush, which the
product can break easily.
• Use and store the appliance at a
temperature between 15ºC and
35ºC.
• The applicance runs on one 1.5V
AAA alkaline battery.
• Open battery compartment in
order to install or remove
the battery.
• The bypack battery is
not rechargeable. Non-
rechargeable batteries are not
to be recharged.
• The rechargeable battery
must be removed out of the
appliance before being charged.
• Batteries are to be inserted with
the correct polarity.
• Exhausted batteries are to be
removed from the appliance
and safely disposed of.
• If the appliance is to be stored
unused for a long period, the
batteries should be removed.
• The supply terminals are not to
be short-circuited.
Electromagnetic elds (EMF)
This Philips appliance complies with all applicable
standards and regulations regarding exposure to
electromagnetic elds.
Environment
Do not throw away the appliance with the normal
household waste at the end of its life, but hand it in
an ocial collection point for recycling. By doing this,
you help to preserve the environment.
2 Introduction
The new Philips ionic brush kit helps to upgrade your
brushing routine in an easy way. By simply changing bristle
pad, you may have either smooth and shiny hair with less
hair breakage and loss, or have a quick and relaxing
scalp massage.
• Ionic care
This easy shine ionic brush has built-in ionizer, which
generates negative ions and neutralizes positive charge of
static electricity. It helps to reduce frizz and bring back shine
and smoothness to your hair instantly.
• Smooth brush pad
Smooth brush pad is designed to disentangle more
eciently thanks to its thin, soft and resilient bristles with
dierent lengths. It helps to reduce hair breakage and hair
loss signicantly, which are normally caused by pulling too
hard when combing through the tangled hair. Amazingly,
you would nd combing experience very much alike
caressing that you would not feel a lot of pulling or pain as
before, and hair gets reshaped and smoothened faster.
• Massage brush pad
Massage brush pad is designed for you to have a quick and
simple scalp massage. It has soft and thick bristles with
micro ngers on tips, which enables wide and gentle touch
on scalp. And the concave design follows better contour of
head. By massaging 1-2 minutes, you could enhance blood
circulation and therefore you would feel more relaxed
and refreshed.
3 Overview
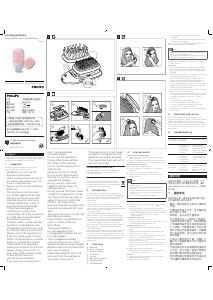
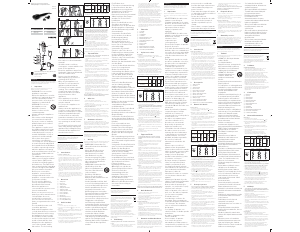
a Brush body
b Battery compartment
c Power on/o switch
d Ionic indicator
e Ion outlet
f Brush pad release button
g Massage brush pad
h Smooth brush pad
4 Use your brush
Install and detach the brush pad
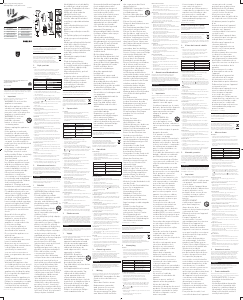
1 ( Fig.2-4 ) To remove the brush pad, push the release
button to detach it.
2 ( Fig.2-2 ) To install the brush pad, press it down into the
brush body, you will hear a “click” if it is installed correctly.
Install and remove the battery
We provide with one 1.5V AAA battery.
1 To remove the battery compartment cover, pull it o
the appliance.
2 ( Fig.2-1 ) Put the battery in the battery holder.
3 Push the battery compartment cover back onto the
appliance (‘click’).
Note
• Make sure that the + and - poles of the battery point in
the right direction.
• Make sure that your hands are dry when you insert
the battery.
• To avoid damage due to battery leakage. Remove the
battery if you are not going to use the appliance for a
month or more.
• Do not leave empty battery in the appliance.
Brush your hair
1 Slide the power on/o switch ( Fig.1, c ) to to turn on
the appliance.
» The ionic indicator ( Fig.1,
d ) lights up and ions are
automatically and continuously released, reducing frizz
and providing additional shine. You may hear a sizzling
sound. It’s commom because it is caused by
the ion generator.
Smooth brush ( Fig. 1,
h )
• Blow dry your wet hair to 80% dry.
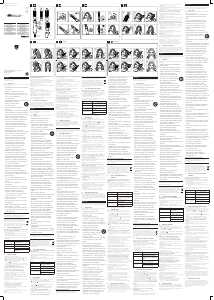
• ( Fig.3 ) Brush from hair roots to tips slowly 2-3 times and
your hair would be disentangled eectively.
Massage brush ( Fig. 1,
g )
• The massaging bristles is most eective on almost
dry hair.
• Brush your hair thoroughly with the smooth brush and
make sure there is no tangles.
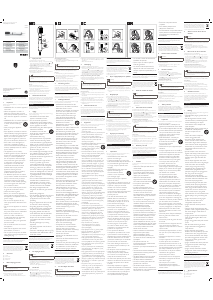
• ( Fig.4-2 ) Put the massage brush on your head, move in
a circular movement with rm pressure.
• ( Fig.4-3 ) Brush from your hairline to the top of the head
gently to massage your scalp.
• ( Fig.4-4 ) To massage the back of your head, section your
hair into four parts as the bristles will be easier to reach
your scalp.
2 Switch to
to switch o the appliance.
» You may hear a sizzling sound. It’s common because
the ions are not released fully.
After use:
1 ( Fig.2-6 ) You can use a damp cloth to clean both the
brush body and the brush pads.
2 To further clean the brush pads:
• Use your ngers to remove the dust or hair on
the brush.
• ( Fig.2-5 ) Detach the brush pad from the brush body
and rinse it under tap water.
Tips: You can use the toothbrush and soap water to clean
the brush if it is stained by your dyed hair.
Note
• Make sure the brush pad is completely dried before
re-attaching to the brush body.
• Never use corrosive liquid to clean the brush cushion
as it may cause damage to the product.
3 Keep it in a safe and dry place or put it in your makeup
bag for daily use.
Tips & Tricks
• The ionic brush performs better when the hair is slightly
wet. If you wish to use the brush after washing your hair,
dry your hair until 80% dry. Over dry your hair may aect
the results.
• Take a small strand of hair ( 3-5cm width ) when using the
smooth bristle brush to detangle your hair.
• To x the entangled hair ends, you would better hold
the strand of hair and then brush the hair ends without
pulling your hair roots until it is smooth and shine.
• For long and dense hair, we suggest to section your hair
into parts when using the massage brush so the bristles
could t your head curvature better.
• Always brush with massage brush from hair roots to ends
vertically to ensure smooth combing.
• Comb your hair slowly and repeatedly from the root until
your hair is smooth. The time to comb varies according to
your hair type and length. It is not easy to observe
the eect if :
• you have short or natural curly hair
• your hair condition is too dry or damaged
• you have straightening perm within 3 to 4 months
• you have lots of short newly grown hair
• Apply leave in hair conditioner to your hair after brushing
for best result.
5 Guarantee and service
If you need information e.g. about replacement of an
attachment or if you have a problem, please visit the Philips
website at www.philips.com.cn/support or contact the
Philips Customer Care Centre in your country (you nd its
phone number in the worldwide guarantee leaet). If there
is no Consumer Care Centre in your country, go to your local
Philips dealer.
6 Troubleshooting
Problem Cause Solution
The appliance
does not work.
The battery is
exhausted.
Replace the battery.
You have not
placed the battery
in the battery
compartment
correctly.
Put the battery in
the compartment in
accordance with the
+ and - indications in
the compartment.
You have
not attached
the battery
compartment
cover properly.
Push the battery
compartment cover
onto the appliance
(‘click’).
The ion
indicator does
not light up
The battery
is installed
incorrectly.
The battery is
nearly empty.
Check if the battery
is installed with the
right pole.
Replace with a new
battery.
キҀ
々嬈⾎䕪⿆杤潎㨈庴 ᴚ柄ℏ㱌潃ᴠᵬ
⾎俣ᶑ⊽柄ℏ㱌㊶ẁ䕪㐕潎嫝☎
YYYRJKNKRUEQOEPYGNEQOGᳰ㯎⾎
䕪ᶍ⎧Ȥ
䛺㺮θ䶦
ṥ䐎ᶍ⎧ᴱℳ潎嫝ᶺ䶬擫嫡㘒䐎ㄝㄱ潎
ⵜ⢋⑪ể䪇ẁ㓋⋴⊨仩Ȥ
• 婌⌰潜嫝⇥☎晆康㬚䕪☖㒟ṥ䐎㘒
ᶍ⎧Ȥ
• ᳳ塧⫬㞙ḹ㱞⁋㬚ᴓ潎ᵅᳳ塧☎僐
㙋㬚湿⠚ᳱₘ㯽Ȥ
• ṥ䐎⋴潎ↇ⺫⁙擓ᶍ⎧䐛㵶Ȥ
• 㘒ᶍ⎧廨⋮䐗⭧ーᳰⵚ湪䕪
‥䧋⊰侈ḹᳳὋ⁎ȣ々墯ー䮤䡄
ᳰ㗯斂䝳ー丠ᴵ䗞⁙䶵楲⍲䛋媬䕪
ᶠ⟑ṥ䐎潎Ḭℳ㊶㔕㗯ᶠ⫟ᶼṥ
䐎㘒ᶍ⎧廁圲䖷䙉ー⫢潎䝔ể
ᶼ⩯⁎ṥ䐎潎ⵜᳺ媏ᶼ㓴䕣䗞
⁙䕪≗⪙Ȥ
• ᳳ媏‥䧋䊏仳㘒ᶍ⎧Ȥᳳ塧媏‥
䧋☎㓆ᶠ䖷䙉䕪⾫ₛᳱ⫟ᶍ⎧廁圲
㳫㯧⍲ểȤ
• ᶍ⎧⋐俣廧№柄ℏ㱌㉮㘩䕪㗳ↇᴓ
⺩㞦ỔȤ䐗ᳳ⋮㜢ᶠ⌾廁圲Ổ䋬⋕
俣⫬䐎ㄝ乔ᵴ㙧ⶌ≗敏䕪❩☖Ȥ
• ⇥ṥ䐎⁜⩩ℜ弆䐅ᶍ䕪ー㘐䶵
柄ℏ㱌䅟ℑ㊎制䕪攪ー忎Ȥ
EN User manual
ZH-CN ⩕ᝤڹ
d
b
a
c
e
f
g
h
1
2
3
4
4
3
ϔ৮ 喟下ݖ⊓䉌⻨ၽ䕍ಸ
ಸ 喟)1
䷊Ⴧ⩢ࢸ 喟7
䷊Ⴧ⩢≮ 喟N"
⩌ϔᬒ 喟䄤㻮ϔ৮᱙Ҁ
ϔౝ 喟పᎬᎬጋ
下ݖ⊓喍ప喎ែ䉱ᰶ䭽ڙ
⊤ጯ๖Ⱋ㺬䌜
ڕప䶫ߎ☚㏬喟
᱙ϔ৮ᵦᢛపᴴ(#
(#ݣ䕍



Praat mee over dit product
Laat hier weten wat jij vindt van de Philips HP4675 Krultang. Als je een vraag hebt, lees dan eerst zorgvuldig de handleiding door. Een handleiding aanvragen kan via ons contactformulier.