Lire attentivement le mode d'emploi ainsi que les
consignes de sécurité avant toute utilisation.
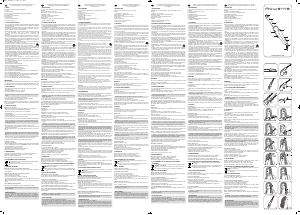
1. DESCRIPTION
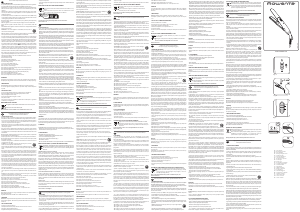
A. Fer à coiffer revêtement céramique (diamètre: 23mm)
B. Pince
C. Voyant de mise sous tension
D. Bouton 0 1 2 (2 positions de température)
E. Embout isolant
F. Boutons de rotation droite/gauche
G. Anneau de suspension
H. Repose fer
I
. Gâchette d’ouverture / fermeture de la pince
J. Sortie de cordon rotative
2. CONSEILS DE SÉCURITÉ
• Pour votre sécurité, cet appareil est conforme aux normes et régle-
mentations applicables (Directives Basse Tension, Compatibilité Elec-
tromagnétique, Environnement...).
• Les accessoires de l'appareil deviennent très chauds pendant l'utili-
sation. Evitez le contact avec la peau. Assurez-vous que le cordon d'al-
imentation ne soit jamais en contact avec les parties chaudes de
l'appareil.
• Vérifiez que la tension de votre installation électrique correspond à
celle de votre appareil. Toute erreur de branchement peut causer des
dommages irréversibles non couverts par la garantie.
• Pour assurer une protection complémentaire, l'installation, dans le cir-
cuit électrique alimentant la salle de bain, d'un dispositif à courant dif-
férentiel résiduel (DDR) de courant différentiel de fonctionnement
a
ssigné n'excédant pas 30 mA, est conseillée. Demandez conseil à
votre installateur.
• L'installation de l'appareil et son utilisation doit toutefois être con-
forme aux normes en vigueur dans votre pays.
• MISE EN GARDE: Ne pas utiliser cet appareil près des baig-
noires, des douches, des lavabos ou autres récipients con-
tenant de l’eau.
• Lorsque l'appareil est utilisé dans une salle de bains, débranchez le
après usage car la proximité de l'eau peut présenter un danger même
lorsque l'appareil est arrêté.
• Cet appareil n’est pas prévu pour être utilisé par des personnes (y
compris les enfants) dont les capacités physiques, sensorielles ou
mentales sont réduites, ou des personnes dénuées d’expérience ou
de connaissance, sauf si elles ont pu bénéficier, par l’intermédiaire
d’une personne responsable de leur sécurité, d’une surveillance ou
d’instructions préalables concernant l’utilisation de l’appareil. Il con-
vient de surveiller les enfants pour s’assurer qu’ils ne jouent pas avec
l
’appareil.
• Si le câble d'alimentation est endommagé, il doit être remplacé par le
fabricant, son service après vente ou des personnes de qualification
similaire afin d'éviter un danger.
• N'utilisez pas votre appareil et contactez un Centre Service Agréé si :
votre appareil est tombé, s'il ne fonctionne pas normalement.
• L'appareil doit être débranché : avant le nettoyage et l'entretien, en
cas d'anomalie de fonctionnement, dès que vous avez terminé de l'u-
tiliser.
• Ne pas utiliser si le cordon est endommagé
• Ne pas immerger ni passer sous l’eau, même pour le nettoyage.
• Ne pas tenir avec les mains humides.
• Ne pas tenir par le boîtier qui est chaud, mais par la poignée.
• Ne pas débrancher en tirant sur le cordon, mais en tirant par la prise.
• Ne pas utiliser de prolongateur électrique.
• Ne pas nettoyer avec des produits abrasifs ou corrosifs.
• Ne pas utiliser par température inférieure à 0 °C et supérieure à 35 °C.
GARANTIE
Votre appareil est destiné à un usage domestique seulement. Il ne peut
être utilisé à des fins professionnelles.
La garantie devient nulle et invalide en cas d'utilisation incorrecte.
3. MISE EN SERVICE
- Posez l'appareil bien stable sur son repose fer et sur une surface plane.
- Branchez l'appareil.
- Sélectionnez la température idéale pour vos cheveux à l’aide du bou-
ton 0 1 2 :
Si vos cheveux sont fragiles ou fins, choisissez la position 1.
CONSEILS : Cette position est fortement recommandée pour les pre-
mières utilisations.
Si vos cheveux sont sains, choisissez la position 2.
- Vous pouvez utiliser l’appareil au bout de 1’30 sec.
- Pour éteindre l’appareil, placez le bouton 0 1 2 sur la position 0.
NB : Gardez à l’esprit que le fer peut encore être chaud : ne le touchez
pas pour éviter tout risque de brûlure. Vous pourrez le manipuler sans
danger au bout d’environ 20 minutes.
4. UTILISATION
Préparation :
• Assurez vous que vos cheveux soient absolument secs avant d’utiliser
l’appareil.
• Démêlez vos cheveux avec un peigne à larges dents.
• Séparez vos cheveux en mèches (largeur de 3 cm maxi).
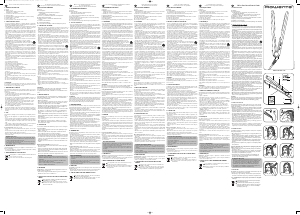
Pour créer des boucles :
• Faites tourner le fer en appuyant sur le bouton de rotation afin de po-
sitionner la pince face à vous.
• Soulevez la pince en appuyant sur la gâchette.
• Introduisez alors la pointe de votre mèche de cheveux entre la pince
et le fer.
CONSEILS : Pour plus de facilité, vous pouvez également introduire
votre mèche de cheveux à mi-hauteur entre la pince et le fer. Puis
faites glisser le fer doucement jusqu’au bout de la mèche.
• Lâchez ensuite la pince à l’aide de la gâchette. Votre mèche est prête à
être bouclée.
• Appuyez sur le bouton de rotation. L’appareil se met alors en fonc-
tionnement et enroule automatiquement la mèche autour du fer.
NB : Reportez vous aux pictos 9 & 10 pour trouver le sens de rotation
idéal (droite ou gauche) pour réaliser de belles boucles.
CONSEILS : Inclinez légèrement le produit de façon à ce que la
mèche s’enroule tout au long du fer et veillez bien à maintenir la
mèche tendue tout au long de l’enroulement.
• Une fois la mèche enroulée, lâchez le bouton de rotation. Par sécurité,
l
e fer opère alors un léger retour en arrière.
• Laissez chauffer pendant 10 secondes environ.
Pour libérer la mèche :
• Positionnez l’appareil à la vertical.
• Sans le tirer vers le bas, appuyez sur le bouton de rotation inverse
pour dérouler à moitié la boucle. ATTENTION : Bien veillez à ne pas
tirer le fer vers le bas pendant cette opération.
• Appuyez sur la gâchette pour ouvrir la pince.
• Libérerez la boucle en tirant vers le bas.
• Répétez l'opération pour former de nouvelles boucles.
5. ENTRETIEN
Débranchez l'appareil et laissez-le refroidir sur son support.
Nettoyez l’appareil lorsqu'il est parfaitement froid.
Essuyez le manche à l'aide d'un chiffon doux humide.
Ne jamais introduire d'eau ou tout autre liquide dans le manche.
6. PARTICIPONS À LA PROTECTION DE L’ENVIRONNEMENT!
Votre appareil contient de nombreux matériaux valoris-
ables ou recyclables.
Confiez celui-ci dans un point de collecte ou à défaut dans
un centre service agréé pour que son traitement soit effec-
tué.
7. EN CAS DE PROBLÈMES :
Votre boucle est cassée à la pointe ?
Vous avez enroulé votre mèche dans le mauvais sens. Bien veillez à re-
specter le sens de rotation pour les boucles suivantes.
Vos boucles sont mal formées ?
• Assurez vous que vos cheveux sont suffisamment secs.
• Choisissez une mèche plus petite
• Si vous êtes en position 1, passez en position 2.
• Laissez chauffer pendant quelques secondes supplémentaires. Atten-
tion cependant à ne jamais dépasser les 20 secondes.
• Bien veillez à maintenir la mèche tendue pendant l’enroulement.
Vous n’arrivez pas à libérer votre mèche de cheveux ?
Appuyer sur le bouton de rotation inverse de façon à libérer complète-
ment la mèche.
CONSEILS:
Vos cheveux sont dégradés ? Assurez vous de boucler
des cheveux de longueurs identiques.
ULTRA PRATIQUE
Un film de démonstration disponible sur internet !
Pour plus de conseils sur CURL ACTIV, n’hésitez pas à aller consul-
ter notre site internet (www.rowenta.com). Vous y trouverez un film
explicatif vous montrant comment utiliser ce produit en toute sim-
plicité et comment réussir à obtenir de magnifiques boucles en un
seul geste !
F
Bitte lesen Sie die Bedienungsanleitung sowie
die Sicherheitshinweise vor der Inbetriebnahme
aufmerksam durch.
1. BESCHREIBUNG
A. Frisierstab mit Keramik-Beschichtung (Durchmesser: 23 mm)
B. Zange
C. Kontrollleuchte
D. Schalter 0 1 2 (2 Temperaturstufen)
E. Isolierte Spitze
F. Schalter für Rechts-/Linkslauf
G. Aufhängeöse
H. Geräteständer
I. Hebel zum Öffnen und Schließen der Zange
J. Drehbarer Kabelausgang
2. SICHERHEITSHINWEISE
• Lesen Sie die Gebrauchsanleitung sorgfältig vor der ersten Inbetriebnahme
i
hres Gerätes durch. Eine unsachgemäße Bedienung entbindet den Hersteller
von jeglicher Haftung.
• Um Ihre Sicherheit zu gewährleisten, entspricht dieses Gerät den gültigen Nor-
men und Bestimmungen (Niederspannungsrichtlinien, elektromagnetische Ver-
träglichkeit, Umwelt...).
• Der Frisierstab dieses Gerätes wird während des Betriebs sehr heiß. Vermei-
den Sie es, sie mit der Haut in Kontakt zu bringen. Versichern Sie sich, dass das
Stromkabel nicht mit den heißen Teilen des Geräts in Kontakt gerät.
•
Überprüfen Sie, dass die Betriebsspannung Ihres Geräts mit der Spannung Ihrer
Elektroinstallation übereinstimmt. Ein fehlerhafter Anschluss kann irreparable
Schäden hervorrufen, die nicht von der Garantie abgedeckt sind.
• Zum zusätzlichen Schutz sollte das Gerät an den Stromkreis des Badezimmers
mit einer Fehlerstrom-Schutzeinrichtung für Wechselstrom mit 30 mA Nennfeh-
lerstrom angeschlossen werden. Lassen Sie sich von Ihrem Elektroinstallateur
beraten.
• Die Installation des Geräts muss den in Ihrem Land gültigen Normen entspre-
chen.
• WARNHINWEIS: Verwenden Sie dieses Gerät nicht in der Nähe einer
Badewanne, einer Dusche, eines Waschbeckens oder eines sonstigen
Behälters, der Wasser enthält.
• Wenn das Gerät in einem Badezimmer eingesetzt wird, muss es nach dem Ge-
brauch ausgesteckt werden, da die Nähe von Wasser selbst bei ausgeschaltetem
Gerät eine Gefahrenquelle darstellen kann.
• Dieses Gerät darf nicht von Personen (inbegriffen Kindern) mit eingeschränk-
ten körperlichen, sensorischen oder geistigen Fähigkeiten benutzt werden. Das
Gleiche gilt für Personen, die keine Erfahrung mit dem Gerät besitzen oder sich
mit ihm nicht auskennen, außer wenn sie von einer für ihre Sicherheit verant-
wortlichen Person beaufsichtigt werden oder von dieser mit dem Gebrauch des
Gerätes vertraut gemacht wurden. Kinder müssen beaufsichtigt werden, damit
sie nicht mit dem Gerät spielen.
• Wenn das Stromkabel beschädigt ist, darf es, um jedwede Gefahr zu vermei-
den, nur vom Hersteller, dem Kundendienst oder ähnlich qualifizierten Personen
a
usgetauscht werden.
• Benutzen Sie das Gerät nicht und treten Sie mit einem zugelassenen Kunden-
dienstcenter in Kontakt, wenn: das Gerät zu Boden gefallen ist und nicht richtig
funktioniert.
• Das Gerät muss ausgesteckt werden: vor Reinigung und Wartung, bei Funk-
tionsstörungen und sofort nach dem Gebrauch. Lassen Sie das Kabel niemals
herunter hängen, oder in die Nähe von, oder in Berührung mit einer Wärme-
quelle oder einer scharfen Kante kommen.
• Wenn das Stromkabel beschädigt ist, darf das Gerät nicht benutzt werden.
• Nicht ins Wasser tauchen und nicht unter fließendes Wasser halten, auch nicht
zur Reinigung.
• Fassen Sie das Gerät nicht mit feuchten Händen an oder wenn Sie barfuss
sind.
• Fassen Sie das Gerät nicht am Gehäuse an, das heiß ist, sondern an den Grif-
fen.
• Stecken Sie das Gerät nicht durch Ziehen am Stromkabel aus, sondern ziehen
Sie den Stecker aus der Steckdose. Legen Sie das heiße Gerät nie auf brennba-
ren Gegenständen wie Handtücher o.ä. ab
• Benutzen Sie kein Verlängerungskabel.
• Reinigen Sie das Gerät nicht mit scheuernden oder ätzenden Produkten.
• Betreiben Sie das Gerät nicht bei Temperaturen unter 0 °C oder über 35 °C.
Legen Sie das Gerät nicht ab solange es einge schaltet ist. Verwenden Sie nur
original Zubehör. Das Gerät nie unbeaufsichtigt betreiben.
GARANTIE:
Jeder Eingriff, außer der im Haushalt üblichen Reinigung und Pflege durch den
K
unden, muss durch den Kundendienst erfolgen. Dieses Gerät ist ausschließlich
für den Hausgebrauch bestimmt. Es darf nicht für gewerbliche Zwecke einge-
setzt werden. Bei unsachgemäßer Benutzung erlischt die Garantie.
3
. INBETRIEBNAHME
- Stellen Sie das Gerät auf einer ebenen Oberfläche stabil auf seinen Ständer.
- Schließen Sie das Gerät an die Stromversorgung an.
- Wählen Sie mit Hilfe des Schalters 0 1 2 die Idealtemperatur für Ihr Haar aus:
Falls Sie brüchiges oder feines Haar haben, wählen Sie Position 1.
EMPFEHLUNG: Diese Einstellung wird bei den ersten Verwendungen des
Geräts, nachdrücklich empfohlen.
Falls Ihr Haar gesund ist, wählen Sie Position 2.
- Sie können das Gerät nach 90 Sek. benutzen.
- Um das Gerät auszuschalten, schieben Sie den Schalter 0 1 2 auf Position 0
zurück.
Bedenken Sie, dass der Frisierstab noch sehr heiß sein kann: Berühren Sie ihn
nicht, um die Gefahr von Verbrennungen zu vermeiden. Sie können ihn nach
ungefähr 20 Minuten ungefährdet anfassen.
4. GEBRAUCH
Vorbereitung:
• Vergewissern Sie sich vor dem Gebrauch des Geräts, dass Ihre Haare vol-
lkommen trocken sind.
• Kämmen Sie Ihr Haar mit einem Kamm durch.
• Teilen Sie Ihr Haar in einzelne Strähnen (max. 3 cm).
Um Locken zu formen:
• Betätigen Sie den Rotationsschalter, um den Frisierstab so zu drehen, dass
sich die Zange Ihnen gegenüber befindet.
• Öffnen Sie die Zange mithilfe des Hebels.
• Platzieren Sie anschließend die Spitze Ihrer Haarsträhne zwischen der Zange
und dem Frisierstab.
E
MPFEHLUNG: Um den Vorgang zu erleichtern, können Sie Ihre Haarsträhne
auch auf halber Höhe zwischen der Zange und dem Frisierstab platzieren.
Ziehen Sie den Frisierstab anschließend behutsam bis zum Ende der
Haarsträhne.
• Schließen Sie dann mit Hilfe des Hebels die Zange. Ihre Haarsträhne kann nun
zu einer Locke geformt werden.
• Betätigen Sie den Rotationsschalter. Das Gerät setzt sich jetzt in Betrieb und
rollt die Strähnen automatisch um den Frisierstab herum auf.
Vergleichen Sie die Abbildungen 9 & 10, um die für Sie ideale Rotationsrich-
tung zu bestimmen (rechts oder links), um wunderschöne Locken zu formen.
EMPFEHLUNG: Neigen Sie das Gerät ein wenig, sodass die Strähne sich um
die gesamte Länge des Frisierstabs rollt, und achten Sie darauf, dass die
Strähne während der gesamten Zeit fest aufgerollt ist.
•
Sobald die Strähne aufgerollt ist, lassen Sie den Rotationsschalter los. Aus
Sicherheitsgründen vollzieht der Frisierstab dann eine leichte Rückwärts-
drehung.
• Lassen Sie die Strähne 10 Sekunden um den erhitzten Frisierstab aufgerollt.
Um die Strähne freizugeben:
• Halten Sie das Gerät senkrecht.
• Betätigen Sie den Rotationsschalter für die umgekehrte Richtung, ohne das
Gerät nach unten zu ziehen, um die Hälfte der Strähne zu entrollen: ACHTUNG:
Achten Sie darauf, den Frisierstab während dieses Vorgangs nicht nach unten
zu ziehen.
• Betätigen Sie den Hebel, um die Zange zu öffnen.
• Geben Sie die Locke frei, indem Sie das Gerät nach unten ziehen.
• Wiederholen Sie den Vorgang, um weitere Locken zu formen.
5. PFLEGE
Trennen Sie das Gerät von der Stromversorgung und lassen Sie es auf seinem
Ständer abkühlen.
Reinigen Sie das Gerät, wenn es vollkommen abgekühlt ist.
Wischen Sie den Frisierstab des Geräts mit einem weichen, feuchten Lappen ab.
Der Frisierstab darf niemals mit Wasser oder sonstigen Flüssigkeiten in
Berührung kommen.
6.TUN SIE ETWAS FÜR DEN UMWELTSCHUTZ!
Ihr Gerät enthält zahlreiche wieder verwertbare oder recyclebare
Materialien.
Bringen Sie das Gerät zur Entsorgung zu einer Sammelstelle Ihrer
Stadt oder Gemeinde.
7. FALLS PROBLEME AUFTRETEN:
Ihre Locke ist an der Spitze abgebrochen?
Sie haben Ihre Strähne in die falsche Richtung aufgerollt. Achten Sie bei den fol-
genden Strähnen sorgfältig auf die Rotationsrichtung.
Ihre Locken sind nicht schön geformt?
•
Vergewissern Sie sich, dass Ihr Haar trocken genug ist.
•
Wählen Sie kleinere Strähnen.
•
Falls der Schalter sich auf Position 1 befindet, schieben Sie ihn auf Position 2.
•
Lassen Sie die Strähne für einige zusätzliche Sekunden um den erhitzten
Frisierstab aufgerollt. Achten Sie jedoch darauf, niemals 20 Sekunden zu über-
schreiten.
•
Achten Sie sorgfältig darauf, dass die Strähne während des Aufrollvorgangs
fest angezogen ist.
Sie können Ihre Haarsträhne nicht befreien?
Drücken Sie auf den Rotationsschalter für die umgekehrte Richtung, um die
Strähne vollkommen zu befreien.
EMPFEHLUNG:
Ihre Haare sind getönt? Achten Sie darauf, Haarsträhnen von
gleicher Länge aufzurollen, um Locken zu formen.
ULTRAPRAKTISCH
Im Internet ist ein Demo-Film verfügbar!
Um weitere Empfehlungen zu CURL ACTIV zu erhalten, zögern Sie nicht, un-
sere Internetseite (www.rowenta.com) zu besuchen. Sie finden dort einen
Demo-Film, der Ihnen zeigt, wie Sie dieses Produkt auf einfachste Weise be-
nutzen können und wie Sie mit einem Handgriff wunderschöne Locken
bekommen!
D
Neem deze gebruiksaanwijzing en de
veiligheidsvoorschriften aandachtig door
voor het eerste gebruik.
1. BESCHRIJVING
A. Stijltang keramische coating (diameter: 23 mm)
B
. Klem
C. Controlelampje "apparaat aan"
D. Schuifknop 0 1 2 (2 temperatuurstanden)
E. Geïsoleerd uiteinde
F. Rotatieknop voor linksom/rechtsom draaien
G. Ophangoogje
H. Steun voor stijltang
I. Knop om de klem te openen/sluiten
J. Roterende snoeruitgang
2 - VEILIGHEID
• Voor uw veiligheid beantwoordt dit apparaat aan de toepasselijke normen en
regelgevingen (Richtlijnen Laagspanning, Elektromagnetische Compatibiliteit,
Milieu…).
• De accessoires van het apparaat worden tijdens het gebruik zeer heet. Vermijd
contact met de ogen. Zorg dat het netsnoer nooit in contact komt met de hete
delen van het apparaat.
•
Controleer of de spanning van uw elektriciteitsinstallatie overeenkomt met die
van het apparaat. Een verkeerde aansluiting kan onherstelbare schade
veroorzaken die niet door de garantie gedekt wordt.
• Voor extra beveiliging is het aan te raden om het elektrische circuit van de
stroomtoevoer naar de badkamer te voorzien van een aardlekschakelaar met
een maximale lekstroom van 30mA. Vraag uw installateur om advies.
• De installatie van het apparaat en het gebruik moeten echter beantwoorden
aan de in uw land geldende normen.
• WAARSCHUWING: Gebruik dit apparaat niet met natte handen of in
de buurt van badkuipen, douches, wastafels of andere water bevat-
tende reservoirs.
• Wanneer het apparaat in een badkamer gebruikt wordt, haal dan de stekker uit
het stopcontact na het gebruik, omdat water gevaarlijk kan zijn, zelfs wanneer
het apparaat uitgeschakeld is.
• Dit apparaat is niet bedoeld om zonder hulp of toezicht gebruikt te worden door
kinderen of andere personen, indien hun fysieke, zintuiglijke of mentale ver-
mogen hen niet in staat stellen dit apparaat op een veilige wijze te gebruiken,
t
enzij zij van tevoren instructies hebben ontvangen betreffende het gebruik van
dit apparaat door een verantwoordelijke persoon. Er moet toezicht zijn op
kinderen zodat zij niet met het apparaat kunnen spelen.
• Indien het netsnoer beschadigd is, moet het vervangen worden door de fab-
rikant, diens servicedienst of een persoon met een gelijkwaardige kwalificatie,
om gevaarlijke situaties te voorkomen.
• Gebruik het apparaat niet meer en neem contact op met een erkende Ser-
vicedienst indien:
- het apparaat gevallen is
- het niet meer normaal werkt.
• De stekker moet uit het stopcontact gehaald worden:
- vóór het reinigen en onderhoud van het apparaat
- bij storingen tijdens het gebruik
- zodra u het apparaat niet meer gebruikt.
• Niet gebruiken wanneer het netsnoer beschadigd is
• Niet in water onderdompelen of onder de kraan houden, ook niet voor het
reinigen.
•
Niet vasthouden met vochtige handen.
• Niet bij het kastje vasthouden wanneer dit heet is, maar aan de handgreep.
• De stekker niet uit het stopcontact halen door aan het snoer te trekken, maar
alleen via de stekker.
• Geen verlengsnoer gebruiken.
• Niet reinigen met schurende of corrosieve middelen.
• Niet gebruiken bij temperaturen onder 0 °C en boven 35 °C.
GARANTIE:
Dit apparaat is alleen bestemd voor huishoudelijk gebruik. Het kan niet voor
bedrijfsmatige doeleinden gebruikt worden.
De garantie is niet geldig in geval van een oneigenlijk gebruik
3
. VOOR HET EERSTE GEBRUIK
- Plaats het apparaat stevig op zijn steun en zorg dat het op een vlakke onder-
grond staat.
- Schakel het apparaat in.
- Stel de ideale temperatuur in voor uw haar met behulp van de knop 0 1 2:
Als u fijn of broos haar hebt, kies dan de stand 1.
ADVIEZEN: Deze stand wordt aanbevolen bij het eerste gebruik.
Als u gezond haar hebt, kies dan de stand 2.
- U kunt het apparaat al na 1 minuut 30 sec. gebruiken.
- Om het apparaat uit te schakelen, zet u de knop 0 1 2 op de stand 0.
N
B: Weet dat de stijltang nog geruime tijd warm is: raak het niet aan om risico’s
op brandwonden te vermijden. U kunt het uiteinde van de stijltang zonder risico
aanraken na ca. 20 minuten.
4. GEBRUIK
Voorbereiding:
• Controleer of uw haar helemaal droog is vóór u het apparaat in gebruik neemt.
• Ontwar uw haar d.m.v. een kam met grote tanden.
• Verdeel uw haar in lokken (max. 3 cm breed).
Krullen maken:
• Laat de stijltang draaien door de rotatieknop in te drukken om de klem voor u
te plaatsen.
• Open de klem door de knop in te drukken.
• Plaats vervolgens het puntje van uw haarlok tussen de klem en de stijltang.
ADVIEZEN: Om gemakkelijker te werken, kunt u tevens uw haarlok in het
midden vastklemmen tussen de klem en de stijltang. Laat vervolgens de sti-
jltang zachtjes glijden tot aan het einde van de lok.
• Maak vervolgens de klem los met behulp van de knop. Uw haarlok is nu klaar
om te krullen.
• Druk de rotatieknop in. Het apparaat schakelt vervolgens in en draait de haar-
lok automatisch om de stijltang.
NB: Raadpleeg de pictogrammen 9 & 10 om de ideale draairichting te vinden
(
linksom of rechtsom) zodat u mooie krullen vormt.
ADVIEZEN: De stijltang onder een lichte hoek gebruiken zodat de lokken
helemaal om de stijltang draaien en zorg ervoor dat de haarlok strak ges-
pannen blijft tijdens het krullen.
• Zodra de lok helemaal is opgerold, laat u de rotatieknop los. Om veiligheid-
sredenen zal de stijltang dan een kleine draai in omgekeerde richting maken
• Laat uw stijltang vervolgens ca. 10 seconden opwarmen.
De haarlok los maken:
• Plaats het apparaat rechtop.
• Druk de rotatieknop in voor de omgekeerde draairichting om de krul tot de
helft af te wikkelen.LET OP: Zorg ervoor dat u de stijltang tijdens deze handel-
ing niet naar beneden trekt.
• Druk de knop in om de klem te openen.
• Maak de krul vrij door het apparaat naar beneden te trekken.
• Herhaal deze handelingen om nieuwe krullen te maken.
5. ONDERHOUD
Schakel het apparaat uit en laat het afkoelen op zijn steun.
Reinig het apparaat zodra het volledig is afgekoeld.
Veeg de handgreep schoon met een zachte, vochtige doek.
Gebruik nooit water of andere vloeistoffen op de handgreep.
6. WEES VRIENDELIJK VOOR HET MILIEU!
Uw apparaat bevat veel materialen die hergebruikt of gerecy-
cleerd kunnen worden.
Breng het naar een hiervoor bedoeld verzamelpunt of een erk-
ende servicedienst voor verwerking hiervan.
7. BIJ PROBLEMEN:
Uw krul is gebroken op het tipje?
U hebt uw haarlok in de verkeerde richting opgerold.
Uw krullen zijn slecht gevormd?
• Controleer of uw haar voldoende droog is.
• Probeer eerst uit op een kleinere haarlok.
• Als de stijltang in stand 1 staat, zet deze dan in stand 2.
• Laat uw stijltang enkele seconden langer opwarmen. Laat uw stijltang echter
nooit langer dan 20 seconden opwarmen.
• Zorg ervoor dat u de haarlok tijdens het oprollen steeds strak gespannen
houdt.
U krijgt uw haarlok niet meer los?
Druk de rotatieknop in voor de omgekeerde draairichting om de haarlok hele-
maal los te maken (afrollen).
ADVIEZEN:
Uw haar is beschadigd? Zorg ervoor dat u haar van gelijke lengte
neemt om krullen te maken.
SUPER HANDIG
Een demonstratiefilmpje op internet!
Voor verdere tips en adviezen over CURL ACTIV, aarzel niet om onze website
te raadplegen (www.rowenta.com). U vindt er een film met gebruiksaanwi-
jzing die u op een eenvoudige manier wegwijs maakt in het gebruik van dit
apparaat en hoe u prachtige krullen kunt maken in één enkel gebaar!
NL
Lea atentamente las instrucciones de uso y las
recomendaciones de seguridad antes de utilizar
este aparato.
1. DESCRIPCIÓN
A. Moldeador con revestimiento cerámico (diámetro: 23 mm)
B. Pinza
C. Indicador de corriente
D. Botón 0 1 2 (2 posiciones de temperatura)
E. Contera aislante
F. Botones de rotación derecha/izquierda
G. Anilla para colgar
H. Base
I. Gatillo de apertura/cierre de la pinza
J. Salida de cable rotativa
2. INSTRUCCIONES DE SEGURIDAD
• Por su seguridad, este aparato cumple las normas y disposiciones
aplicables (Directivas de Baja Tensión, Compatibilidad Electromag-
nética, Medio ambiente…).
• Los accesorios del aparato alcanzan una elevada temperatura durante
su uso. Evite el contacto con la piel. Asegúrese de que el cable de al-
imentación no se encuentre nunca en contacto con las partes calientes
del aparato.
• Asegúrese de que la tensión de su instalación eléctrica se corresponde
con la de su aparato. Cualquier error de conexión puede causar daños
irreversibles que no cubre la garantía.
• Para asegurar una protección complementaria, se recomienda que la
i
nstalación en el circuito eléctrico que alimenta el cuarto de baño
disponga de un diferencial de corriente residual (DDR) que no exceda
los 30 mA. Pida consejo a su instalador.
• La instalación del aparato y su uso debe cumplir no obstante las nor-
mas en vigor en su país.
• ATENCIÓN: No utilice este aparato cerca de la bañera, de la
ducha, del lavabo o de cualquier otro recipiente que contenga
agua.
• Cuando utilice el aparato en un cuarto de baño, desconéctelo después
de utilizarlo, ya que la proximidad del agua puede suponer un peligro
incluso aunque no esté en marcha.
• Este aparato no está diseñado para ser utilizado por personas (inclu-
idos los niños) cuyas capacidades físicas, sensoriales o mentales sean
reducidas, o por personas carentes de experiencia o de conocimiento,
salvo si éstas han contado por medio de una persona responsable de
su seguridad, con una vigilancia o con instrucciones previas relativas
al uso del aparato. Se recomienda vigilar a los niños para asegurarse
d
e que no juegan con el aparato.
• En caso de que el cable de alimentación esté dañado, éste deberá ser
sustituido por el fabricante, su servicio postventa o por personas cual-
ificadas con el fin de evitar cualquier peligro.
• No utilice el aparato y contacte con un Centro de Servicio Autorizado
si su aparato ha caído al suelo o si no funciona normalmente.
• El aparato debe desconectarse antes de su limpieza y mantenimiento,
en caso de anomalías en su funcionamiento, una vez que haya termi-
nado de utilizarlo.
• No lo utilice si el cable está dañado
• No sumerja ni pase el aparato por el agua, ni siquiera para limpiarlo.
• No lo sujete con las manos húmedas.
• No lo sujete por la carcasa que está caliente, sino por el asa.
• No lo desconecte tirando del cable, sino tirando del enchufe.
• No utilice ningún alargador eléctrico.
• No lo limpie con productos abrasivos o corrosivos.
• No lo utilice con una temperatura inferior a 0°C ni superior a 35°C.
GARANTÍA:
Su aparato está destinado únicamente a un uso doméstico. No puede
utilizarse con fines profesionales.
La garantía quedará anulada y dejará de ser válida en caso de un uso
incorrecto.
3. PUESTA EN MARCHA
- Coloque el aparato estable sobre su base y en una superficie plana.
- Enchufe el aparato.
- Seleccione la temperatura ideal para su pelo mediante el botón 0 1 2:
Si su pelo es frágil o fino, escoja la posición 1.
CONSEJOS: Recomendamos utilizar esta posición las primeras
v
eces que utilice el aparato.
Si su pelo está sano, escoja la posición 2.
- Puede utilizar el aparato al cabo de 1,30 segundos.
- Para apagar el aparato, coloque el botón 0 1 2 en la posición 0.
NOTA: Recuerde que el moldeador todavía estará caliente: no lo toque
para evitar cualquier riesgo de quemaduras. Podrá manipularlo sin peli-
gro al cabo de unos 20 minutos.
4. USO
Preparación:
•
Asegúrese de que su pelo esté completamente seco antes de utilizar
e
l aparato.
•
Desenrede el pelo con una pinta de púas gruesas.
•
Separe el pelo en mechones (de un grosor de 3 cm máximo).
Para crear los rizos:
•
Gire el moldeador presionando sobre el botón de rotación de modo
que la pinza quede hacia usted.
•
Levante la pinza presionando el gatillo.
•
Introduzca la punta del mechón de pelo entre la pinza y el moldeador.
CONSEJOS: Para que le resulte más fácil, también puede introducir
el mechón de pelo a media altura entre la pinza y el moldeador. A
continuación haga girar el moldeador hasta el inicio del mechón.
•
A continuación suelte la pinza mediante el gatillo. Su mechón está
listo para rizar.
•
Presione el botón de rotación. El aparato se pondrá en marcha y en-
r
ollará automáticamente el mechón alrededor del moldeador.
NOTA: Consulte las imágenes 9 & 10 para encontrar el sentido de
rotación ideal (derecha o izquierda) para crear bonitos rizos.
CONSEJOS: Incline ligeramente el aparato de modo que el mechón
quede enrollado alrededor de todo el moldeador y asegúrese de que
el mechón esté tensado durante el proceso de enrollado.
•
Cuando tenga el mechón enrollado, deje el botón de rotación. Para su
seguridad, el moldeador hará un pequeño giro hacia atrás.
•
Deje calentar el mechón durante unos 10 segundos.
Para liberar el mechón:
•
Coloque el aparato en posición vertical.
•
Sin moverlo hacia abajo, presione el botón de rotación invertida para
desenrollar hasta la mitad del rizo. ATENCIÓN: Tenga cuidado de no
mover el moldeador hacia abajo durante este paso.
•
Pulse el gatillo para abrir la pinza.
•
Libere el rizo tirando hacia abajo.
•
Repita el proceso para crear nuevos rizos.
5. MANTENIMIENTO
Desconecte el aparato y déjelo enfriar sobre la base.
Limpie el aparato cuando esté completamente frío.
Limpie el mango con un paño humedecido.
No introduzca agua ni cualquier otro líquido en el mango.
6. ¡COLABOREMOS EN LA PROTECCIÓN DEL MEDIO
AMBIENTE!
Su aparato contiene un gran número de materiales valori-
zables o reciclables.
Llévelo a un punto de recogida o en su defecto a un servi-
cio técnico autorizado para que realice su tratamiento.
7. EN CASO DE PROBLEMAS:
¿El rizo se rompe por la punta?
Ha enrollado el mechón en el sentido contrario. Asegúrese de utilizar el
sentido de rotación correcto para los demás rizos.
¿Los rizos están mal formados?
•
Asegúrese de que su pelo esté completamente seco.
•
Escoja un mechón más pequeño.
•
Si utiliza la posición 1, cambie a la posición 2.
•
Deje calentar el mechón durante algunos segundos más. Atención: No
sobrepase nunca los 20 segundos.
•
Asegúrese de que el mechón esté tensado durante el enrollado.
¿No consigue liberar el mechón de pelo?
Presione el botón de rotación inversa para liberar completamente el
mechón.
CONSEJOS:
¿Su pelo es escalado? Asegúrese de rizar mechones con
longitudes idénticas.
ULTRA PRÁCTICO
¡Un vídeo de demostración en Internet!
Para más consejos sobre CURL ACTIV, consulte nuestra página web
(www.rowenta.com). En ella encontrará un vídeo explicativo de
cómo utilizar este producto con total facilidad y como conseguir
magníficos rizos con un solo gesto.
E
Prima di qualsiasi utilizzo, leggere attentamente
le istruzioni per l'uso e le informazioni di sicurezza.
1. DESCRIZIONE
A. Ferro arricciacapelli rivestito in ceramica (diametro: 23 mm)
B. Pinza
C. Spia di apparecchio in tensione
D. Pulsante 0 1 2
E. Puntale isolante
F. Pulsante di rotazione destra/sinistra
G. Anello d'aggancio
H. Poggiaferro
I
. Levetta d'apertura/chiusura della pinza
J. Uscita cavo rotante
2. SICUREZZA
• Per la vostra sicurezza, questo apparecchio è conforme alle norme e
normative applicabili (Direttive Bassa Tensione, Compatibilità elettro-
magnetica, Ambiente,…).
• Gli accessori dell’apparecchio diventano molto caldi durante l’uso.
Evitate il contatto con la pelle. Assicuratevi che il cavo d’alimentazione
non sia mai a contatto con le parti calde dell’apparecchio.
• Verificate che la tensione del vostro impianto elettrico corrisponda a
quella dell‘apparecchio. Qualsiasi errore di collegamento all’alimen-
tazione può causare danni irreversibili non coperti dalla garanzia.
• Per assicurare una protezione complementare, è consigliata l’instal-
lazione, nel circuito elettrico che alimenta il bagno, di un dispositivo a
corrente differenziale residua (DDR) di corrente differenziale di fun-
zionamento nominale non superiore a 30 mA. Chiedete consiglio al
v
ostro installatore.
• L’installazione dell’apparecchio e il suo utilizzo devono tuttavia essere
conformi alle norme in vigore nel vostro paese.
• AVVERTIMENTO: Non utilizzare l’apparecchio vicino a vasche
da bagno, docce, lavandini o altri recipienti contenenti acqua.
• Quando l’apparecchio è utilizzato in un bagno, staccatelo dalla cor-
rente dopo l’uso poiché la vicinanza dell’acqua può presentare un peri-
colo anche quando l’apparecchio è spento.
• Questo apparecchio non deve essere utilizzato da persone (compresi
i bambini) con capacità fisiche, sensoriali o mentali ridotte o da per-
sone prive di esperienza o di conoscenza, a meno che una persona re-
sponsabile della loro sicurezza li sorvegli o li abbia preventivamente
informati sull’utilizzo dell’apparecchio. È opportuno sorvegliare i bam-
bini per assicurarsi che non giochino con l’apparecchio.
• Se il cavo d’alimentazione è danneggiato, deve essere sostituito dal
fabbricante, dal suo servizio assistenza o da persone con qualifica sim-
ile per evitare pericoli.
•
Non utilizzate l’apparecchio e contattate un Centro Assistenza autoriz-
zato se: l’apparecchio è caduto, se non funziona normalmente.
• L’apparecchio deve essere staccato dalla corrente: prima di operazioni
di pulizia e manutenzione, in caso di anomalia di funzionamento, non
appena avete terminato di utilizzarlo.
• Non utilizzare se il cavo è danneggiato
• Non immergerlo né passarlo sotto l’acqua, nemmeno per la pulizia.
• Non tenerlo con le mani umide.
• Non tenerlo per la carcassa che è calda, ma usare l’impugnatura.
• Non staccare l’apparecchio dalla corrente tirando il cavo, ma afferrare
la spina ed estrarla dalla presa.
• Non usare prolunghe elettriche.
• Non pulire con prodotti abrasivi o corrosivi.
• Non usare con temperatura inferiori a 0 °C e superiori a 35 °C.
GARANZIA
Questo apparecchio è destinato esclusivamente ad un uso domestico.
Non può essere utilizzato a scopi professionali.
La garanzia diventa nulla e non valida in caso di uso non corretto.
3. AVVIO
- Appoggiare l'apparecchio stabilmente sul poggiaferro e su una su-
perficie piana.
- Inserire la spina
- Selezionare la temperatura ideale per i capelli utilizzando il pulsante 0
1 2 :
Per capelli fragili o fini, scegliere la posizione 1.
CONSIGLIO: si raccomanda vivamente di utilizzare questa posizione
durante le prime applicazioni.
Per capelli sani, scegliere la posizione 2.
- È possibile utilizzare l'apparecchio dopo 1 min. e 30 sec.
- Per spegnere l'apparecchio, spostare il pulsante 0 1 2 sulla posizione 0.
Nota: è bene tenere presente che il ferro potrebbe essere ancora caldo.
Si consiglia pertanto di non toccarlo per evitare qualsiasi rischio di scot-
t
atura. Sarà possibile maneggiarlo senza pericolo dopo circa 20 minuti.
4. UTILIZZO
Preparazione:
•
Prima di utilizzare l'apparecchio, assicurarsi che i capelli siano asso-
lutamente secchi.
•
Togliere i nodi ai capelli con un pettine a denti larghi.
•
Separare i capelli in ciocche (larghezza max. 3 cm).
Arricciatura di ricci:
•
Premendo sul pulsante di rotazione, far girare il ferro e posizionare la
pinza davanti a sé.
•
Sollevare la pinza premendo sulla levetta.
•
Inserire la punta della ciocca tra la pinza e il ferro.
CONSIGLIO: una procedura più facile consiste nell'inserire la ciocca
metà altezza tra pinza e ferro, quindi nel far scivolare il ferro lenta-
m
ente fino alla punta della ciocca.
•
Abbassare la pinza lasciando andare la levetta. La ciocca è ora pronta
ad essere arricciata.
•
Premere sul pulsante di rotazione. L'apparecchio si avvia, avvolgendo
automaticamente la ciocca attorno al ferro.
Nota: per stabilire il senso di rotazione più indicato (destra o sinistra)
alla realizzazione dei ricci, fare riferimento ai pittogrammi 9 & 10.
CONSIGLIO: inclinare leggermente l'apparecchio per consentire alla
ciocca di avvolgersi sull'intera lunghezza del ferro e assicurarsi di
mantenere la ciocca tesa per l'intera durata dell'avvolgimento.
•
Una volta terminato l'avvolgimento della ciocca, rilasciare il pulsante
di rotazione. Per motivi di sicurezza, il ferro esegue una piccola ro-
tazione in senso opposto.
•
Lasciare riscaldare per circa 10 secondi.
Rilascio della ciocca:
•
Posizionare l'apparecchio verticalmente.
•
Senza tirare verso il basso, premere il pulsante di rotazione inversa
per srotolare il riccio a metà. ATTENZIONE: fare attenzione a non tirare
il ferro verso il basso durante questa operazione.
•
Premere il gancio per aprire la pinza.
•
Liberare il riccio tirando verso il basso.
•
Ripetere l'operazione per creare nuovi ricci.
5. MANUTENZIONE
Scollegare l'apparecchio e lasciarlo raffreddare sul suo supporto.
Pulire l'apparecchio quando si è raffreddato completamente.
Asciugare l'impugnatura usando un panno morbido umido.
Assicurarsi che nell'impugnatura non penetri mai acqua o altro liquido.
6. CONTRIBUIAMO ALLA PROTEZIONE DELL’AMBIENTE!
L’apparecchio contiene numerosi materiali valorizzabili o
riciclabili.
Portatelo in un punto di raccolta, o in sua mancanza, in un
centro assistenza autorizzato affinché venga effettuato il
trattamento più opportuno.
7. RISOLUZIONE DEI PROBLEMI:
La punta del riccio è rotta.
La ciocca è stata arrotolata in senso errato. Assicurarsi di rispettare il
senso di rotazione per i ricci seguenti.
I ricci sono venuti male.
•
Assicurarsi che i capelli siano bene asciutti.
•
Scegliere una ciocca più piccola
•
Se si sta utilizzando la posizione 1, passare alla posizione 2.
•
Lasciare riscaldare ancora per qualche secondo. Fare attenzione, tut-
tavia, a non superare mai i 20 secondi.
•
Assicurarsi di mantenere la ciocca tesa durante l'avvolgimento.
La ciocca non si libera.
Premere il pulsante di rotazione inversa così da liberare completamente
la ciocca.
CONSIGLIO:
I capelli sono scalati. Assicurarsi di arricciare capelli
di lunghezza uguale.
PRATICISSIMO
Film dimostrativo disponibile su Internet.
Per ulteriori consigli su CURL ACTIV, raccomandiamo di consultare
il nostro sito Internet (www.rowenta.com), dove è possibile vision-
are un film che illustra come utilizzare questo prodotto in tutta sem-
plicità e come ottenere dei riccioli magnifici in una sola mossa.
I
Leia atentamente o manual de instruções e os conselhos
de segurança antes da primeira utilização do aparelho.
1. DESCRIÇÃO
A. Ferro modelador com revestimento cerâmico (diâmetro 23 mm)
B. Pinça
C. Luz piloto de funcionamento
D. Botão 0 1 2 (2 posições de temperatura)
E. Extremidade isolante
F. Botões de rotação direita / esquerda
G. Anel de suspensão
H. Repouso do modelador
I
. Mola de abertura/fecho da pinça
J. Cabo rotativo
2. SEGURANÇA
• Para sua segurança, este aparelho está em conformidade com as nor-
mas e regulamentos aplicáveis (Directivas Baixa Tensão, Compatibili-
dade Electromagnética, Meio Ambiente...).
• Os acessórios do aparelho ficam muito quentes no decorrer da sua
utilização. Evite o contacto com a pele. Certifique-se que o cabo de al-
imentação nunca entra em contacto com as partes quentes do apar-
elho.
• Verifique se a tensão da sua instalação eléctrica é compatível com a do
seu aparelho. Qualquer erro de ligação pode causar danos irrever-
síveis que não estão cobertos pela garantia.
• Para garantir uma protecção suplementar, é aconselhável instalar, no
circuito que alimenta a casa-de-banho, um dispositivo com corrente
diferencial residual (DDR) de corrente diferencial de funcionamento
a
tribuído não superior a 30 mA. Aconselhe-se junto de um técnico
qualificado.
• A instalação do aparelho bem como a sua utilização devem, no en-
tanto, estar em conformidade com as normas em vigor no seu país.
• ADVERTÊNCIA: não utilize este aparelho próximo de ban-
heiras, chuveiros, lavatórios ou outros recipientes com água.
• Quando o aparelho é utilizado numa casa-de-banho, desligue-o
após a sua utilização, dado que a proximidade da água pode constituir
um perigo, mesmo quando o aparelho se encontra desligado.
• Este aparelho não foi concebido para ser utilizado por pessoas (in-
cluindo crianças) cujas capacidades físicas, sensoriais ou mentais se
encontram reduzidas, ou por pessoas com falta de experiência ou
conhecimento, a não ser que tenham sido devidamente acompan-
hadas e instruídas sobre a correcta utilização do aparelho, pela pes-
soa responsável pela sua segurança.É importante vigiar as crianças
por forma a garantir que as mesmas não brinquem com o aparelho.
• Se o cabo de alimentação se encontrar de alguma forma danificado,
d
everá ser substituído pelo fabricante, Serviço de Assistência Técnica
autorizado ou por um técnico qualificado por forma a evitar qualquer
situação de perigo para o utilizador.
• Não utilize o seu aparelho e contacte um Serviço de Assistência
Técnica autorizado se: o aparelho tiver caído ao chão ou não estiver a
funcionar correctamente.
• O aparelho deve ser desligado: antes de proceder a qualquer operação
de limpeza ou manutenção, no caso de anomalia de funcionamento, após
cada utilização.
• Não utilizar se o cabo se encontrar de alguma forma danificado
• Não mergulhar nem passar por água, mesmo que seja para a limpeza.
• Não segurar com as mãos húmidas.
• Não segurar na caixa de comandos, que está quente, mas sim pela
pega.
• Não desligar puxando pelo cabo, mas sim retirando a ficha da tomada.
• Não utilizar uma extensão eléctrica.
• Não limpar com produtos abrasivos ou corrosivos.
•
Não utilizar a temperaturas inferiores a 0 °C nem superiores a 35 °C.
GARANTIA:
O seu aparelho destina-se apenas a uma utilização doméstica. Não
pode ser utilizado para fins profissionais. A garantia torna-se nula e in-
válida no caso de uma utilização incorrecta.
3. COLOCAÇÃO EM FUNCIONAMENTO
- Coloque o aparelho numa superfície plana sobre o suporte de re-
pouso.
- Ligue o aparelho à corrente.
- Seleccione a temperatura ideal para os seus cabelos com a ajuda do
botão 0 1 2:
Se tem um cabelo frágil ou fino, escolha a posição 1.
C
ONSELHO: Esta posição é fortemente recomendada para as
primeiras utilizações.
Se tem um cabelo forte e saudável, escolha a posição 2.
- O aparelho está pronto a utilizar ao fim de 1 minuto e 30 segundos.
- Para desligar o aparelho, coloque o botão 0 1 2 na posição 0.
NOTA: Tenha em atenção que o ferro pode ainda estar quente: não
toque no mesmo para evitar riscos de queimadura. Pode manuseá-lo
em segurança após cerca de 20 minutos.
4. UTILIZAÇÃO
Preparação:
•
Certifique-se que os seus cabelos estão totalmente secos antes de uti-
lizar o aparelho.
•
Desembarace os cabelos com um pente de dentes largos.
•
Separe os cabelos em madeixas (largura máxima de 3 cm).
Para encaracolar o cabelo:
•
Rode o ferro, premindo o botão de rotação para posicionar a pinça de
frente para si.
•
Abra a pinça premindo a mola.
•
C
oloque a ponta da sua madeixa de cabelo entre a pinça e o ferro.
CONSELHO: Para uma maior facilidade, também pode colocar a
ponta da sua madeixa de cabelo a meia altura entre a pinça e o ferro.
Em seguida, faça deslizar o ferro suavemente até à ponta da
madeixa de cabelo.
•
Feche a pinça com a ajuda da mola. A madeixa está pronta a ser en-
caracolada.
•
Prima o botão de rotação. O aparelho começa a funcionar e enrola au-
tomaticamente a madeixa à volta do ferro.
NOTA: Consulte as ilustrações 9 & 10 para descobrir o sentido de ro-
tação ideal (direita ou esquerda) para obter caracóis bem definidos.
CONSELHO: Incline ligeiramente o aparelho por forma a que a
madeixa de cabelo se enrole ao longo do ferro e tenha o cuidado de
a manter esticada durante o enrolamento.
•
Quando a madeixa estiver enrolada, solte o botão de rotação. Por
razões de segurança, o ferro roda ligeiramente no sentido inverso.
•
Deixe aquecer durante cerca de 10 segundos.
Para libertar a madeixa:
•
Posicione o aparelho na vertical.
•
Sem o puxar para baixo, prima o botão de rotação inversa, para de-
senrolar metade do caracol. ATENÇÃO: Ter o cuidado de não puxar o
ferro para baixo durante esta operação.
•
Prima a mola para abrir a pinça.
•
Liberte o caracol deslizando o ferro para baixo.
•
Repita a operação para criar mais caracóis.
5. MANUTENÇÃO
Desligue o aparelho da corrente e deixe-o arrefecer em cima do suporte.
Limpe o aparelho quando este estiver totalmente frio.
Limpe o cabo com a ajuda de um pano macio humedecido.
Não introduza água ou quaisquer outros líquidos no cabo.
6. PROTECÇÃO DO AMBIENTE EM PRIMEIRO LUGAR!
O seu aparelho contém materiais que podem ser recupera-
dos ou reciclados.
Entregue-o num ponto de recolha para possibilitar o seu
tratamento.
7. EM CASO DE PROBLEMAS:
O caracol fica dividido na ponta?
Enrolou a madeixa no sentido errado. Tenha o cuidado de enrolar os
outros caracóis no sentido correcto.
Os caracóis não ficam bem definidos?
•
Certifique-se que o cabelo está devidamente seco.
•
Enrole uma madeixa de cabelo mais pequena.
•
Se está na posição 1, passe para a posição 2.
•
Deixe aquecer durante mais alguns segundos. No entanto, tenha
atenção para não ultrapassar os 20 segundos.
•
Certifique-se que mantém a madeixa de cabelo esticada durante o
enrolamento.
Não consegue soltar a madeixa de cabelo?
Prima o botão de rotação inversa por forma a libertar completamente
a madeixa.
CONSELHO:
Tem o cabelo escadeado? Certifique-se de que en-
rola madeixas de cabelo com o mesmo comprimento.
ULTRA PRÁTICO
Um filme de demonstração está disponível na internet!
Para obter mais conselhos sobre o CURL ACTIV, consulte o nosso
site da internet (www.rowenta.com). Encontrará um filme explica-
tivo que demonstra como utilizar facilmente este produto e obter
magníficos caracóis com um só gesto!
P
Please read the instructions and safety precautions
carefully before you use the curling tongs.
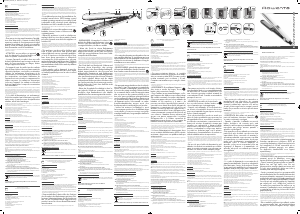
1. PARTS
A. Ceramic coated barrel (23mm diameter)
B. Clamp
C. Power indicator
D. On/off - temperature switch (2 temperature settings)
E. Cool-touch tip
F
. Direction of turn (left/right)
G. Hanging ring
H. Counter rest
I. Lever to open/close clamp
J. Swivel power cord
2. SAFETY INSTRUCTIONS
• For your safety, this appliance complies with the applicable standards
and regulations (Low Voltage Directive, Electromagnetic Compatibil-
ity, Environmental…).
• The appliance’s accessories become very hot during use. Avoid con-
tact with the skin. Make sure that the supply cord never comes into
contact with the hot parts of the appliance.
• Check that the voltage of your electricity supply matches the voltage
of your appliance. Any error when connecting the
appliance can cause irreparable harm, not covered by the
guarantee.
•
Do not use this appliance if you are using it in the UK. If you are using
it outside of the UK then as an additional safety measure, we recom-
mend the installation of a residual current difference device in the
electrical circuit supplying the bathroom, acting at not more than 30
mA.Ask your installer for advice.
• The installation of the appliance and its use must however comply
with the standards in force in your country.
• Caution: Never use your appliance with wet hands or near water
contained in bath tubs, showers, sinks or other containers…
• If using the appliance outside of the UK and you are using it in the
bathroom, unplug it after use as the presence of water nearby may
pose a danger even when the appliance is turned off.
• This appliance is not intended for use by persons (including children)
with reduced physical, sensory or mental capabilities, or lack of ex-
perience and knowledge, unless they have been given supervision or
instruction concerning use of the appliance by a person responsible
for their safety. Children should be supervised to ensure that they do
n
ot play with the appliance.
• If the supply cord is damaged, it must be replaced by the
manufacturer, its service agent or similarly qualified persons in order
to avoid a hazard.
• Stop using your appliance and contact an Authorised Service Centre if:
- your appliance has fallen.
- it does not work correctly.
• The appliance must be unplugged:
- before cleaning and maintenance procedures.
- if it is not working correctly.
- as soon as you have finished using it.
- if you leave the room, even momentarily.
• Do not use if the cord is damaged.
• Do not immerse or put under running water, even for cleaning purposes.
• Do not hold with damp hands.
• Do not hold the appliance by the casing, which is hot, but by the handle.
• Do not unplug by pulling on the cord, rather pull out by the plug.
•
Do not use an electrical extension lead.
• Do not clean with abrasive or corrosive products.
• Do not use at temperatures below 0°C and above 35°C.
GUARANTEE:
This product has been designed for domestic use only. Any commercial
use, inappropriate use or failure to comply with the instructions, the
manufacturer accepts no responsibility and the guarantee will not apply.
3. SWITCHING ON
- Place the tongs on a flat surface with the counter rest extended.
-
Plug in the tongs.
- Select the right temperature for your hair :
If your hair is fragile or fine, use setting 1.
TIPS : This setting is strongly recommended when you first use the
tongs.
If your hair is strong and healthy, use setting 2.
- The tongs will be ready to use after 1 minute 30 seconds.
- To switch off the tongs set the switch to 0.
NB: Do not forget that the tongs may still be hot: to avoid risk of burns
do not touch the barrel. The tongs will be safe to handle after approxi-
mately 20 minutes.
4. USING THE TONGS
Before you use the tongs
• Make sure your hair is completely dry before you use the tongs.
• Use a long-toothed comb to eliminate any tangles.
• Separate your hair in sections (max. 3 cm in width)
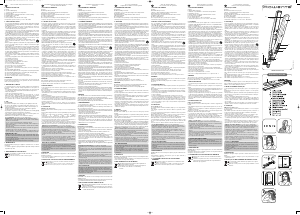
To curl your hair
•
Press the direction of turn button so that the barrel rotates and the
clamp is facing you.
• Open the clamp by pressing the clamp release.
• Place the end of your section of hair between the clamp and the barrel.
TIPS: If you prefer, you can also place your hair between the clamp
and the barrel half way up the section. Then slide the tongs gently to
the end of your hair.
• Press the lever to close the clamp. Your hair is ready to curl.
• Press the button to start winding. The tongs will wind your hair round
the barrel automatically.
NB : See illustrations 9 & 10 to better find the direction your hair is
wound.
TIPS: Tilt the tongs slightly so that the section of hair is wound along
the barrel. Pull the tongs away from you so that your hair is kept
taut.
• When your hair is wound round the barrel, release the winding button.
For safety reasons the barrel will wind back a short distance.
•
Hold the tongs in place for approximately 10 seconds.
To release your hair:
• Hold the tongs upright.
• Without pulling the tongs downwards press the reverse winding but-
ton to unwind half the section. WARNING! Be careful not to pull the
tongs down when you are doing this.
• Press the lever to open the clamp.
• Slide the tongs downwards to release the curl.
• Repeat these steps to create more curls.
5. MAINTENANCE
Unplug the tongs and leave them to cool down on the counter rest.
Clean the tongs when they have cooled down completely.
Wipe them with a soft damp cloth.
Never allow water or any other liquid to enter the barrel.
6. ENVIRONMENT PROTECTION FIRST!
Your appliance contains valuable materials which can be re-
covered or recycled.
Leave it at a local civic waste collection point.
7. COMMON PROBLEMS
What can I do if my curls come apart at the ends?
• You have wound the curl the wrong way. Be careful to wind in the
right direction.
What can I do if the curls are not properly shaped?
• Make sure that your hair is dry.
• Curl a smaller section of hair.
• If you are using setting 1, change to setting 2.
• Hold the tongs in place for a few extra seconds. (Be careful not to use
them for longer than 20 seconds.)
• Make sure you pull the section of hair taut as it is wound round the
barrel.
I have difficulty releasing my hair.
• Press the reverse wind button and you will be able to free it.
TIPS:
If your hair is layer-cut, make sure you curl sections which are
the same length.
DEMONSTRATION
You can see a practical demonstration of the product on internet.
For more advice on using CURL ACTIV go to our website:
www.rowenta.com. You will find a video clip giving a simple expla-
nation of how to use the tongs and get fabulous curls at the flick of
a wrist.
GB
www.rowenta.com
1800120870 / 18-10
A
E
B
H
I
J
F
C
D
G
1
2
3
4
5
6
7
8
9
1
0
11 12
13 14
15
16
17
18
19
20


Praat mee over dit product
Laat hier weten wat jij vindt van de Rowenta CF6510 Curl Activ Stijltang. Als je een vraag hebt, lees dan eerst zorgvuldig de handleiding door. Een handleiding aanvragen kan via ons contactformulier.