
7 8
Before First Use
1. Remove all packing material and stickers. Do not remove the rating
label.
2. Wipe the non-stick cooking surface with a damp cloth or sponge and
wipe dry with a soft cloth or paper towel.
3. Next, season the cooking surface by wiping it with a paper towel
moistened in a small amount of vegetable oil then turn the appliance
on (by plugging it into an outlet) for 1-2 minutes. Once done, turn the
appliance off (unplug) and wipe any excess oil with a paper towel.
NOTE: Seasoning needs to be done only the first time that the crepe
maker is used.
4. When ready to cook, clean the cooking surface as per step 3 again.
NOTE: When your appliance is new you may notice a slight smoking
or odor. Some minor expansion/contraction sounds may occur during
heating and cooling. These don’t affect the functionality or safety of
your appliance.
5. Discard the first crepe.
The cooking surface is very hot. Extreme
caution must always be taken to prevent injury or
damage to property.
Use Instructions
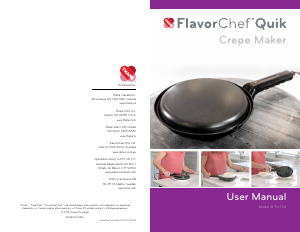
1. Place the FlavorChef™ Quik Crepe Maker on a dry level surface and
plug it into an outlet. The red indicator light will turn on as the cooking
surface begins heating. Once it has reached optimal heat, the red
light will turn off and you can start cooking.
NOTE: The red light will keep turning on and off throughout the cooking
process. This is normal and the product is designed to work this way
in order to prevent overheating of the cooking surface.
Do not touch the cooking surface. Since
there is no ON/OFF switch, the appliance starts heating
up as soon as it is plugged in.
2. Pour the crepe batter into the batter dish.
3. Lift and turn the Crepe Maker so that the baking surface faces downward.
4. Dip the cooking surface into the batter dish for 3 seconds.
NOTE: Do not immerse the Crepe Maker too deep into the batter to
avoid the batter spilling over.
5. Move the Crepe Maker back and forth so that the complete cooking
surface is covered by batter.
NOTE: Do not hold the Crepe Maker dipped in the batter for more
than 3 seconds. If it is held in the batter for too long, the crepe will
not stick to the cooking surface and the batter in the dish will start
cooking after a few crepes are made.
6. Place the Crepe Maker back down onto a flat surface.
7. The crepe is ready when it has reached the desired browning degree
and steam is no longer visible.
8. Once the crepe is ready, lift and turn the Crepe Maker over a plate
so that the cooked crepe falls off the cooking surface and onto the
plate. Depending on which batter is used, if the crepe sticks and does
not fall off easily, loosen it carefully at the edge with a non-stick
friendly utensil (no metal).
NOTE: It is not required to brown the other side of the crepe.
9. Repeat steps 3-8 until you use up all the batter.
Instructions for 3”/7.72cm Silicone Ring Set
1. Wash the silicone ring set with warm soapy water and dry off.
2. When ready to cook, wait for the cooking surface to preheat and
place the silicone ring set in the center of the cooking surface. Make
sure the edges are not sticking out on the sides of the cooking surface.
Even a small space can allow for batter or egg white to leak through.
NOTE: When using the optional silicone rings set to make pancakes
or eggs, it is recommended to line the inside of the rings with a little
bit of oil or butter (use your index finger). This will make it easier to
remove the silicone rings when the eggs are done and when the
pancakes are ready to be flipped.
3. Pour the batter or crack the eggs directly into the silicone rings and
be careful not to move the silicone rings as the pancake batter or
eggs are being poured inside.
NOTE: Be careful not to pour too much batter into the rings when
making pancakes. It will take them longer to be ready to flip and it will
be harder to take the silicone rings off when they are ready to flip.
4. When pancakes are ready to flip, remove the silicone rings and flip
the pancakes with a non-stick friendly spatula made of plastic, wood
or silicone (no metal).
5. In the case of the eggs, wait for them to cook through, until the egg
white is not runny, and at that point you can serve them right away,
for sunny side up, or flip them if you prefer over easy.
NOTE: It is recommended not to use very large eggs because the
silicone rings are a set size (3”/7.62cm diameter) and the eggs will
take longer to cook through.
!
WARNING
!
WARNING



Praat mee over dit product
Laat hier weten wat jij vindt van de Thane TV-130 FlavorChef Quik Crepemaker. Als je een vraag hebt, lees dan eerst zorgvuldig de handleiding door. Een handleiding aanvragen kan via ons contactformulier.