
CLEANING & DISASSEMBLY
Cleaning your Mandoline Slicer should be done
immediately after use to prevent food from drying on
the parts. The Slicer Body should be washed by hand
in warm soapy water, rinsed, then dried immediately.
Lightly oil the Slicer Body with a food safe lubricant
before storing.
The Blades and the Hand Guard/Food Pusher can
be washed in the top rack of a dishwasher. Carefully
position these pieces where they won’t cut or damage
other utensils.
CAUTION: If hand washing the Blades and
underside of Hand Guard/Food Pusher, always
wipe AWAY from Blade edges. These surfaces are extremely sharp and can cause
severe injury!
1. When nished slicing, remove any remaining material from the Hand Guard/Food
Pusher.
2. Remove the Slicing Blade by holding on to the Handle and depressing the Locking
Tab. Be careful during Blade removal as the Blade is sharp! Remember to always hold
Blade by the handle.
3. If using a Julienne Blade in addition to the Slicer Blade, remove the Julienne
Blade by holding on to the handle and carefully sliding it out of the Slicer Body.
CAUTION: Once Blades are removed, DO NOT immerse them in water! Blades
should be washed either in a top rack of the dishwasher or by holding onto the Blade
handle. With a soapy towel, wipe AWAY from the Blade edges. To rinse Blade, hold
by the Handle and wipe with a clean, damp towel, or hold under running water. After
Blades are clean and dry, BE SURE TO STORE OUT OF REACH OF CHILDREN!
4. Completely remove the Depth Adjustment Plate Thumb Screws. Once the
Thumb Screws are removed, the Depth Adjustment Plate should slide out of the
bottom of the Slicer Body.
5. If desired, the Front and Rear Stands can also be removed by simply squeezing
the ends of the Stand together and removing from mounting holes. However, it is not
typically necessary for proper cleaning.
Locking Tab facing up. Slide it into the right-hand side of the Slicer Body pushing it all
the way in until it latches into place.
CAUTION: The Blades are very sharp! NEVER touch the Blade,
always use the Blade Handles!
3. If using a Julienne Blade in conjunction with the Straight Edge Slicing Blade,
install the Straight Edge Slicing Blade rst, then install the Julienne Blade by holding
it by the Blade Handle. Firmly slide it into right hand side of the Slicer Body pushing it
all the way in until in place. NOTE: Only use Julienne Blades with the Straight
Edge Slicing Blade. Do not use them with the Wafe Blade.
4. Once Blade(s) are installed, loosen the Depth Adjustment Plate Thumb Screws
on both sides of the Slicer Body and slide the Depth Adjustment Plate to the desired
slicing thickness, then secure into place by tightening the Depth Adjustment Plate
Thumb Screws.
CAUTION: When moving Depth Adjustment Plate, hold Depth
Adjustment Plate by the end farthest away from the Blades to avoid
injury.
ASSEMBLY INSTRUCTIONS
It is recommended that the Vegetable Slicer be
thoroughly washed prior to use!
1. Using a at and sturdy work platform, unfold the
Front and Rear Stands of the Slicer Body. Position
the Vegetable Slicer with the Rear Stand closest to
you.
2. To insert your Blade of choice, carefully remove
the Blade from holder, holding it by the Blade Handle.
The arrow should be pointing to the right of the
DIRECTIONS FOR USE
1. Install the Blade(s) according to the type of
slicing you plan on doing.
CAUTION: The Blades are very
sharp! NEVER touch the Blade, always
use the Blade Handles!
2. Position the Vegetable Slicer on a steady,
at working surface, with the Rear Stand is
closest to you.
3. ALWAYS use the Food Pusher. NEVER
use your ngers, hands or other objects to push
the food on the Slicer! The Food Pusher is
designed so that it will not touch the Blades as
you slide it up and down the face of the Slicer.
There are two arrows on the Food Pusher. Always make sure that these arrows
are pointing down the face of the Slicer, toward the Blades. The elongated
edges help keep it aligned on Slicer.
4. Cut vegetable/fruit to t the width of the Food Pusher, 3-7/8” (9.8 cm) wide
is the maximum. Trim tips and stems for uniformity.
5. Press the vegetable/fruit onto the Food Pusher so that the Spikes pierce
into the vegetable/fruit.
6. To make slices, hold the knob on top of the Food Pusher and slide it DOWN
the Vegetable Slicer and over the Slicing Blade(s). REMEMBER to always
slice away from yourself! Use smooth, steady strokes to cut the vegetables/
fruits. Never attempt to cut too quickly.
NOTE: Several test cuts may be needed to achieve the desired cutting
thickness.
-4- -5-
WARNING
SHARP BLADES!
Protective/cut-resistant
Kevlar Gloves are
recommended
whenever handling
the Blades!
WARNING
SHARP BLADES!
Protective/cut-resistant
Kevlar Gloves are
recommended
whenever handling
the Blades!
WARNING
SHARP BLADES!
Protective/cut-resistant
Kevlar Gloves are
recommended
whenever handling
the Blades!











Praat mee over dit product
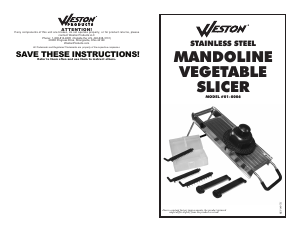
Laat hier weten wat jij vindt van de Weston 01-0006 Mandoline. Als je een vraag hebt, lees dan eerst zorgvuldig de handleiding door. Een handleiding aanvragen kan via ons contactformulier.